Credit transfer requests
Families with account credits can apply them to one of their own fees from myAccount, instead of emailing you to ask. You decide whether that happens instantly or only after you approve it.
Nobody can create credits this way, or move credits to another family. All this does is let a family spend credits they already have, on a fee they already owe.
Turning it on
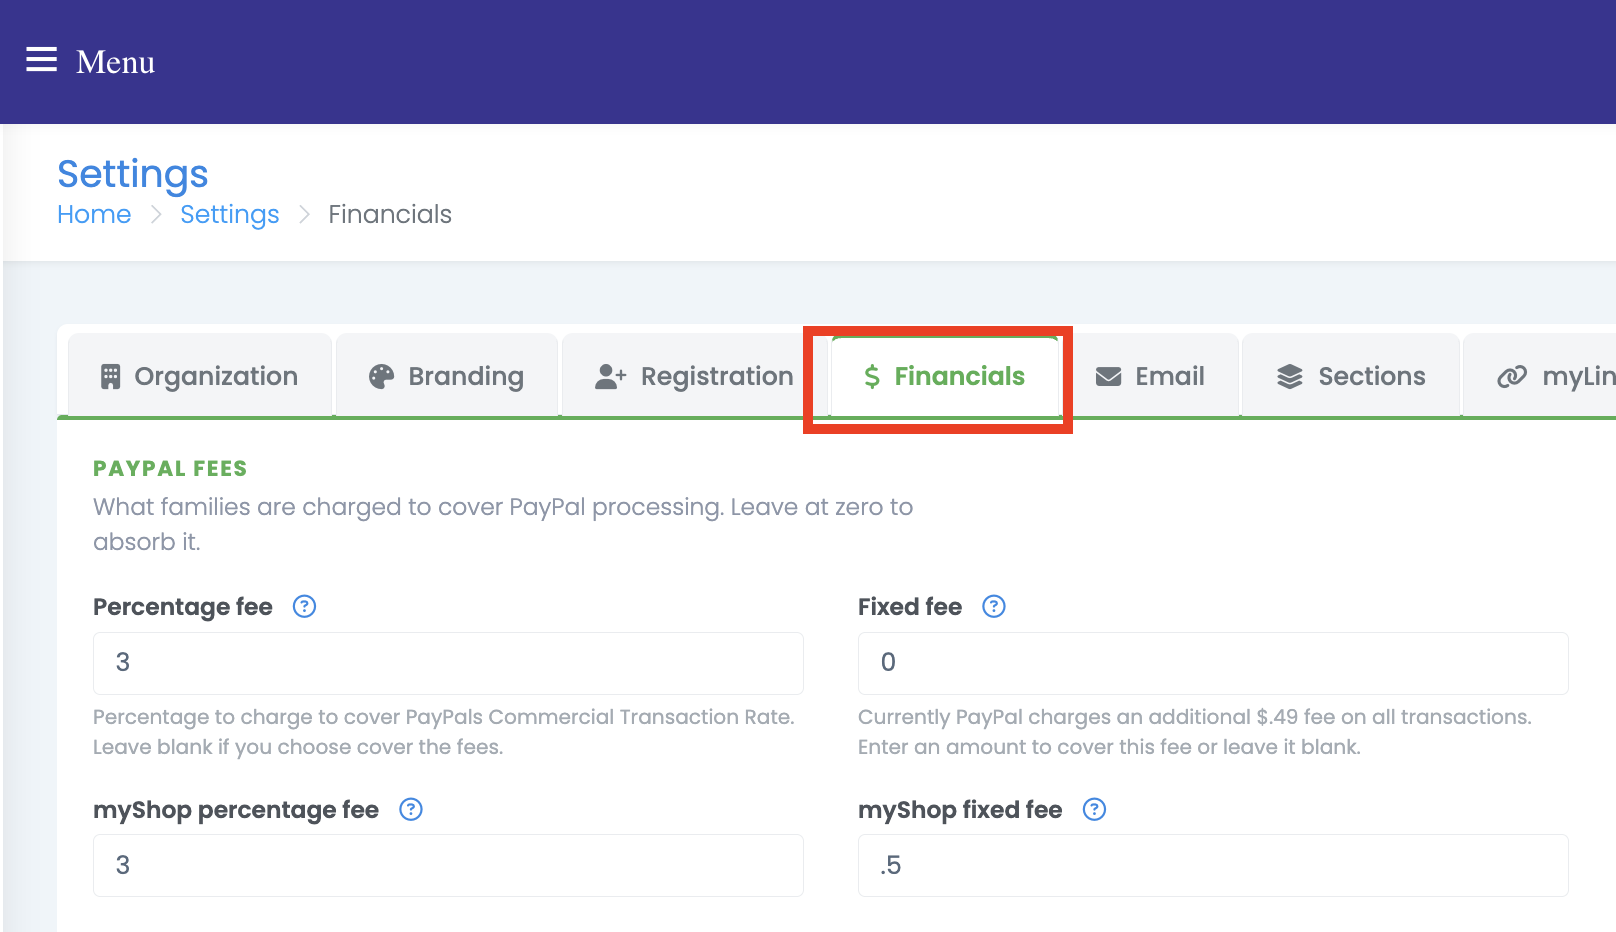
- Open Settings, then the Financials tab.
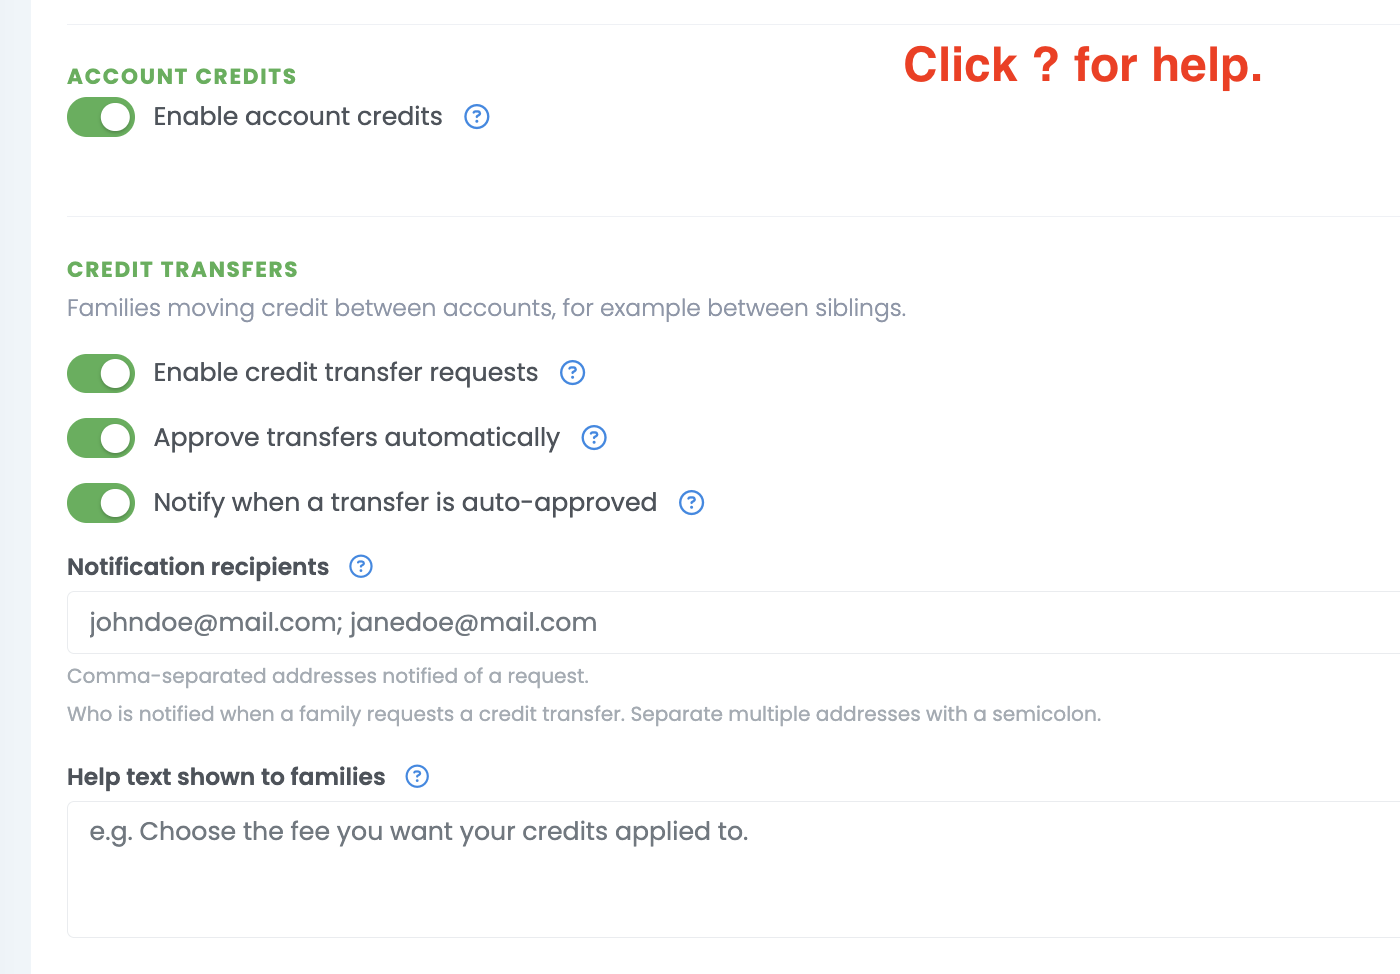
- Under Account credits, turn on Enable account credits — transfer requests do nothing without it, and the Credit transfers section stays hidden until it is on.
- Under Credit transfers, turn on Enable credit transfer requests.
- Decide how requests are handled with Approve transfers automatically:
- On — credits are applied the moment a family submits. Beneath it, Notify when a transfer is auto-approved decides whether an email goes out each time one is applied. Leave it off if you would rather review transfers under Financials → Account Credits than be emailed about each one.
- Off — nothing moves until you approve. You get an email with Approve and Deny buttons.
- Fill in Notification recipients — who gets notified, for both the approval requests and the auto-approved confirmation emails. Separate multiple addresses with a semi-colon. This is required while credit transfer requests are on: the tab will not save until at least one address is there.
- Optionally fill in Help text shown to families — shown to families in the request window. Use it to say anything they should know first.
- Select Save Financials.
Each setting only appears once the one above it is on, so the section grows as you work down it. Turning a setting back off hides what sits under it without changing those values.
Somebody has to be designated
You cannot switch credit transfer requests on and leave Notification recipients empty — saving is refused with the field highlighted. The same address list receives the Approve/Deny emails when auto-approve is off, so leaving it blank meant approval requests went to whoever happened to hold a director role, and nobody owned the queue.
Turning credit transfer requests back off removes the requirement, and keeps whatever addresses you had saved.
What families see
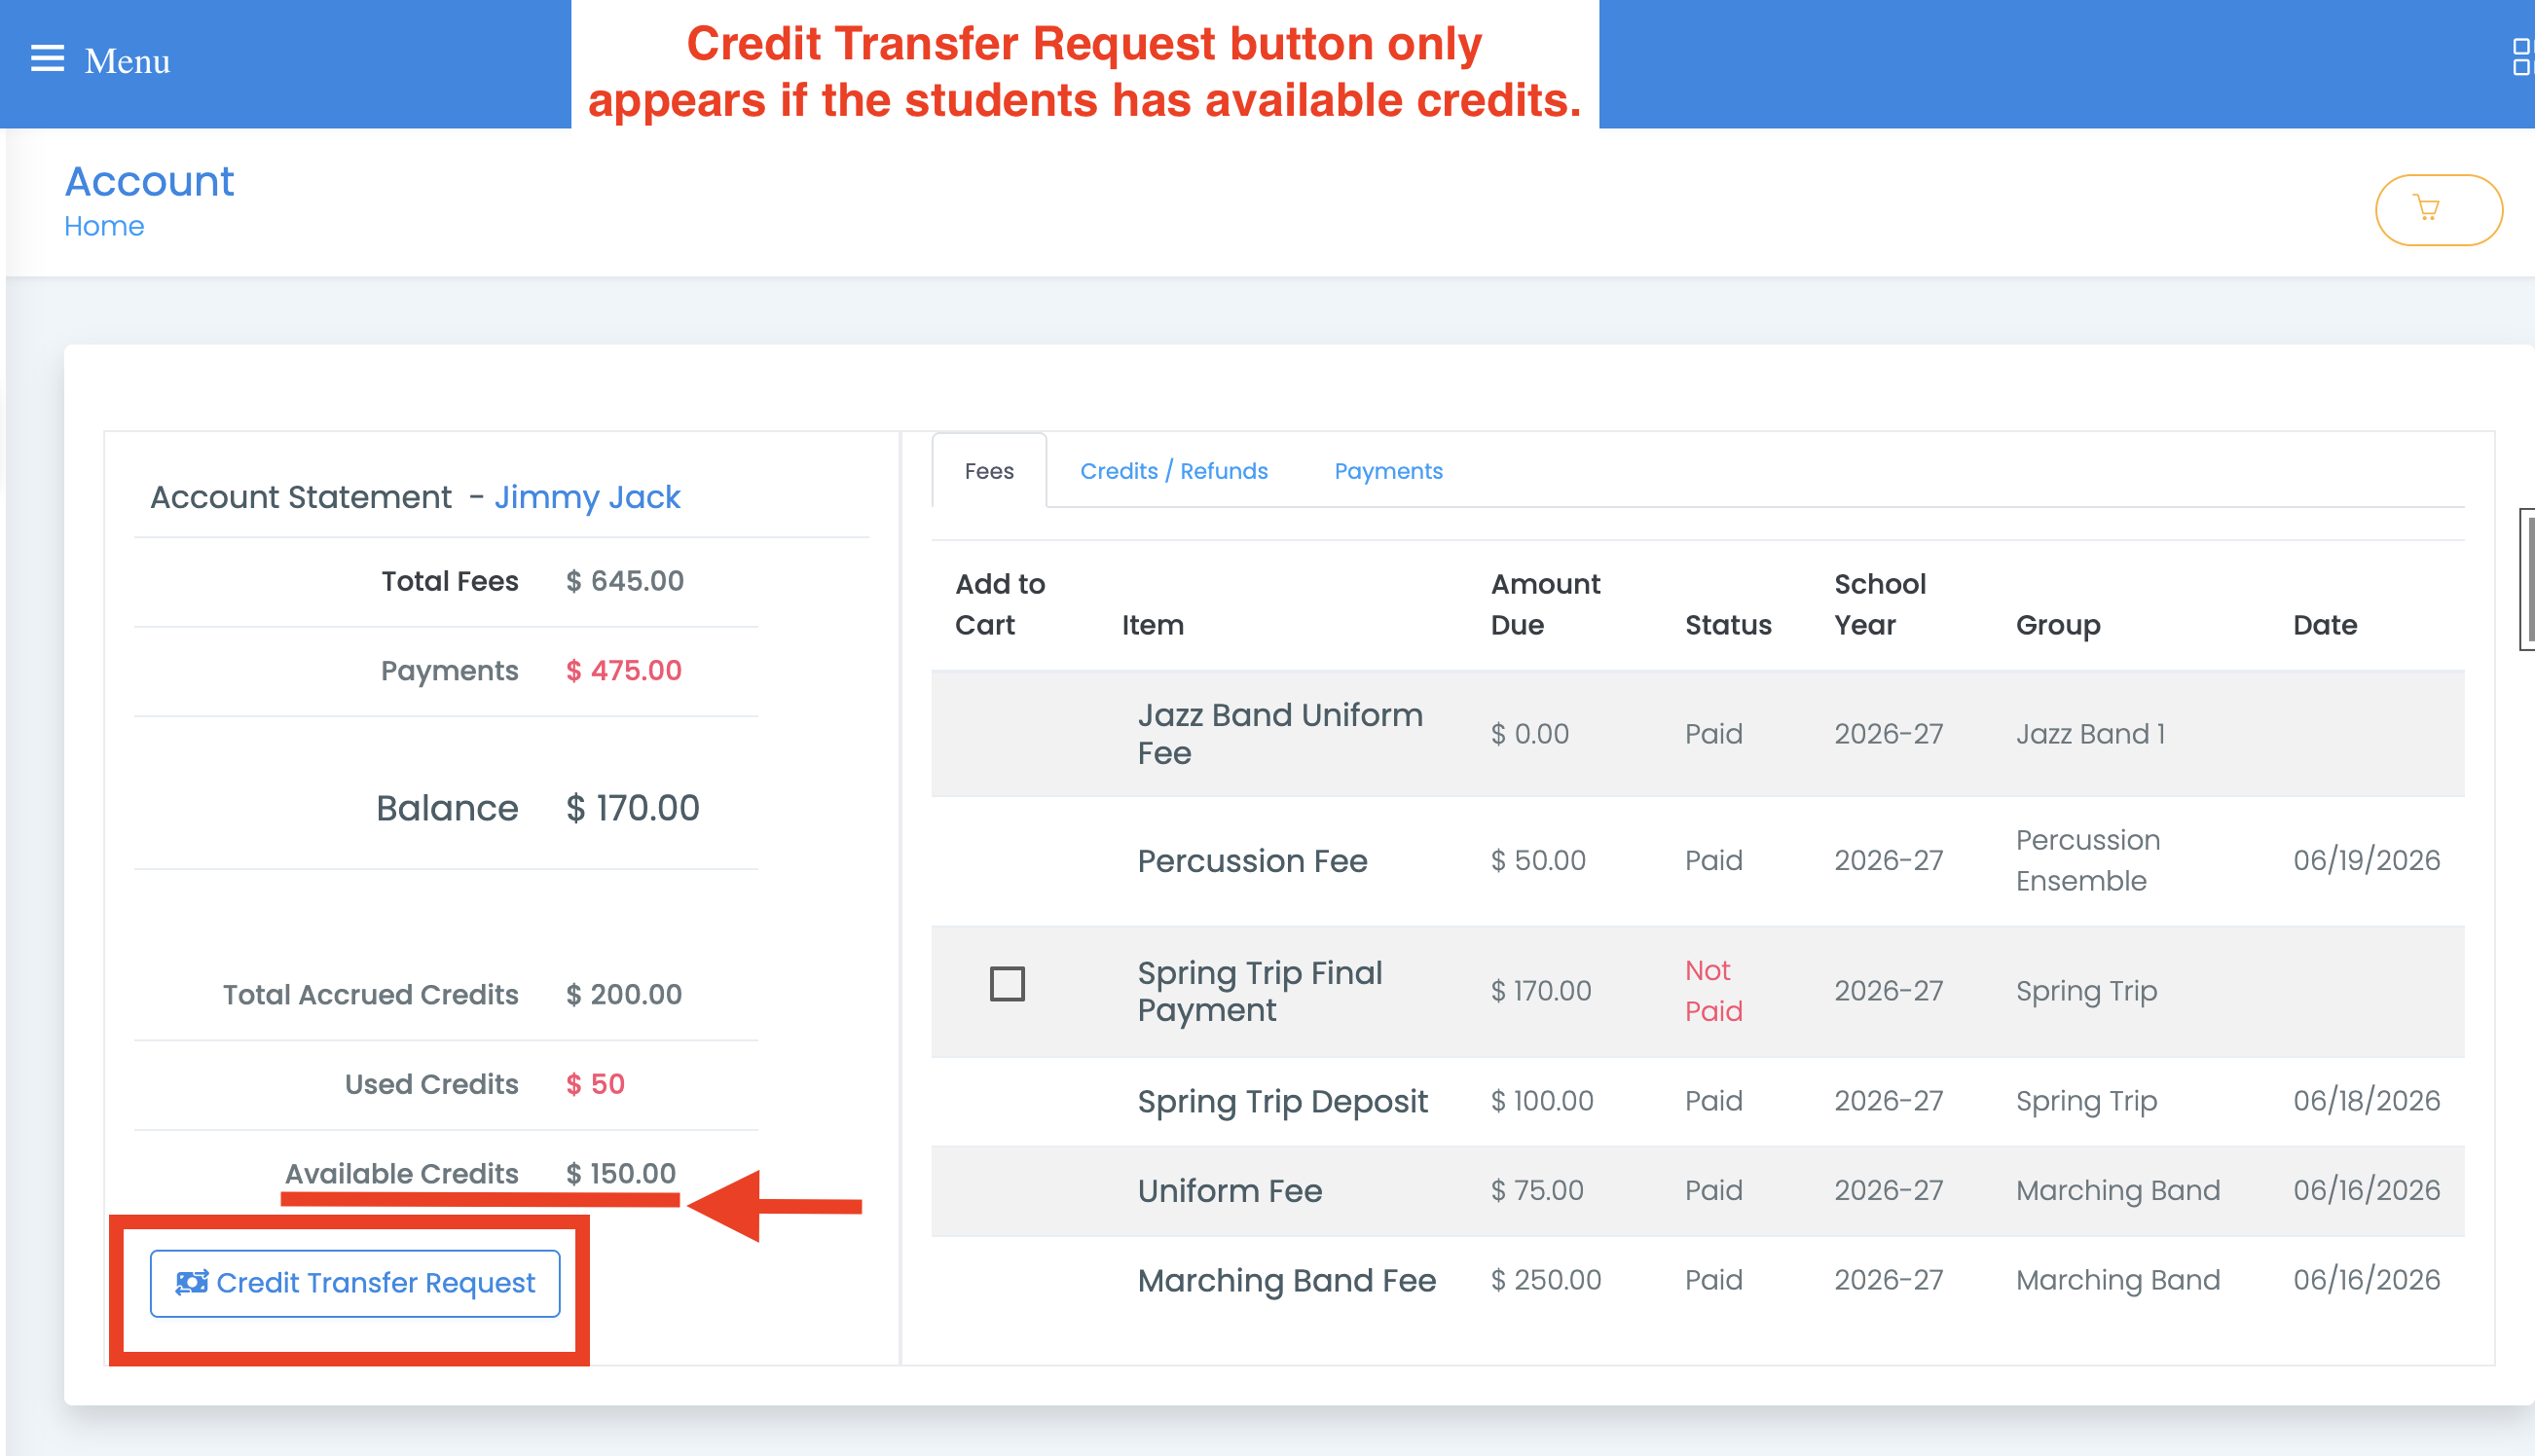
A Credit Transfer Request button appears on each student's statement in myAccount. A parent with two students gets one button per student.
The window shows their available credit, an amount box, and a list of their unpaid fees. They pick a fee, enter an amount, and submit.
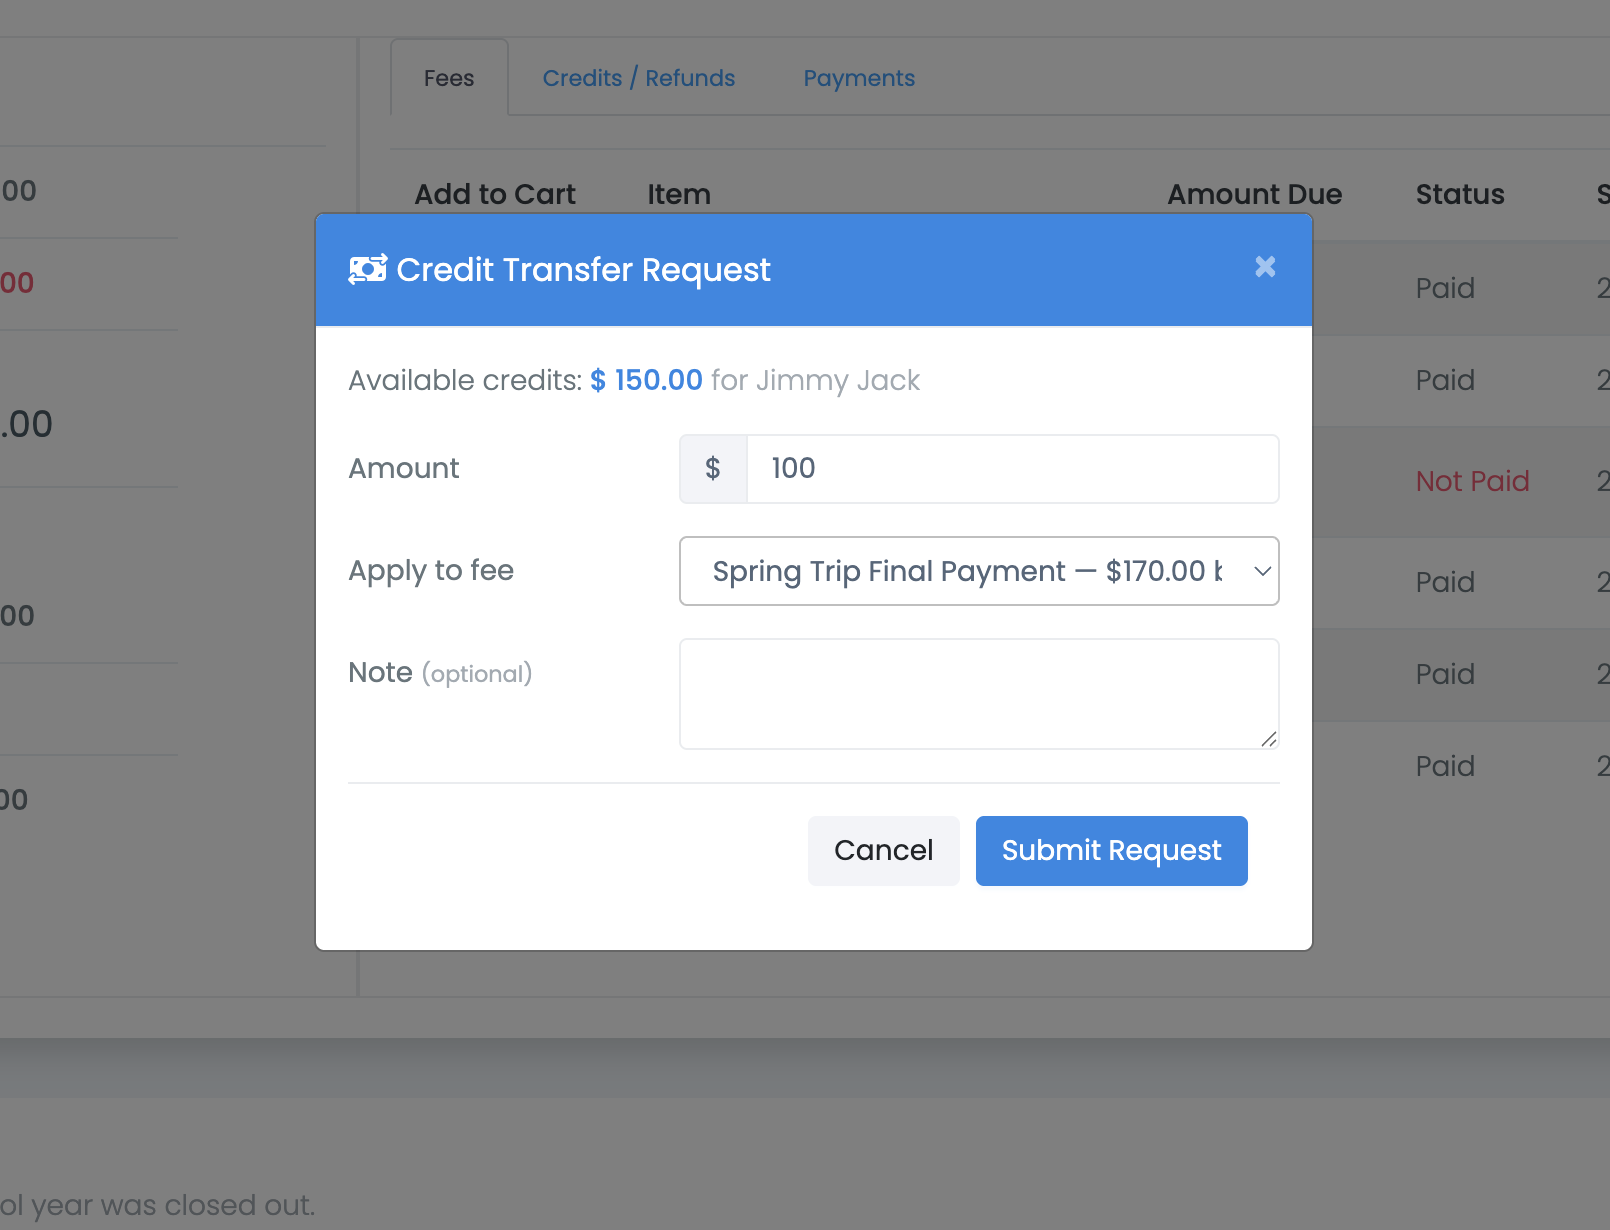
They can never submit more than they have available, or more than the fee's remaining balance.
If approval is required, they can tick Email me when this is approved or denied.
The two confirmations
What a family sees after selecting Submit Request depends entirely on your auto-approve setting — and the two messages mean very different things.
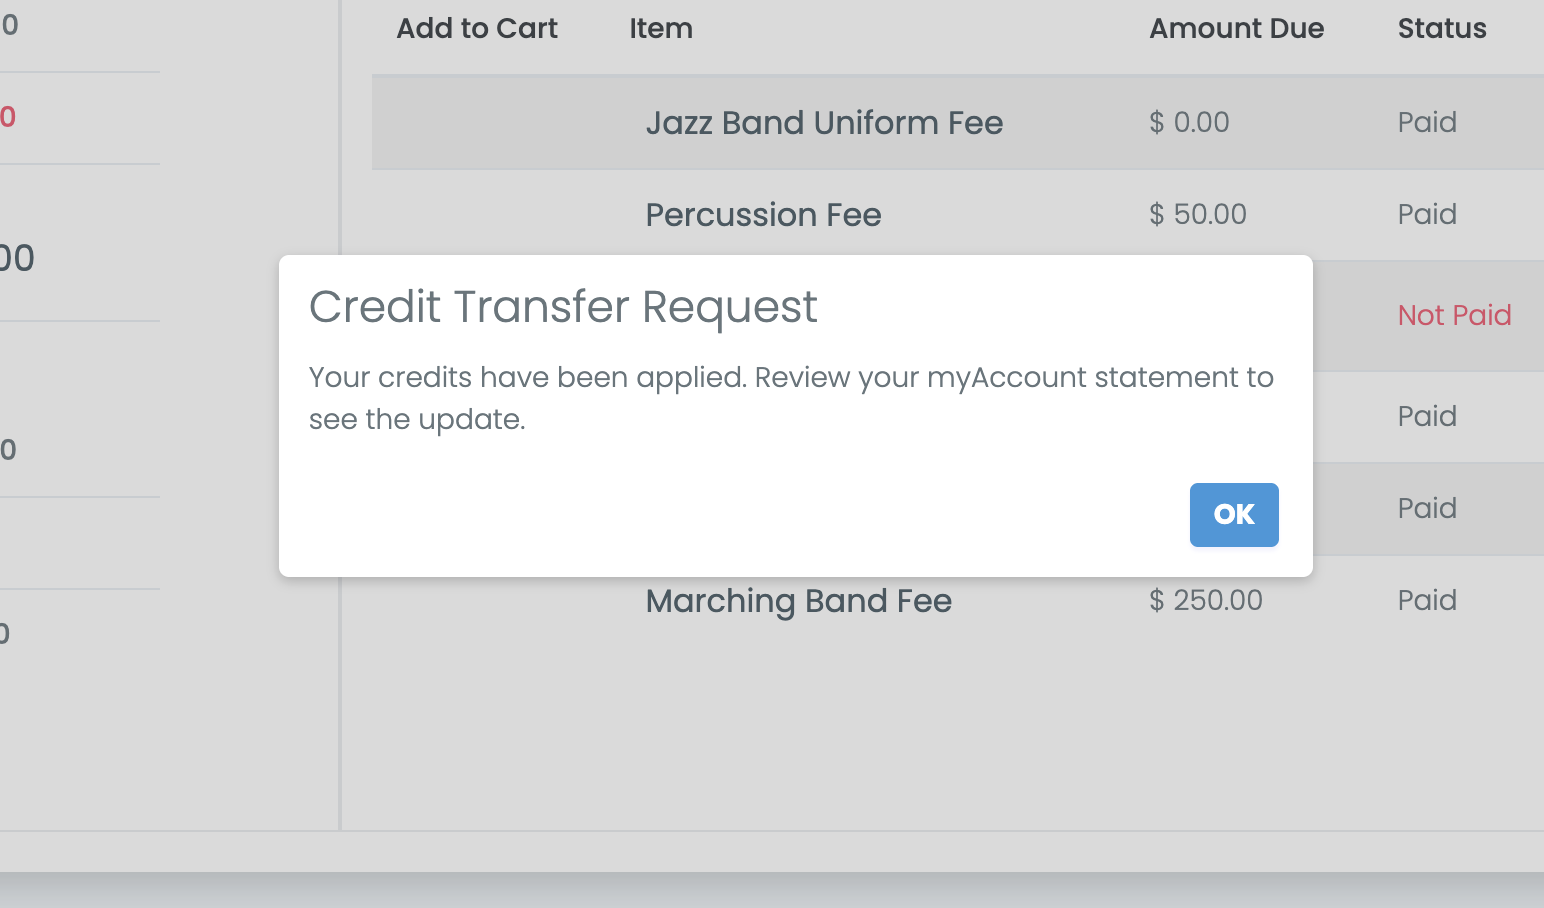
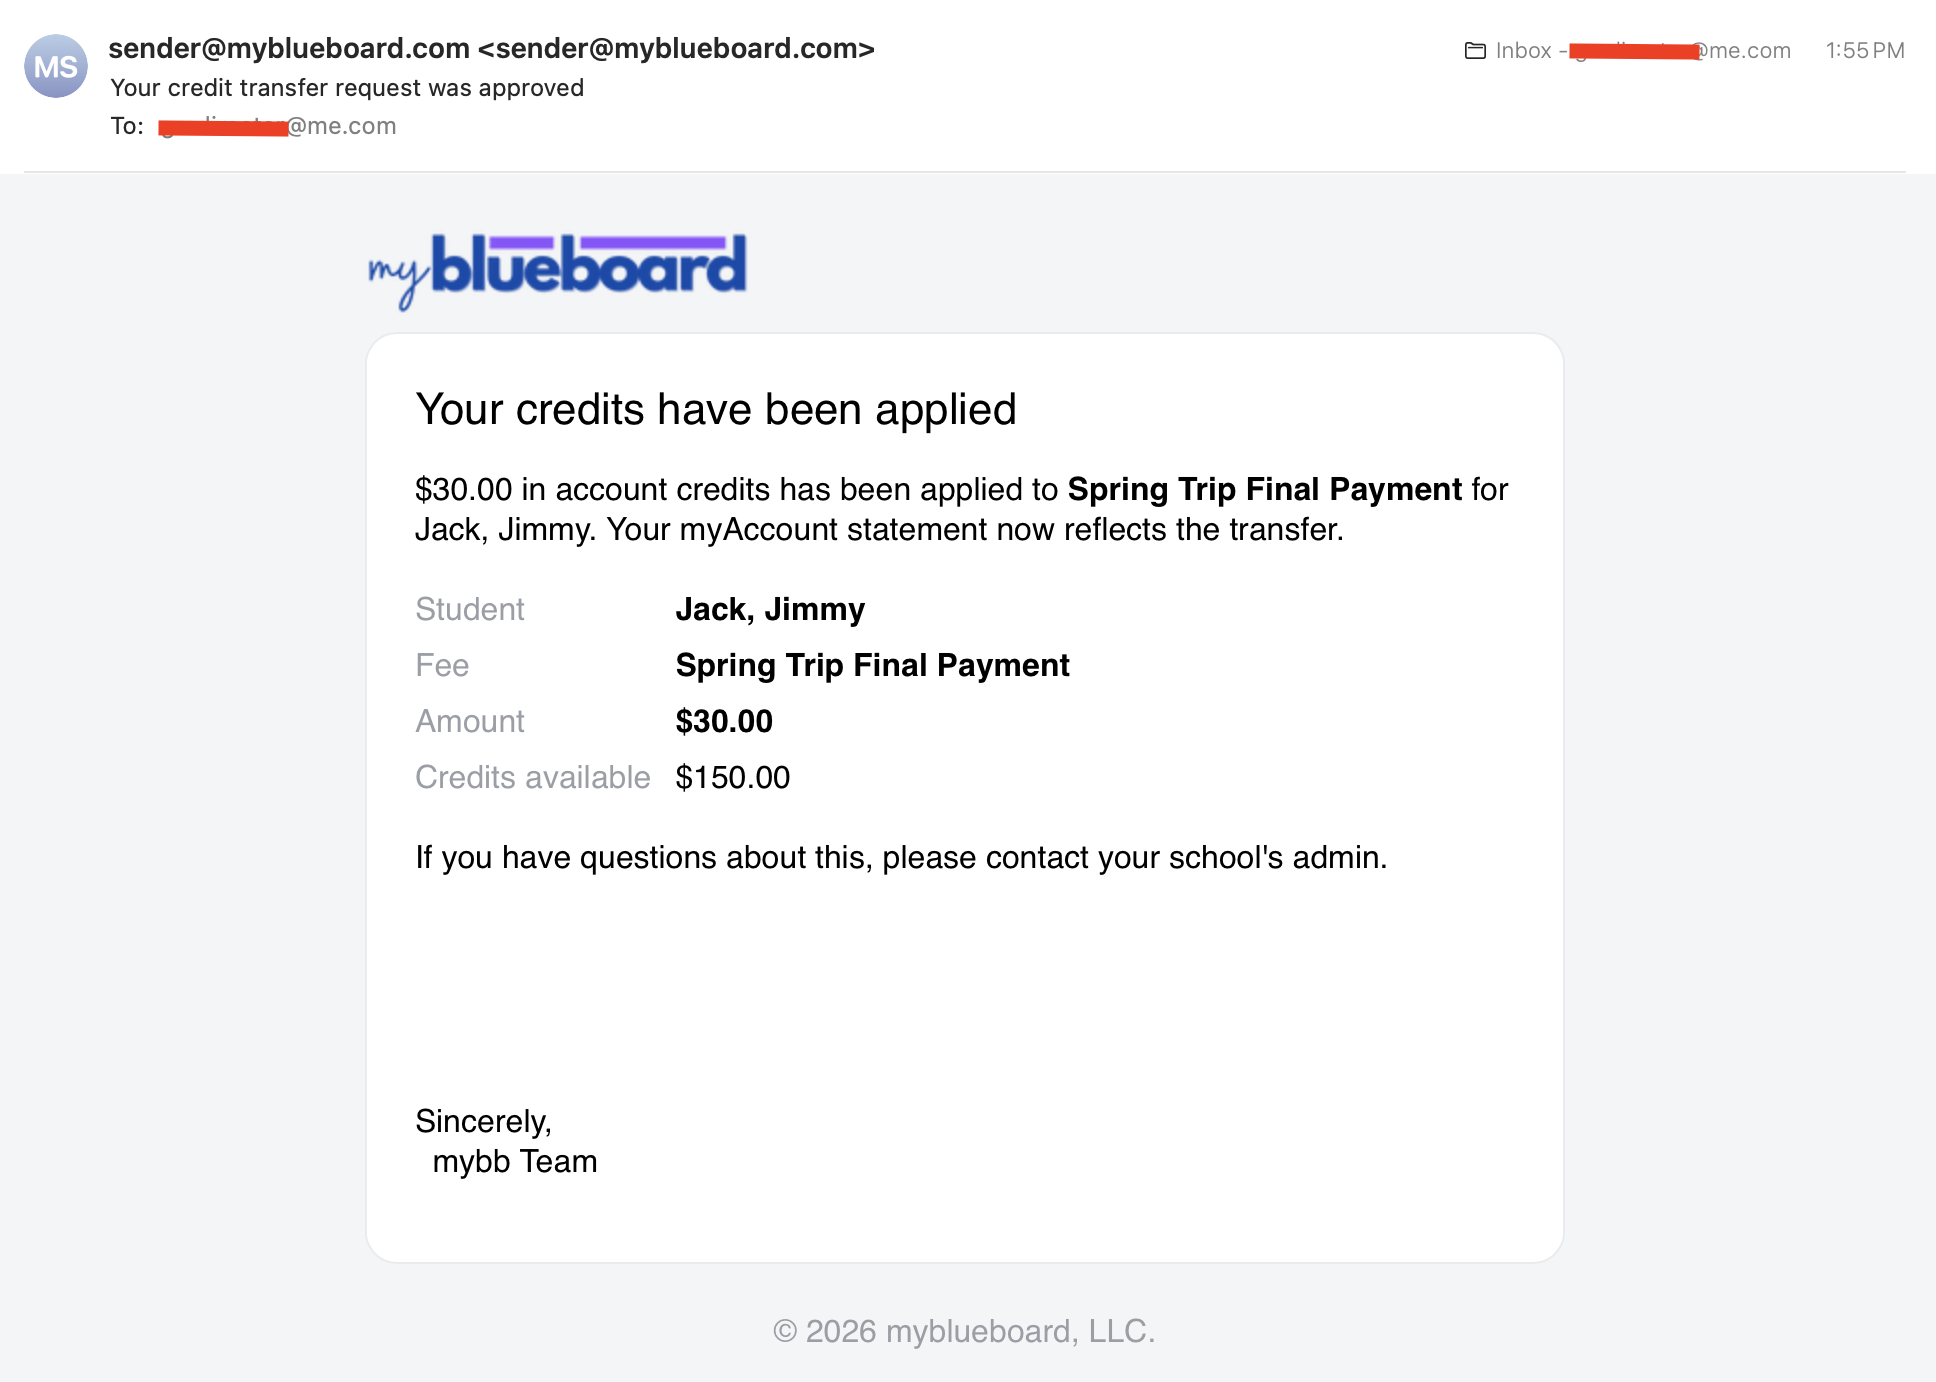
Auto-approve on — the credits are already applied. The transfer is done, and their statement reflects it as soon as they close the message.
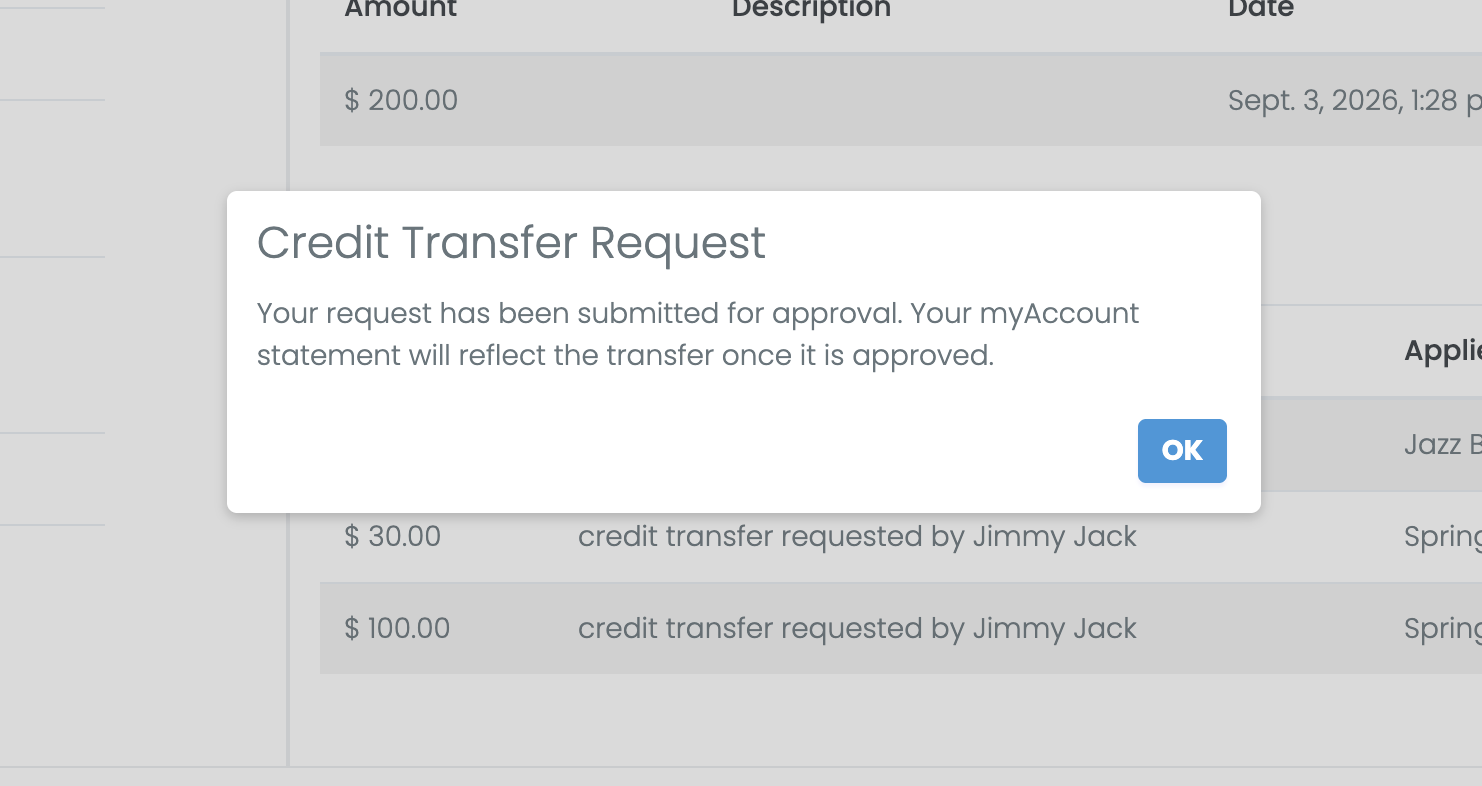
Auto-approve off — nothing has moved yet. The request is waiting for a director, and their statement will not change until someone approves it.
Telling the two apart at a glance
"have been applied" = done, no action needed from you. "submitted for approval" = waiting on you, and the family's balance has not changed.
This is the single most common source of "why hasn't my balance updated?" questions. If your school runs with approval required, families will see the second message and expect the change only after you act.
Deciding a request
When approval is required, you can act in either place:
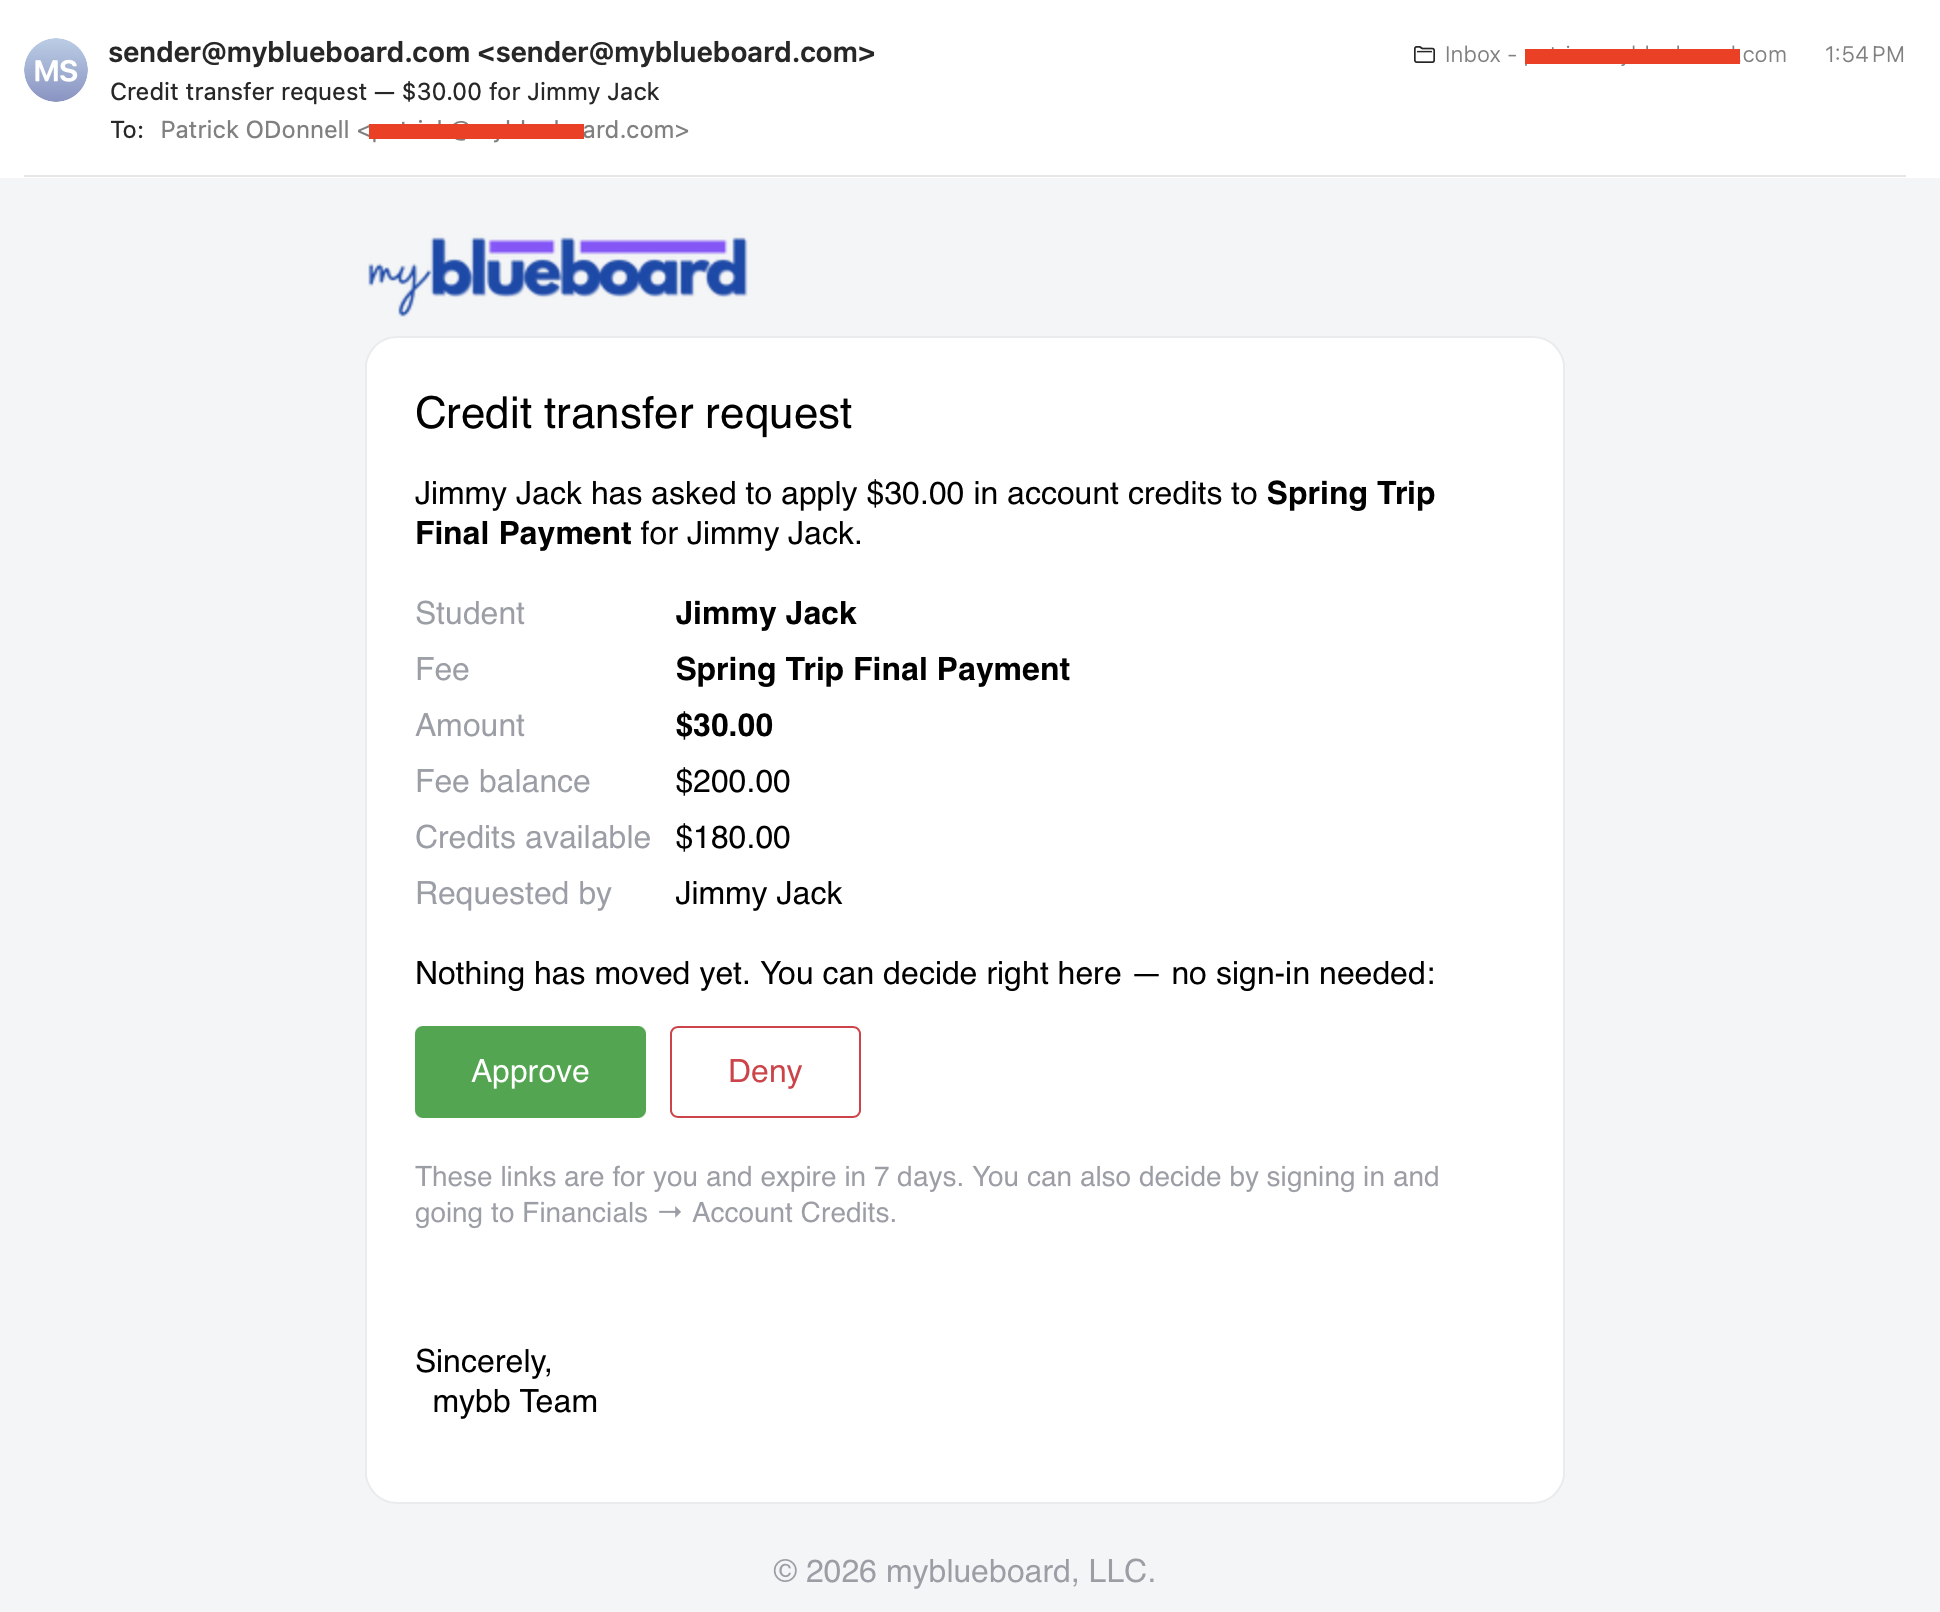
From the email. It lists the student, fee, amount and their note, with Approve and Deny buttons. Selecting one opens a confirmation page showing the current numbers — no sign-in needed. The credits move when you confirm.
In myblueboard. Open Financials → Account Credits. Pending requests sit in a Credit Transfer Requests card with the same Approve and Deny buttons, and a badge showing how many are waiting. Each row gives you the date, student, fee, amount, who asked, and their note — everything the email has.
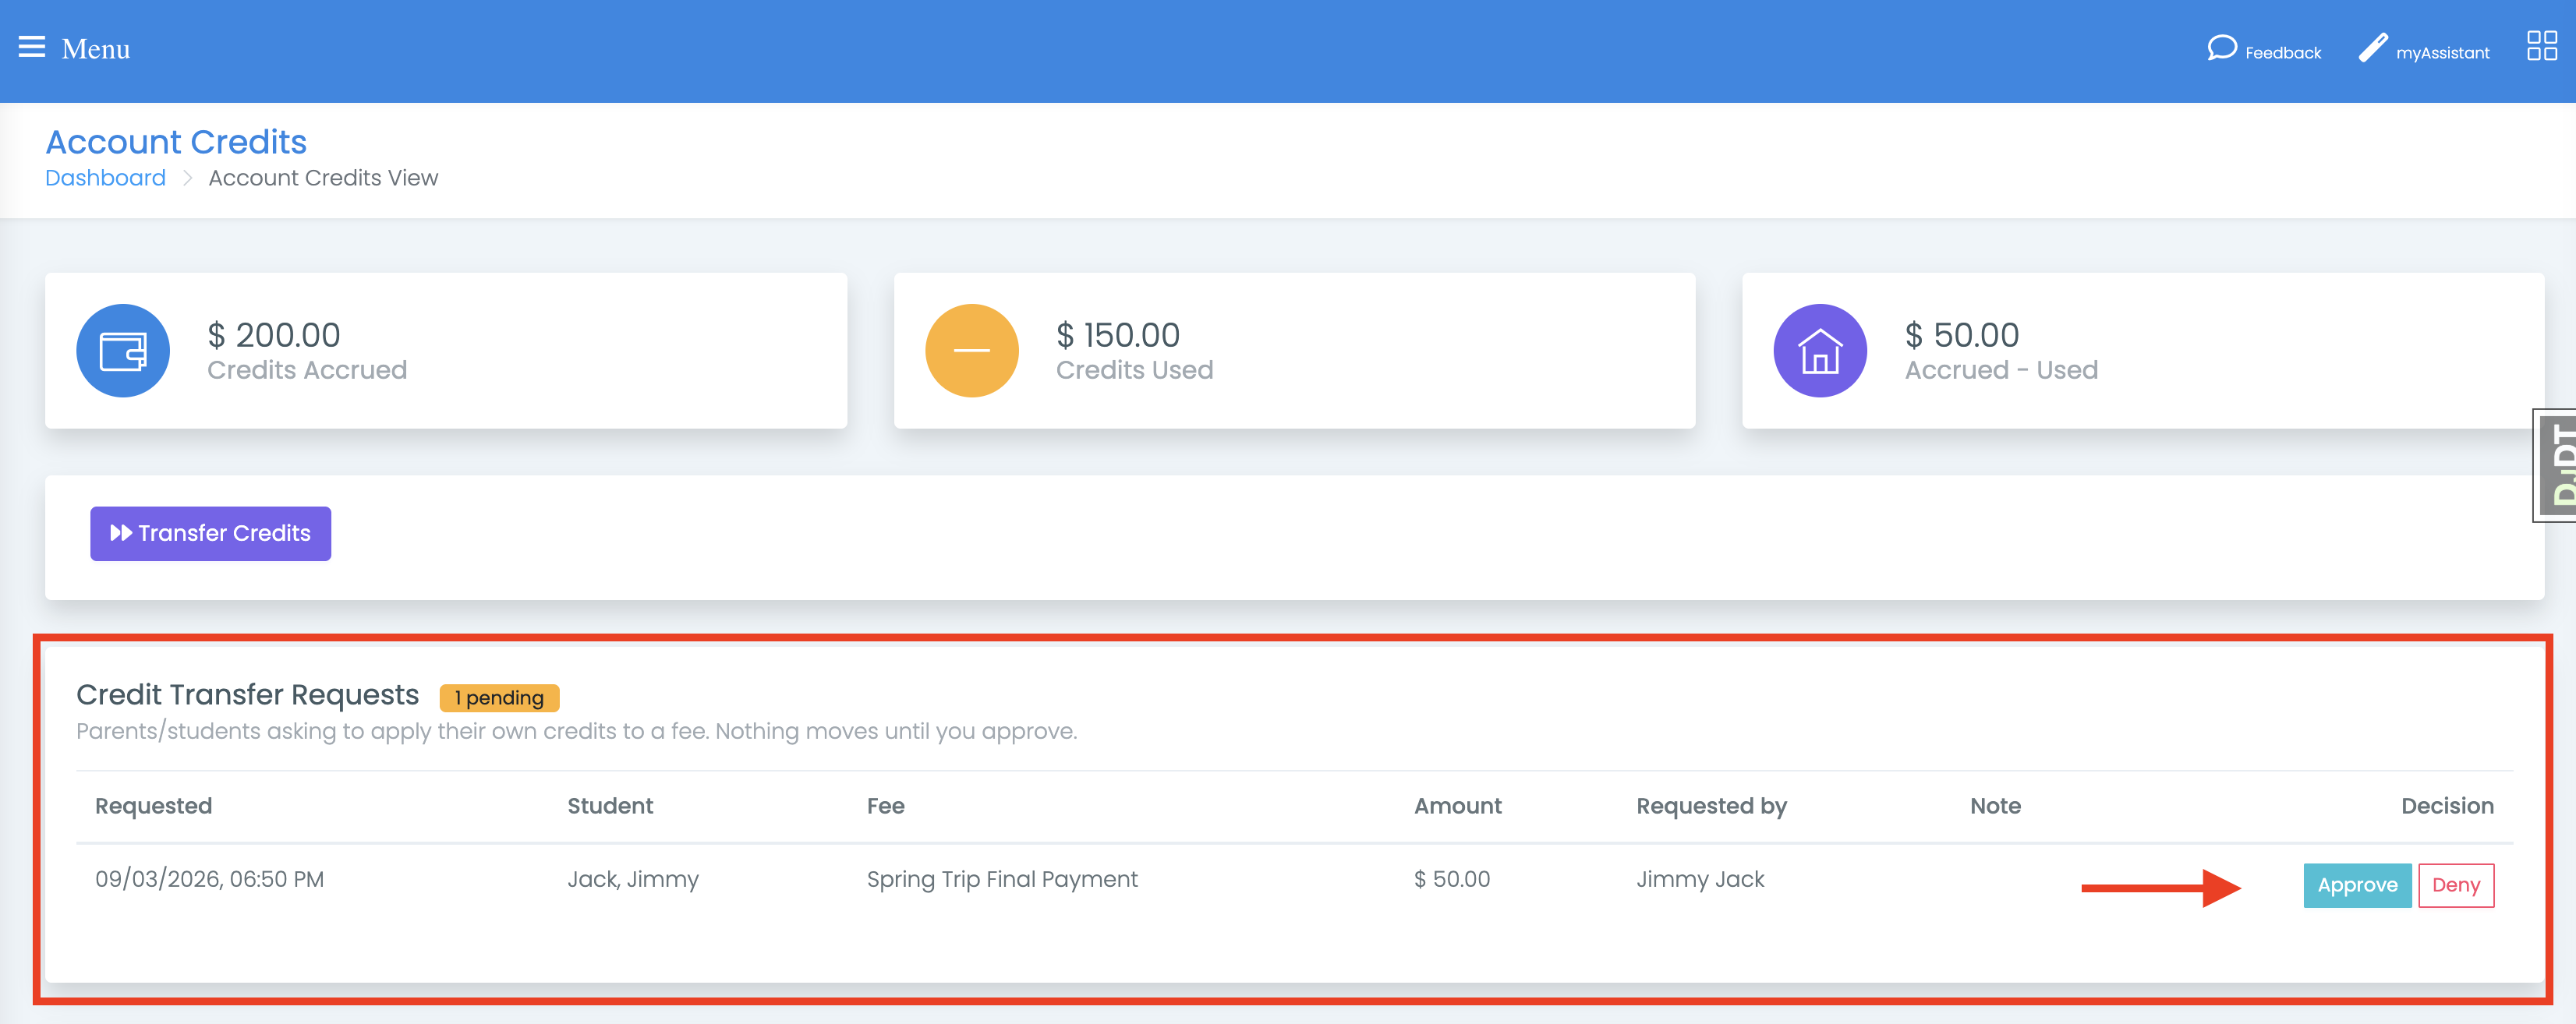
This is also the place to go when an approval link has expired, or when the person who got the email is not the person deciding.
Either way the request is decided once. If someone else has already handled it, the link says so rather than applying the credits twice.
Approval links expire after 7 days
Each recipient gets their own links, so the record shows who approved it. After 7 days, sign in and use the Account Credits page instead.
If a family spends those credits elsewhere between requesting and your approval — in myShop, say — approving tells you the balance no longer covers it and leaves the request pending. Nothing is applied by accident.
Requests still waiting after seven days trigger a reminder email.
Deciding which fees get paid first
You can require that some fees are settled before credits go anywhere else. If uniforms should be covered before a trip, set the uniform fee's priority higher, and families won't be able to put credits toward the trip until the uniform fee is clear.
- Open Financials → Assign/Create Fees.
- Create or modify a fee.
- Set Payment Priority:
- 0 — no priority. Never blocks anything, never blocked.
- 1 — must be settled first.
- 2 — next, and so on.
- Save.
A lower number wins. Two fees with the same number don't block each other. A fee cleared entirely by credits counts as settled, the same as one that was paid.
In the family's fee list, a blocked fee is greyed out with the reason next to it — for example "Pay Uniform Fee first".
Priorities are re-checked when a request is approved, not just when it's made, so changing them takes effect on requests already in the queue.
What gets recorded
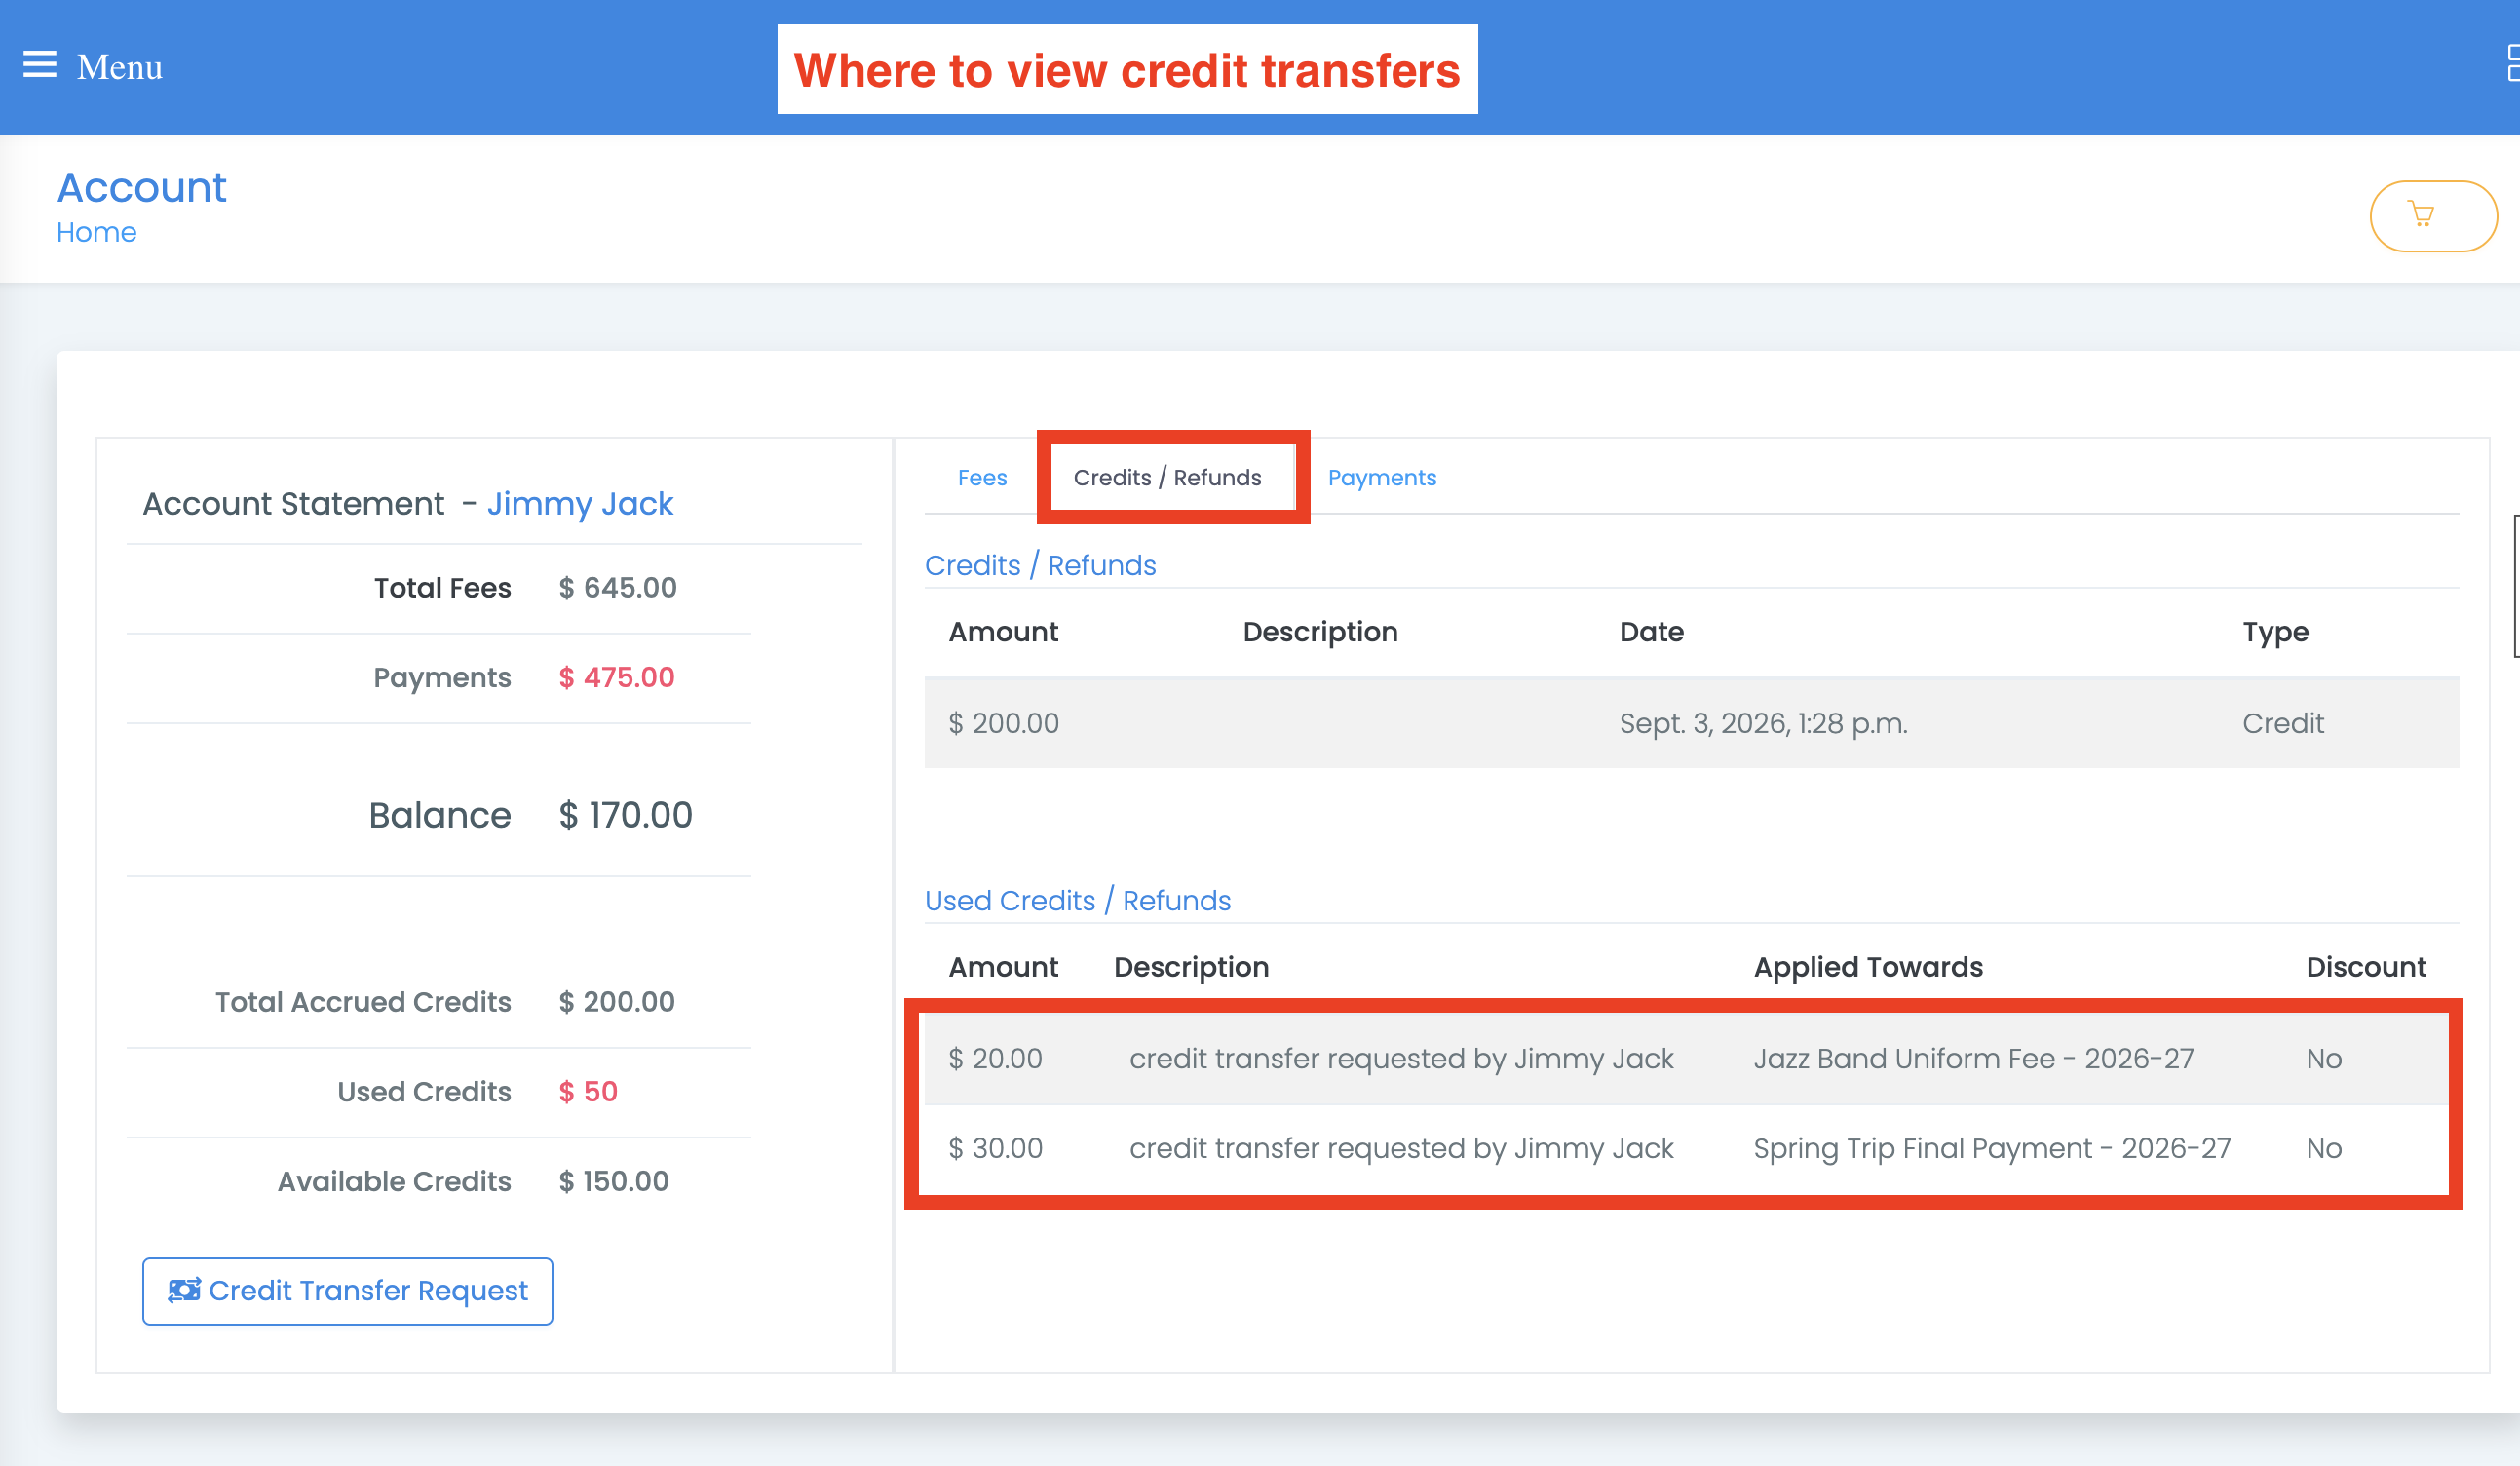
An applied transfer is an ordinary applied credit: it shows in Credits Used, on the student's statement, and in the fee's history. If a fee is fully covered, it's marked paid.
Families see their own transfers under the Credits / Refunds tab of their statement, listed as "credit transfer requested by ..." against the fee the credits went to.
If the family asked to be told, they also get an email once the request is decided.
To reverse one, delete the applied credit on the Account Credits page as you would any other.