Setting up myShop
myShop is your organization's online storefront. Sell spirit wear, fundraiser items, event tickets, ad space, and more — with payments handled through your own PayPal or Stripe account, and in-person sales handled through Point of Sale view.
This guide walks through setting up myShop from scratch. If you already have products listed, skip to the section you need.
Who can manage myShop
Managing myShop requires myShop Admin Access. Selling and setup options stay hidden from anyone without it.
To grant access:
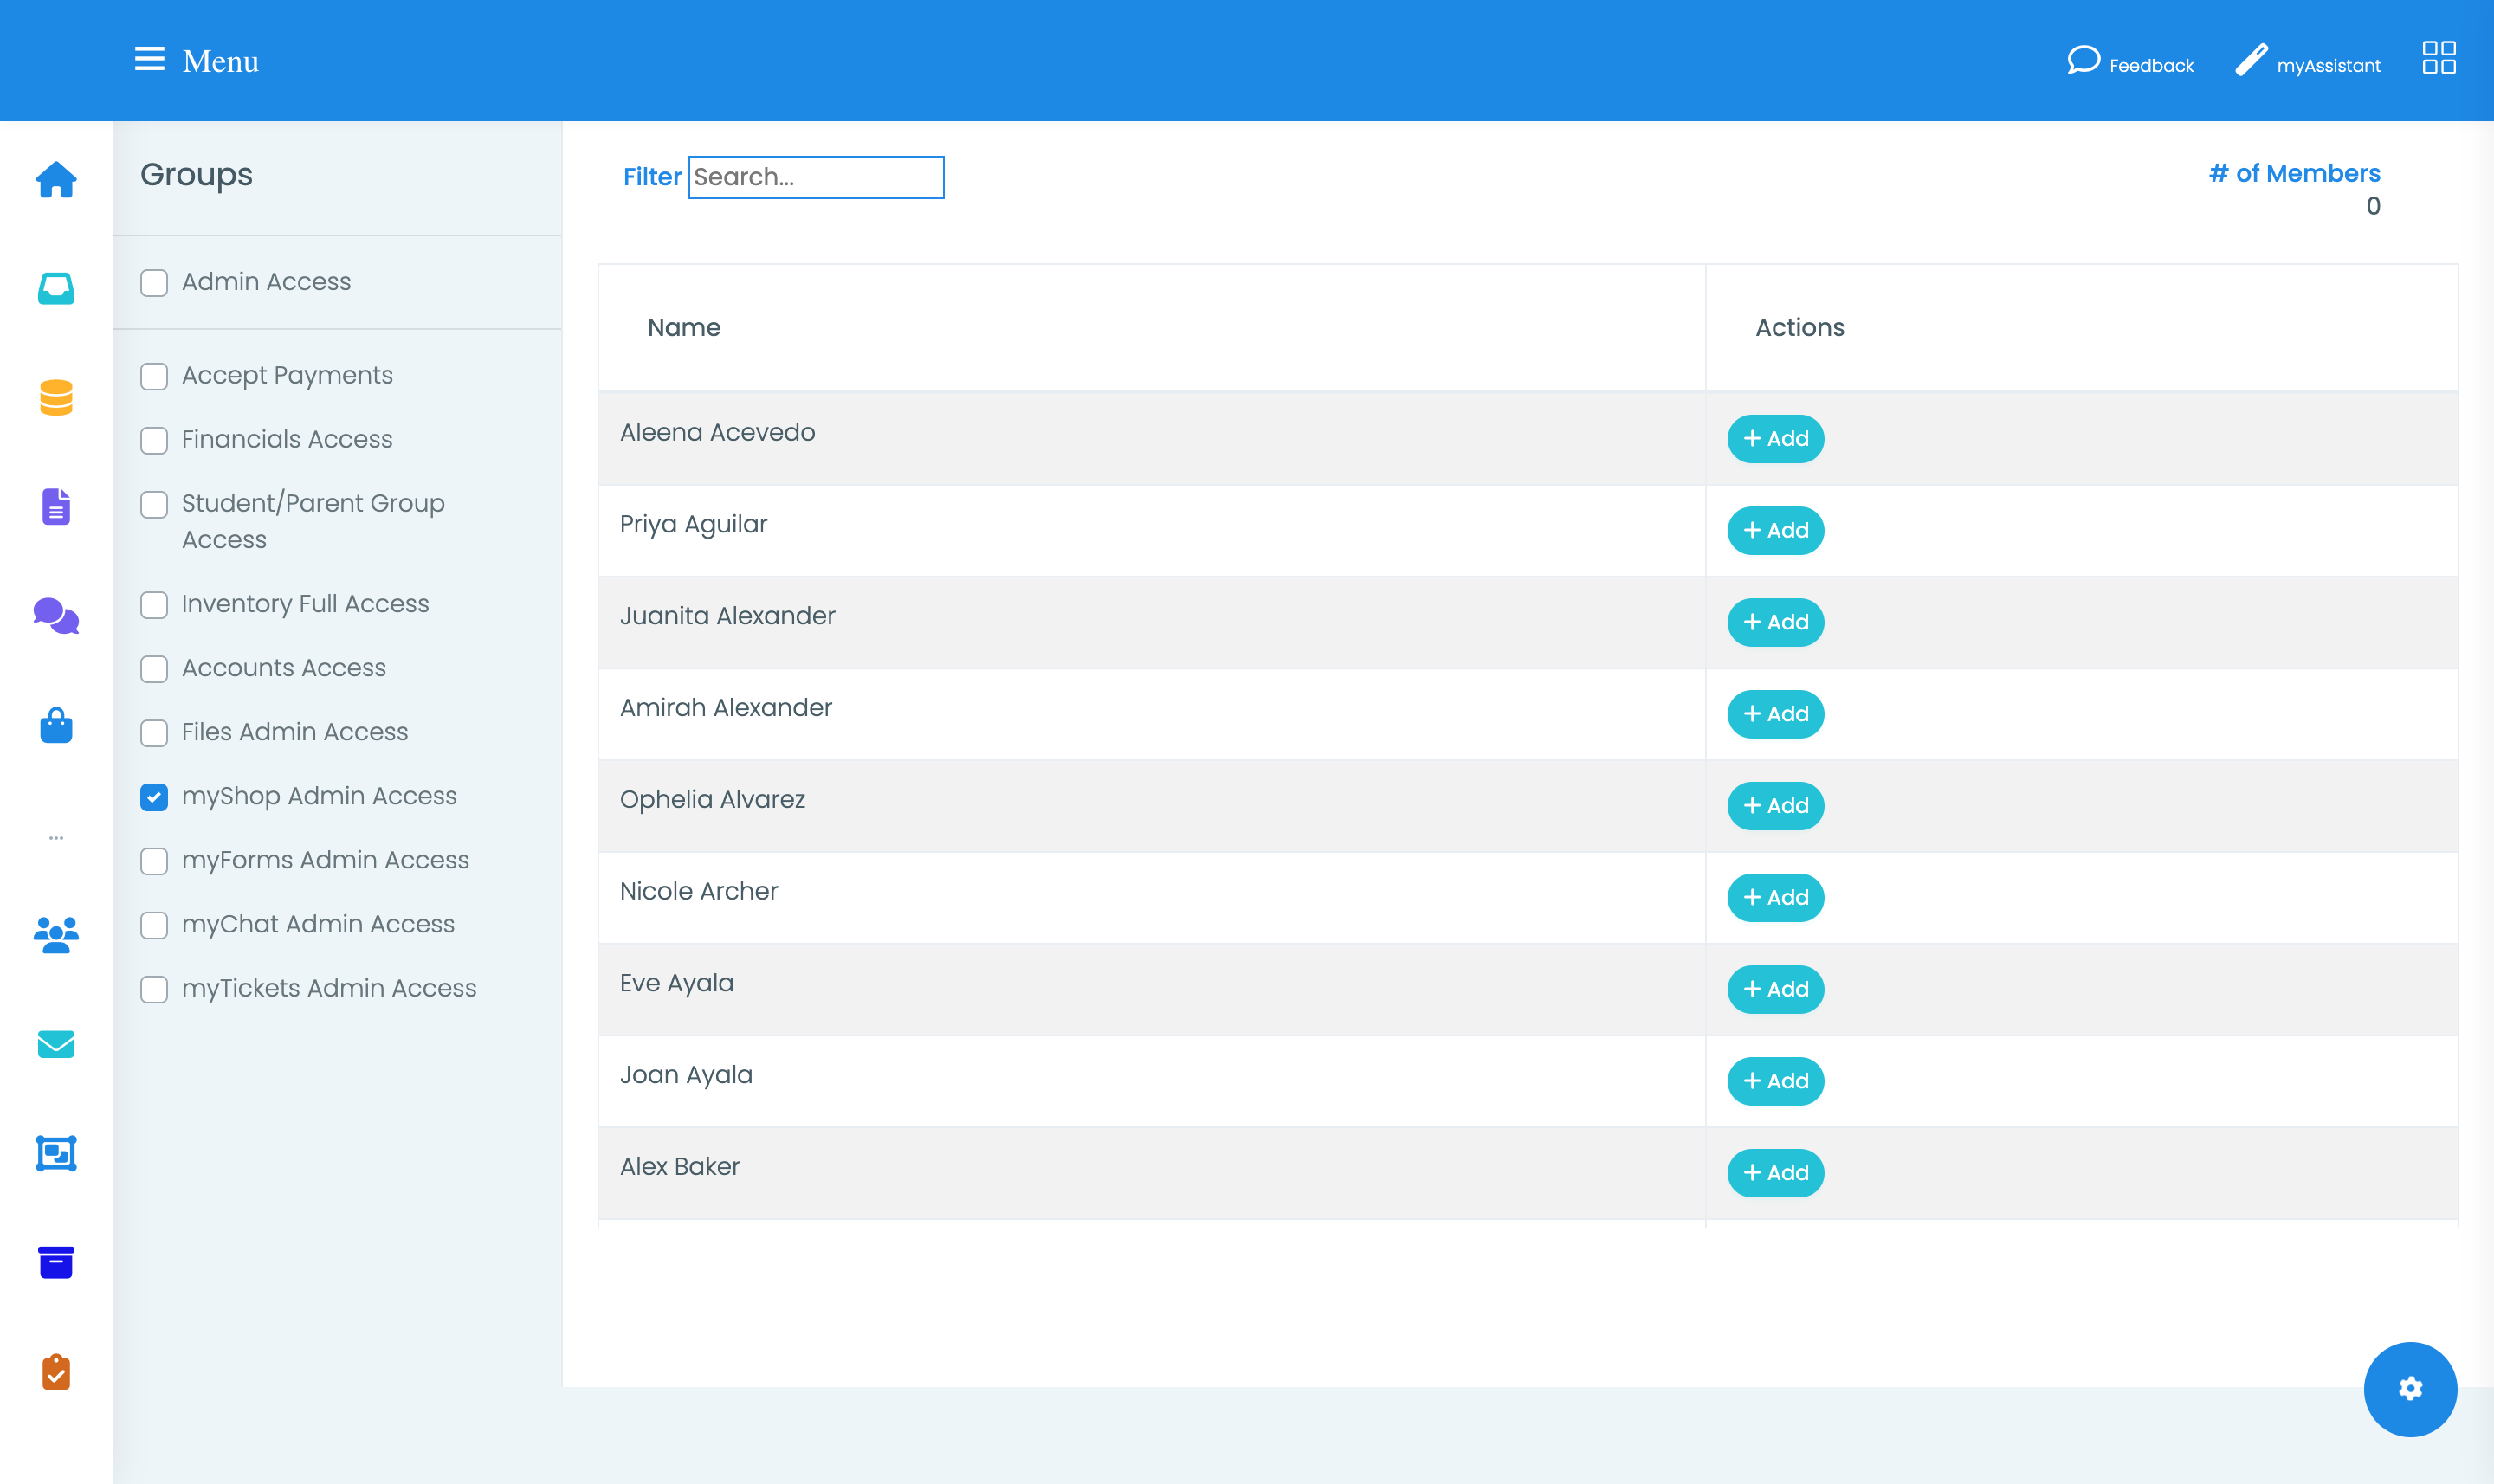
- Open Settings from the top navigation, then the Elevated Access tab.
- Check the myShop Admin Access box.
- Select Add next to each member who should have it.
Who has it already depends on the account type:
- Full Directors receive every access group automatically when their account is created, including myShop Admin Access.
- Staff Directors receive only the groups you assign manually. A Staff Director will not have myShop access until you grant it.
Community subscriptions
Community subscriptions have their own myShop Admin permission, granted the same way.
The Manage myShop menu
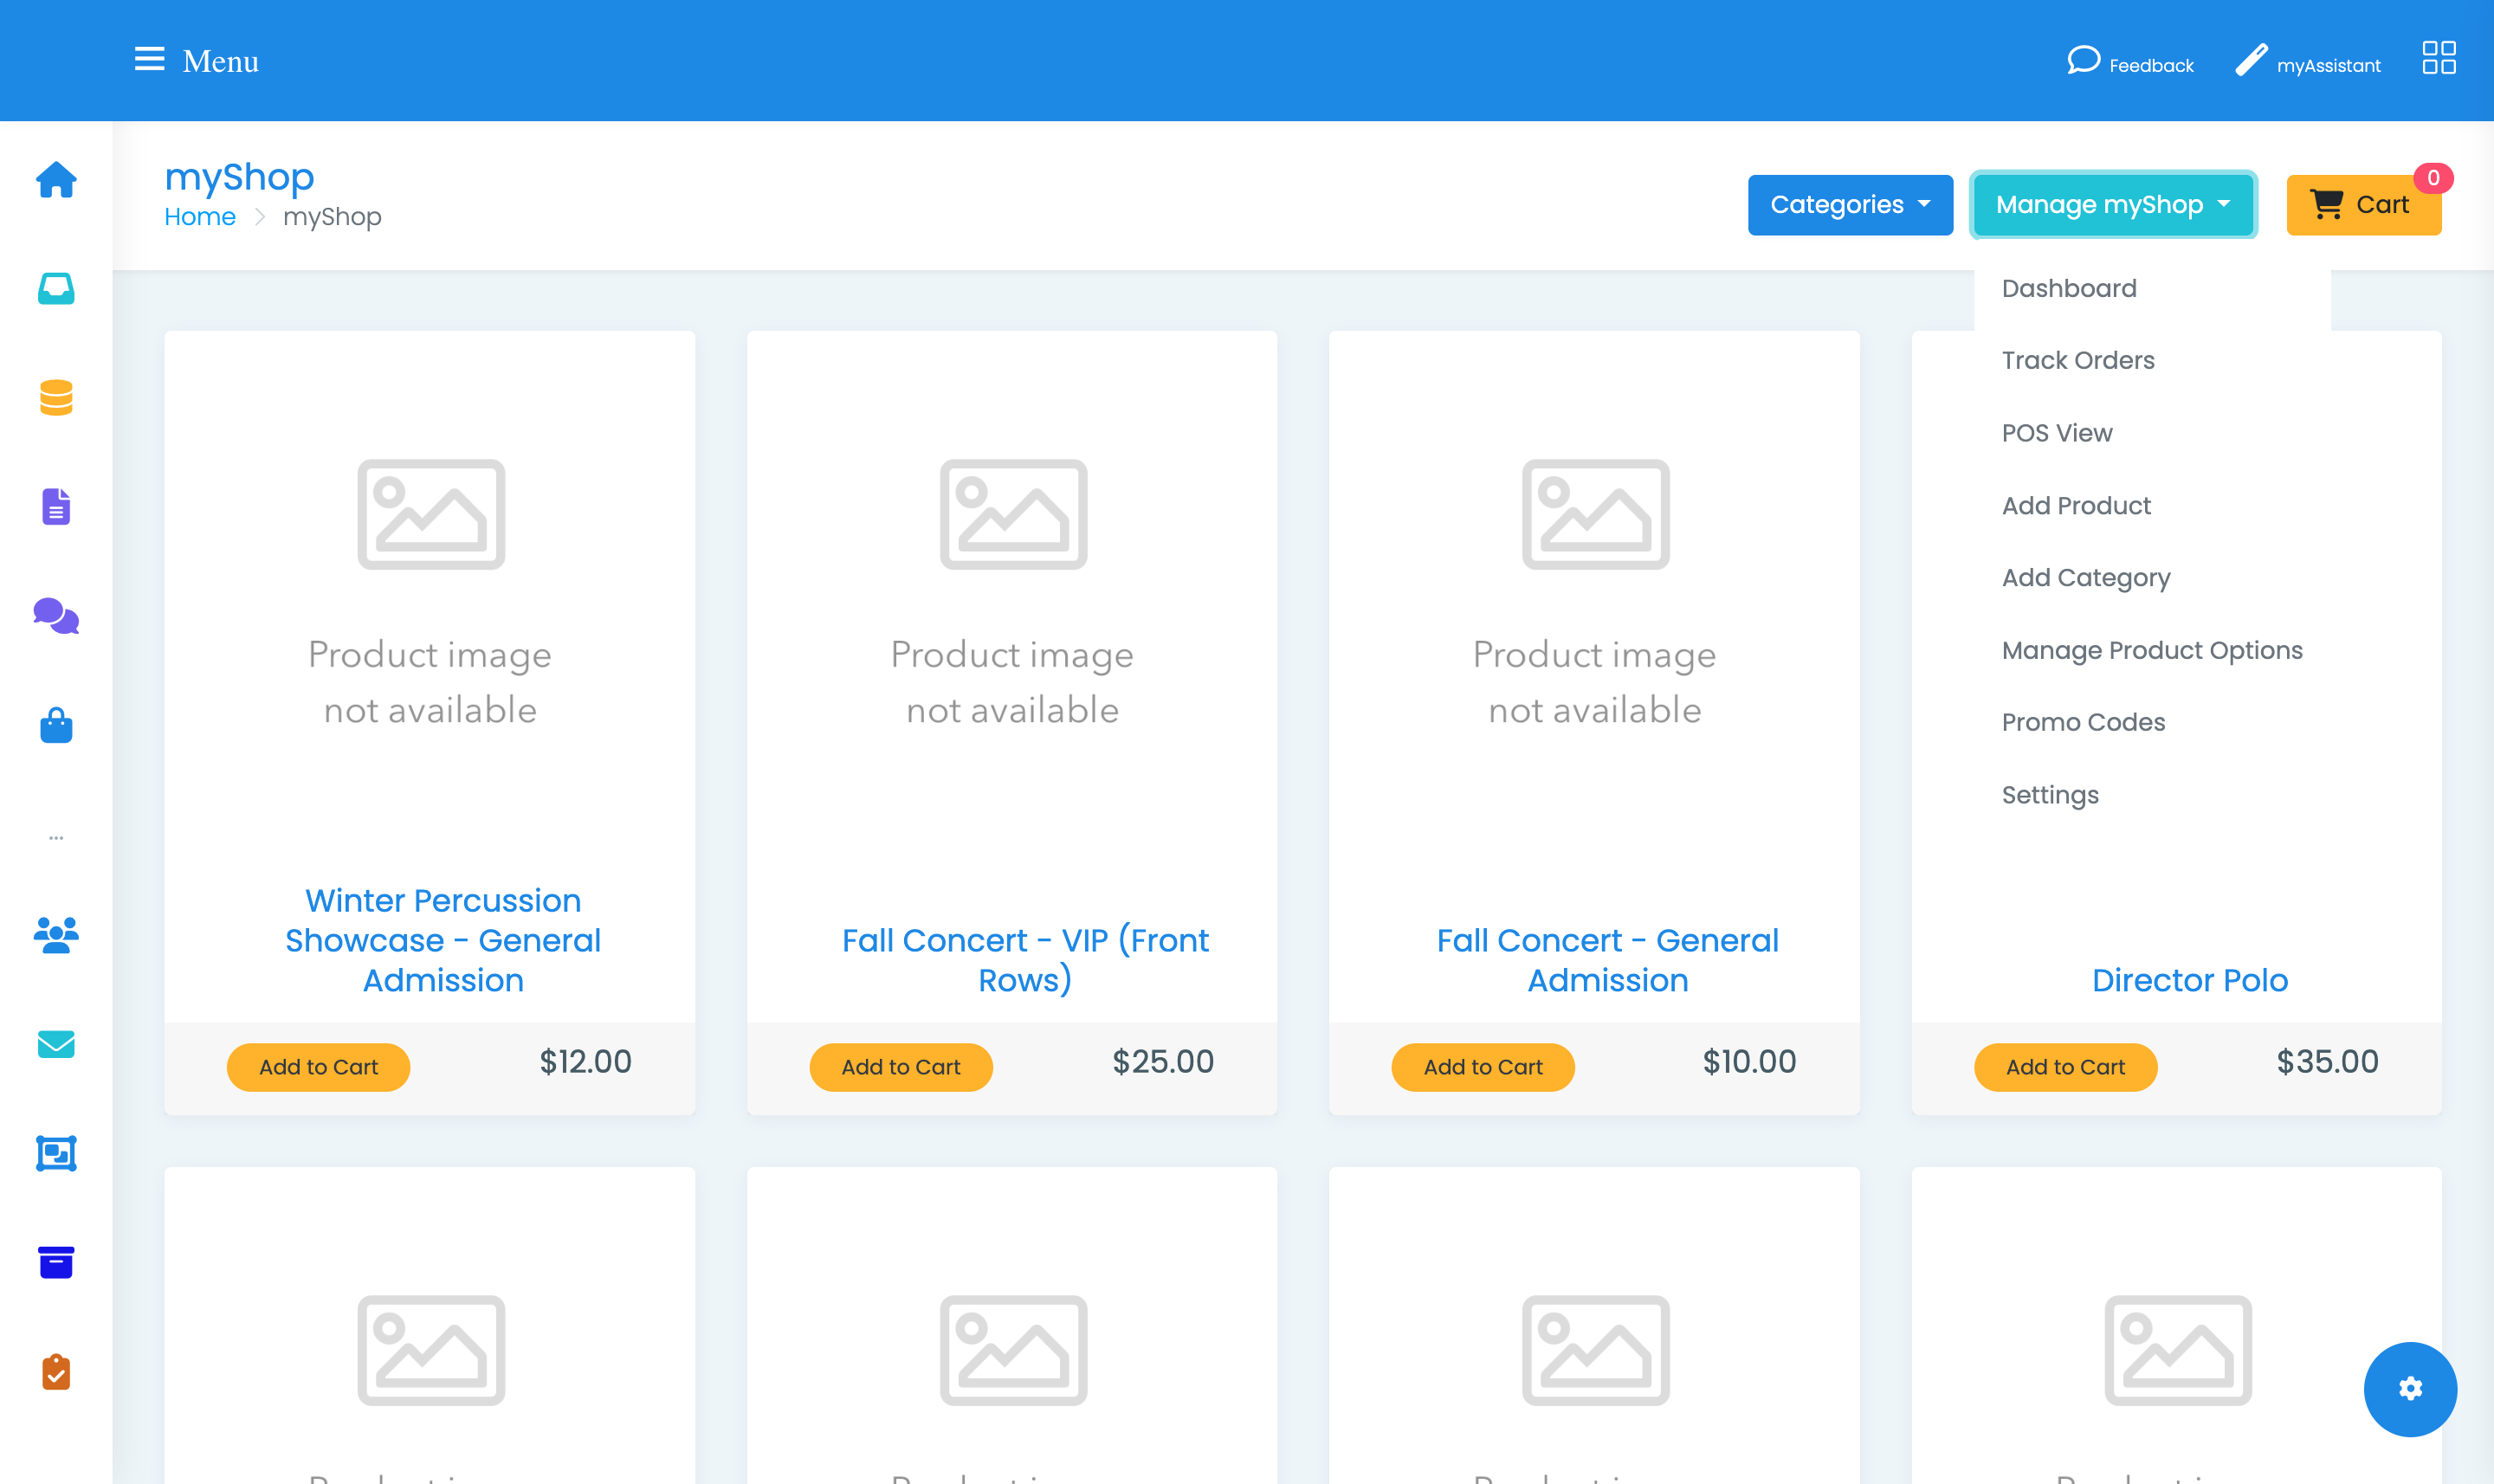
Everything below lives under Manage myShop:
- Dashboard — sales totals, product performance and expenses
- Track Orders — every order and its status
- POS View — in-person selling
- Add Product / Add Category
- Manage Product Options — sizes, colors, sponsor levels
- Promo Codes
- Settings — edit categories and recover deleted products
Step 1 — Create your categories
Categories come first. You can't add a product without one, so set these up before anything else.
Think about how shoppers will browse. Broad groupings work better than narrow ones — "Spirit Wear," "Fundraisers," "Concert Tickets" rather than a category per item.
- Select myShop in the sidebar.
- Open Manage myShop and select Add Category.
- Enter a title and save.
To rename or remove a category later, go to Manage myShop → Settings.
Step 2 — Add a product
Open Manage myShop → Add Product and fill in:
- Title — what shoppers see first
- Brand or sub-category — a second level of grouping
- Description — full formatting available; describe sizing, materials, pickup or delivery expectations
- Price per unit
- Category
Under Product Settings, check Make product available to public when you're ready for the product to appear in your storefront. Leave it unchecked while you're still building the listing — you'll still be able to see it as an admin.
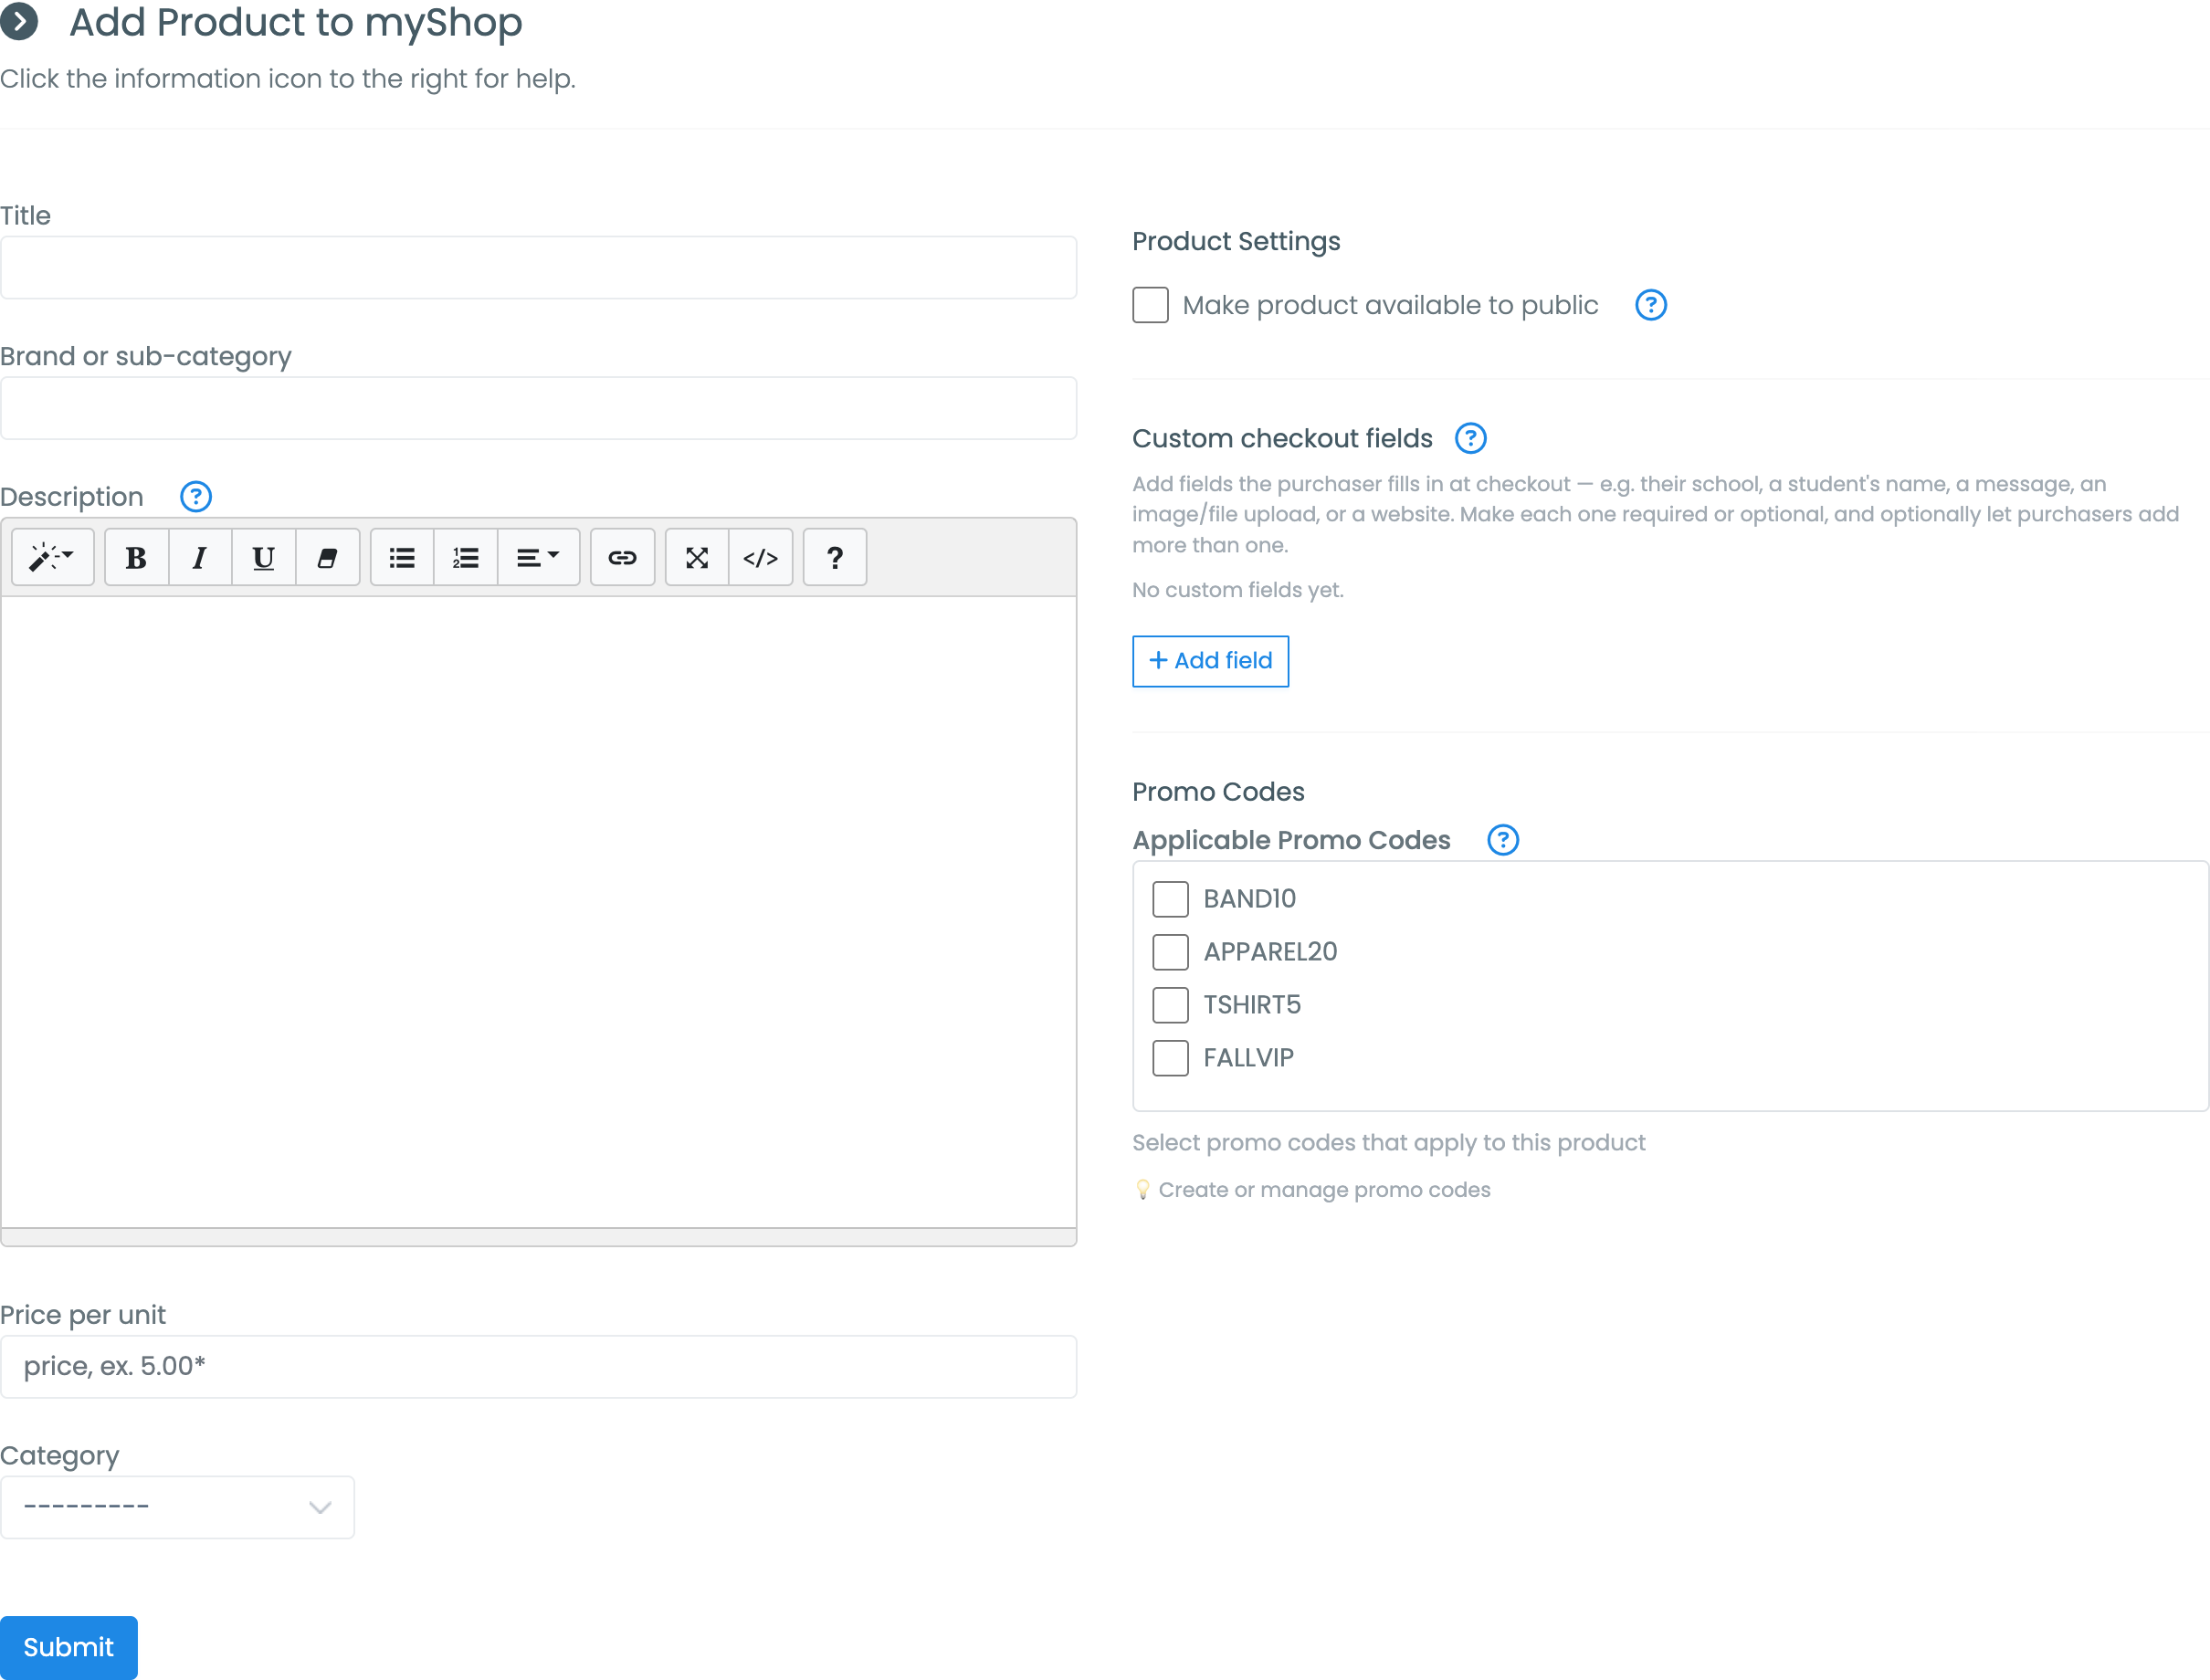
If you already have promo codes set up, you can select which ones apply to this product in the Promo Codes section at the bottom of the form.
Select Submit to create the product.
Step 3 — Add product images
Images are added after the product exists, so create the product first.
- Return to the myShop home page.
- Select the product title.
- Select the yellow Edit button.
- Scroll to Product Images and upload.
A few things that make listings look better:
- Crop to a 4:5 or 5:7 ratio so images sit consistently in the storefront grid
- Keep dimensions under 1000px — larger files slow the page down without looking better
- Upload several angles, and upload them in the order you want them shown. The first image becomes the product's primary image
- Remove an image with the red X beside it
Step 4 — Arrange your storefront
New products land at the end of your storefront. Once you have a few listed, put the ones you want shoppers to see first at the top.
- Open myShop from the sidebar so you're on the storefront home page.
- Select Re-Order Products at the top of the page. The product cards get a dashed outline and the button changes to Save.
- Drag each product to where you want it. The other cards slide out of the way as you go. On a tablet or phone, press and hold a card for a moment before dragging.
- Select Save. A "Product order saved!" message confirms it.
Changed your mind mid-way? Select Cancel and the products go back to where they were.
The order you save is the order everywhere products are listed — the storefront home page, each category page, and the product grid in POS View.
Only members with myShop Admin Access see the Re-Order Products button. Products in a Draft category don't appear on the storefront home page, so move a product out of Draft before you try to position it.
Product options
Product options cover anything the purchaser chooses at checkout — sizes, colors, sponsor levels, or a numbered range for raffles.
A product can have one option group. Build all the choices a purchaser needs into a single option rather than trying to combine two.
Creating a new option
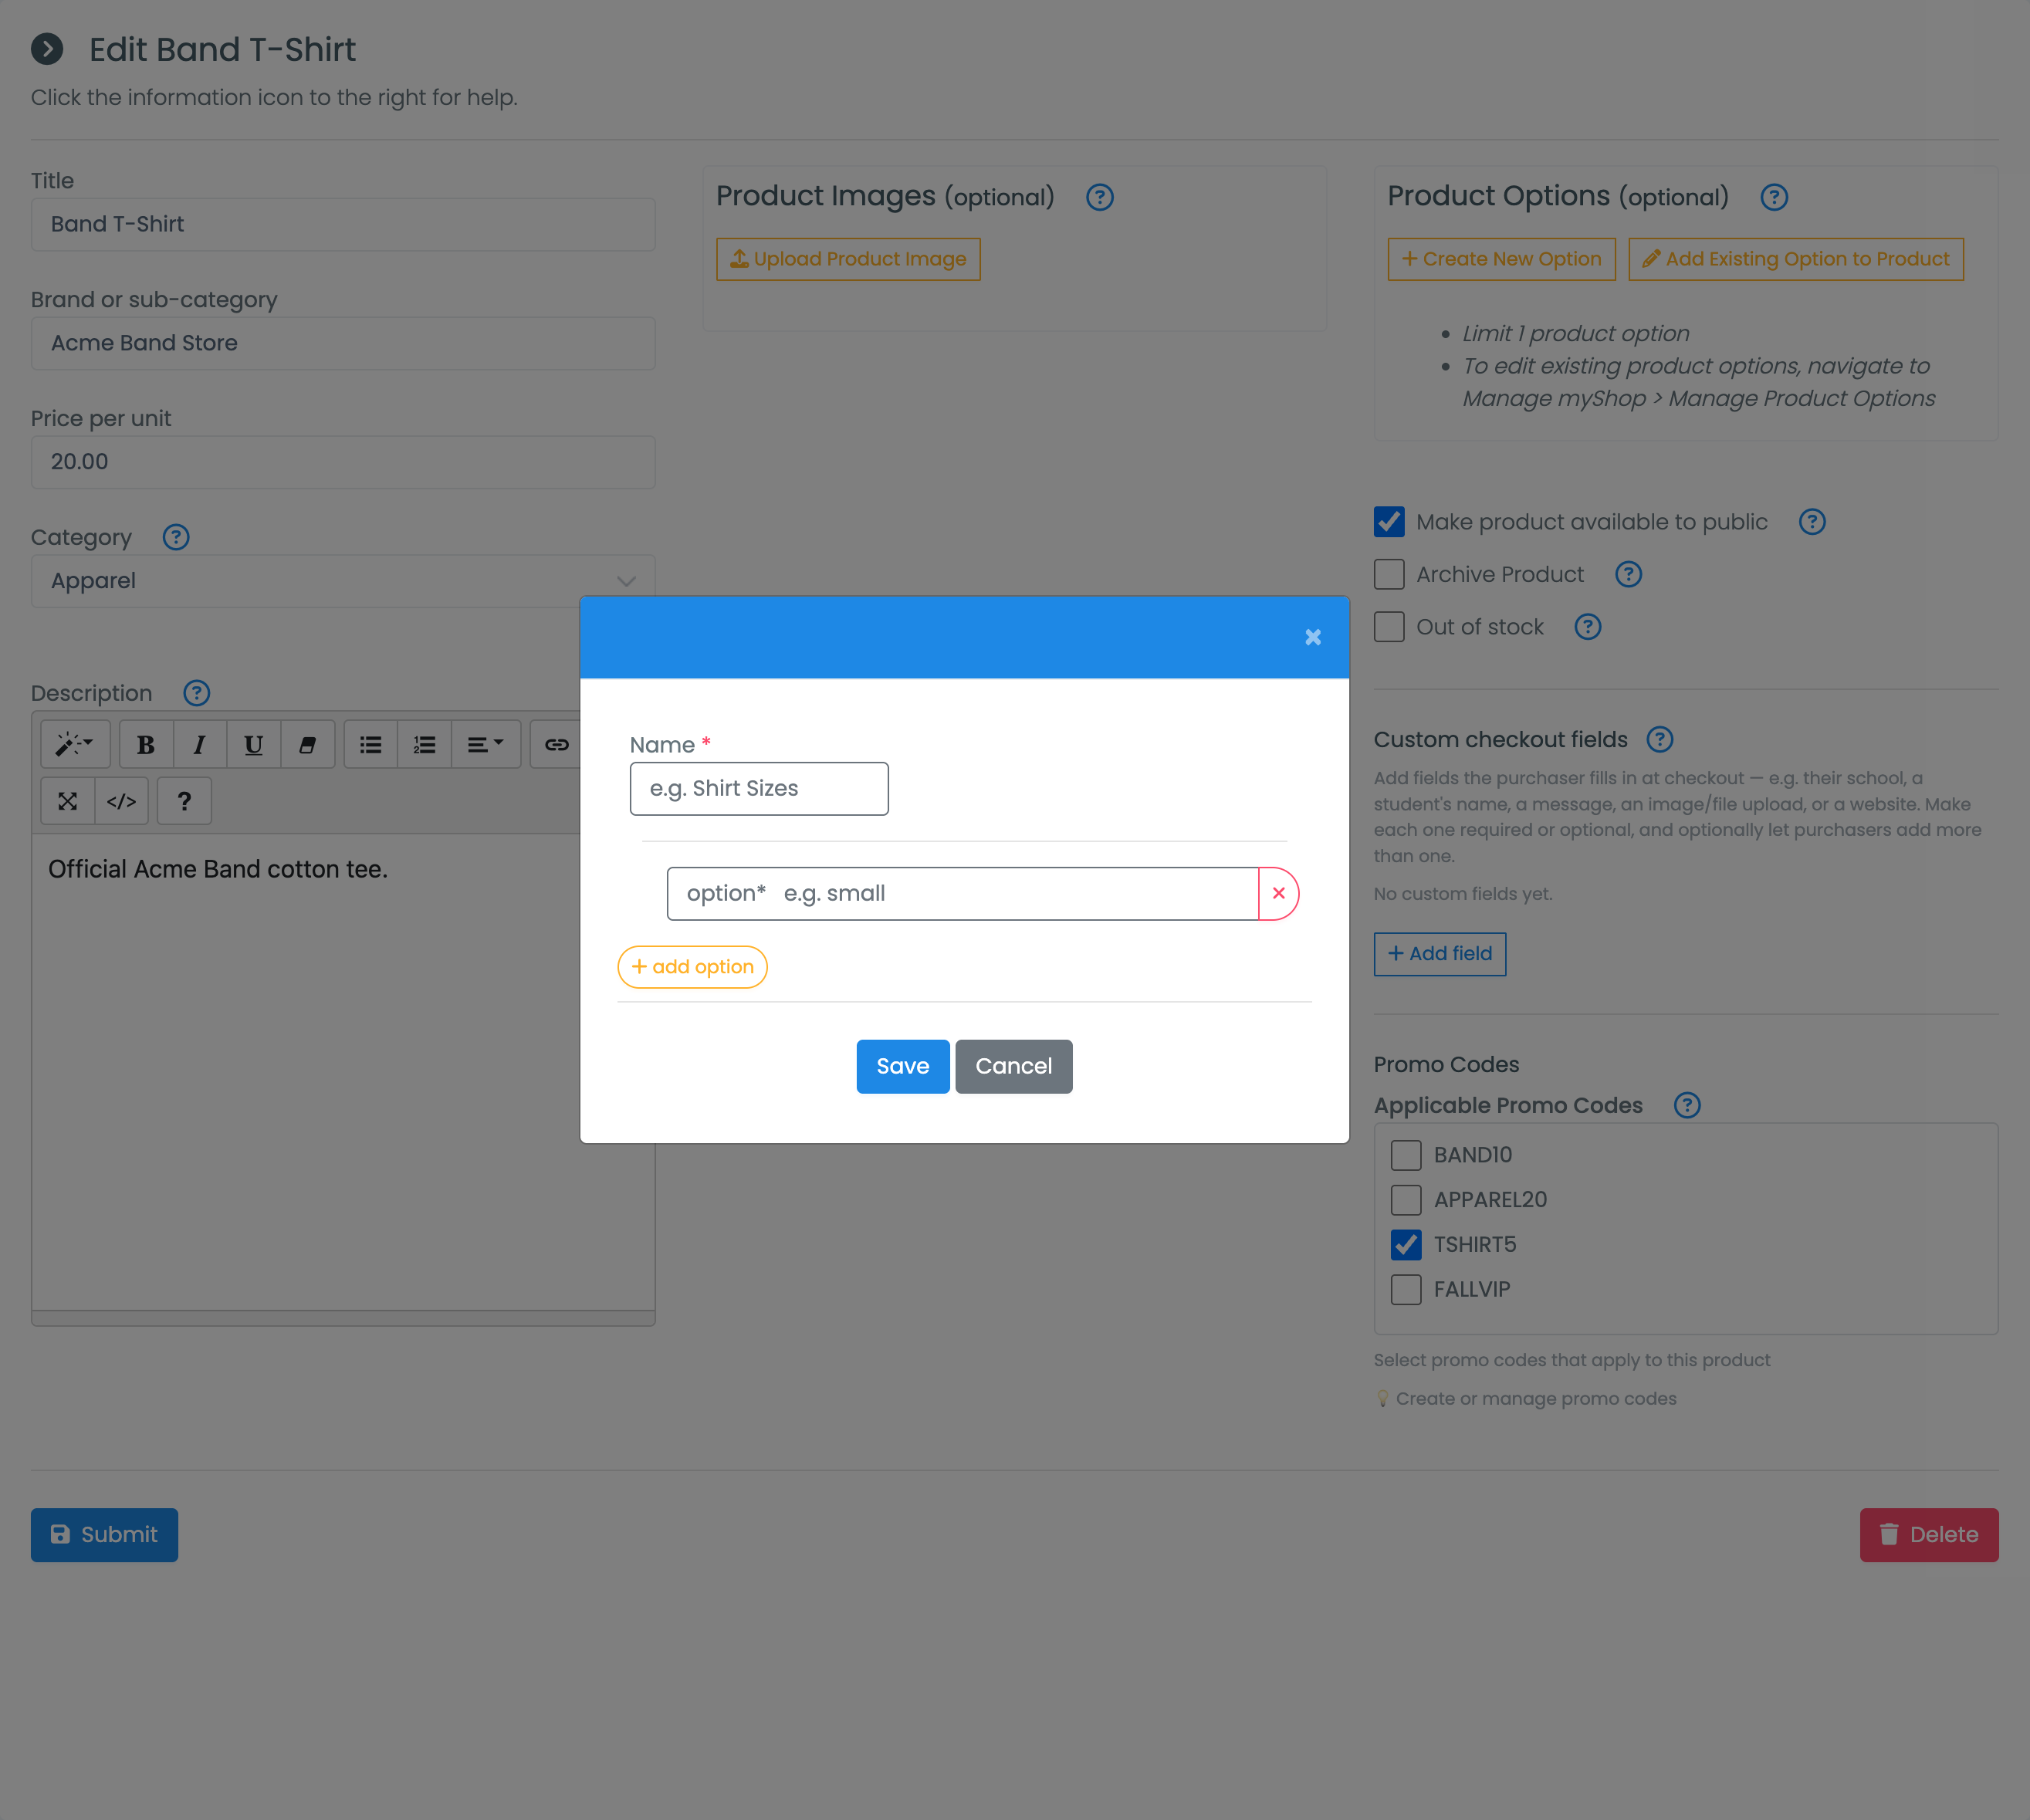
On the product's edit page, select Create New Option, give it a name (for example, "Sponsor Levels"), and add each choice in order, starting with the base level.
For tiered options, the price you enter on each tier is the amount added to the product's base price, not the total. So a sponsorship product priced at $100 might look like:
- Bronze — base price, no addition
- Silver — +$200
- Gold — +$400
Don't re-enter the base price on the first tier — it's already included.
Reusing an existing option
Options can be shared across products. On the product's edit page, select Add Existing Option to Product, choose from the dropdown, and select Add. A shirt-size option built once can be attached to every shirt you sell.
Managing options
Go to Manage myShop → Manage Product Options to see every option and the products using it. The yellow edit icon changes an option; the red X deletes it.
Editing an option changes it everywhere it's used, so check the product list before making changes.
Collecting information at checkout
Some products need information from the purchaser — a student's name for a personalized item, an uploaded image for an ad, a dedication message for a program tribute.
You build these yourself, per product, in the Custom checkout fields section of the product form. Select Add field and choose what you need: short text, a longer message, an image or file upload, a website, a school, or a student's name. Each field can be required or optional, and you can let purchasers add more than one.
Whatever purchasers enter is attached to the order, so you'll see it in Track Orders alongside the rest of the order detail.
Charging to a student account
If Enable Account Credits is turned on in your school settings, purchases can be charged against a student's account balance instead of taking payment at the register.
At checkout in POS View, choose the student from the dropdown — their available balance shows beside the name — and the purchase amount comes off that balance. If the balance doesn't cover the purchase, the account goes negative rather than blocking the sale.
Cash and check payments can be applied later through the Account Credits view. Students and parents see these purchases under Credits/Refunds in myShop, and on the Credits tab of their account statement.
Editing, archiving, and deleting products
Open any product and select the yellow Edit button to change it.
The Product Settings section of the edit page controls where a product shows up:
- Make product available to public — lists it in your storefront for shoppers. Uncheck it to take a product out of the storefront without losing its order history; past orders stay intact and reportable, and you can still see the product as an admin.
- Out of stock — keeps the product listed but stops purchases.
- Show in POS — includes the product in the POS View product grid. It's on for every product by default. Uncheck it for online-only items so the register list stays short; check it for event-only merchandise you never list online. This setting is independent of the public checkbox — a product can be sold at the table without being on the storefront, or listed online without cluttering the register.
- Archive Product — removes it from the storefront and POS View.
Show in POS only appears on the edit page, not the Add Product form, so a brand-new product is always on the register until you edit it.
Deleting a product is recoverable — deleted products can be restored from Manage myShop → Settings.
Next steps
With products listed, you'll want to set up how you get paid and how you track what sells:
- Accept PayPal payments in myShop — connect your PayPal account