Scanning Tickets at the Door
Every ticket carries a unique number and a QR code that points at a verification page. At the door, a volunteer scans it with the myblueboard mobile app, and the ticket is marked used.
Granting scanner permission
myTickets → Scanner Permissions. The page lists everyone who could scan — students, parents and directors — and shows how many scanners you currently have.
For each person you choose either:
- All events — they can scan anything, now and in future
- Specific events — pick the events from the list
"All events" suits a booster volunteer who works every home game. Per-event permission suits a parent helping at one concert, and it means you don't have to remember to take access away.
Only published events appear in the per-event list.
Who can grant it
Opening the Scanner Permissions page requires myTickets Admin Access. Adding or removing a scanner requires a Director account — a community member with myTickets Admin Access can see the page but can't change permissions there.
Grant permissions a day or two ahead, not at the door. Volunteers need to sign in and find the scanner in the app, and the parking lot is a poor place to discover they can't.
Finding the scanner
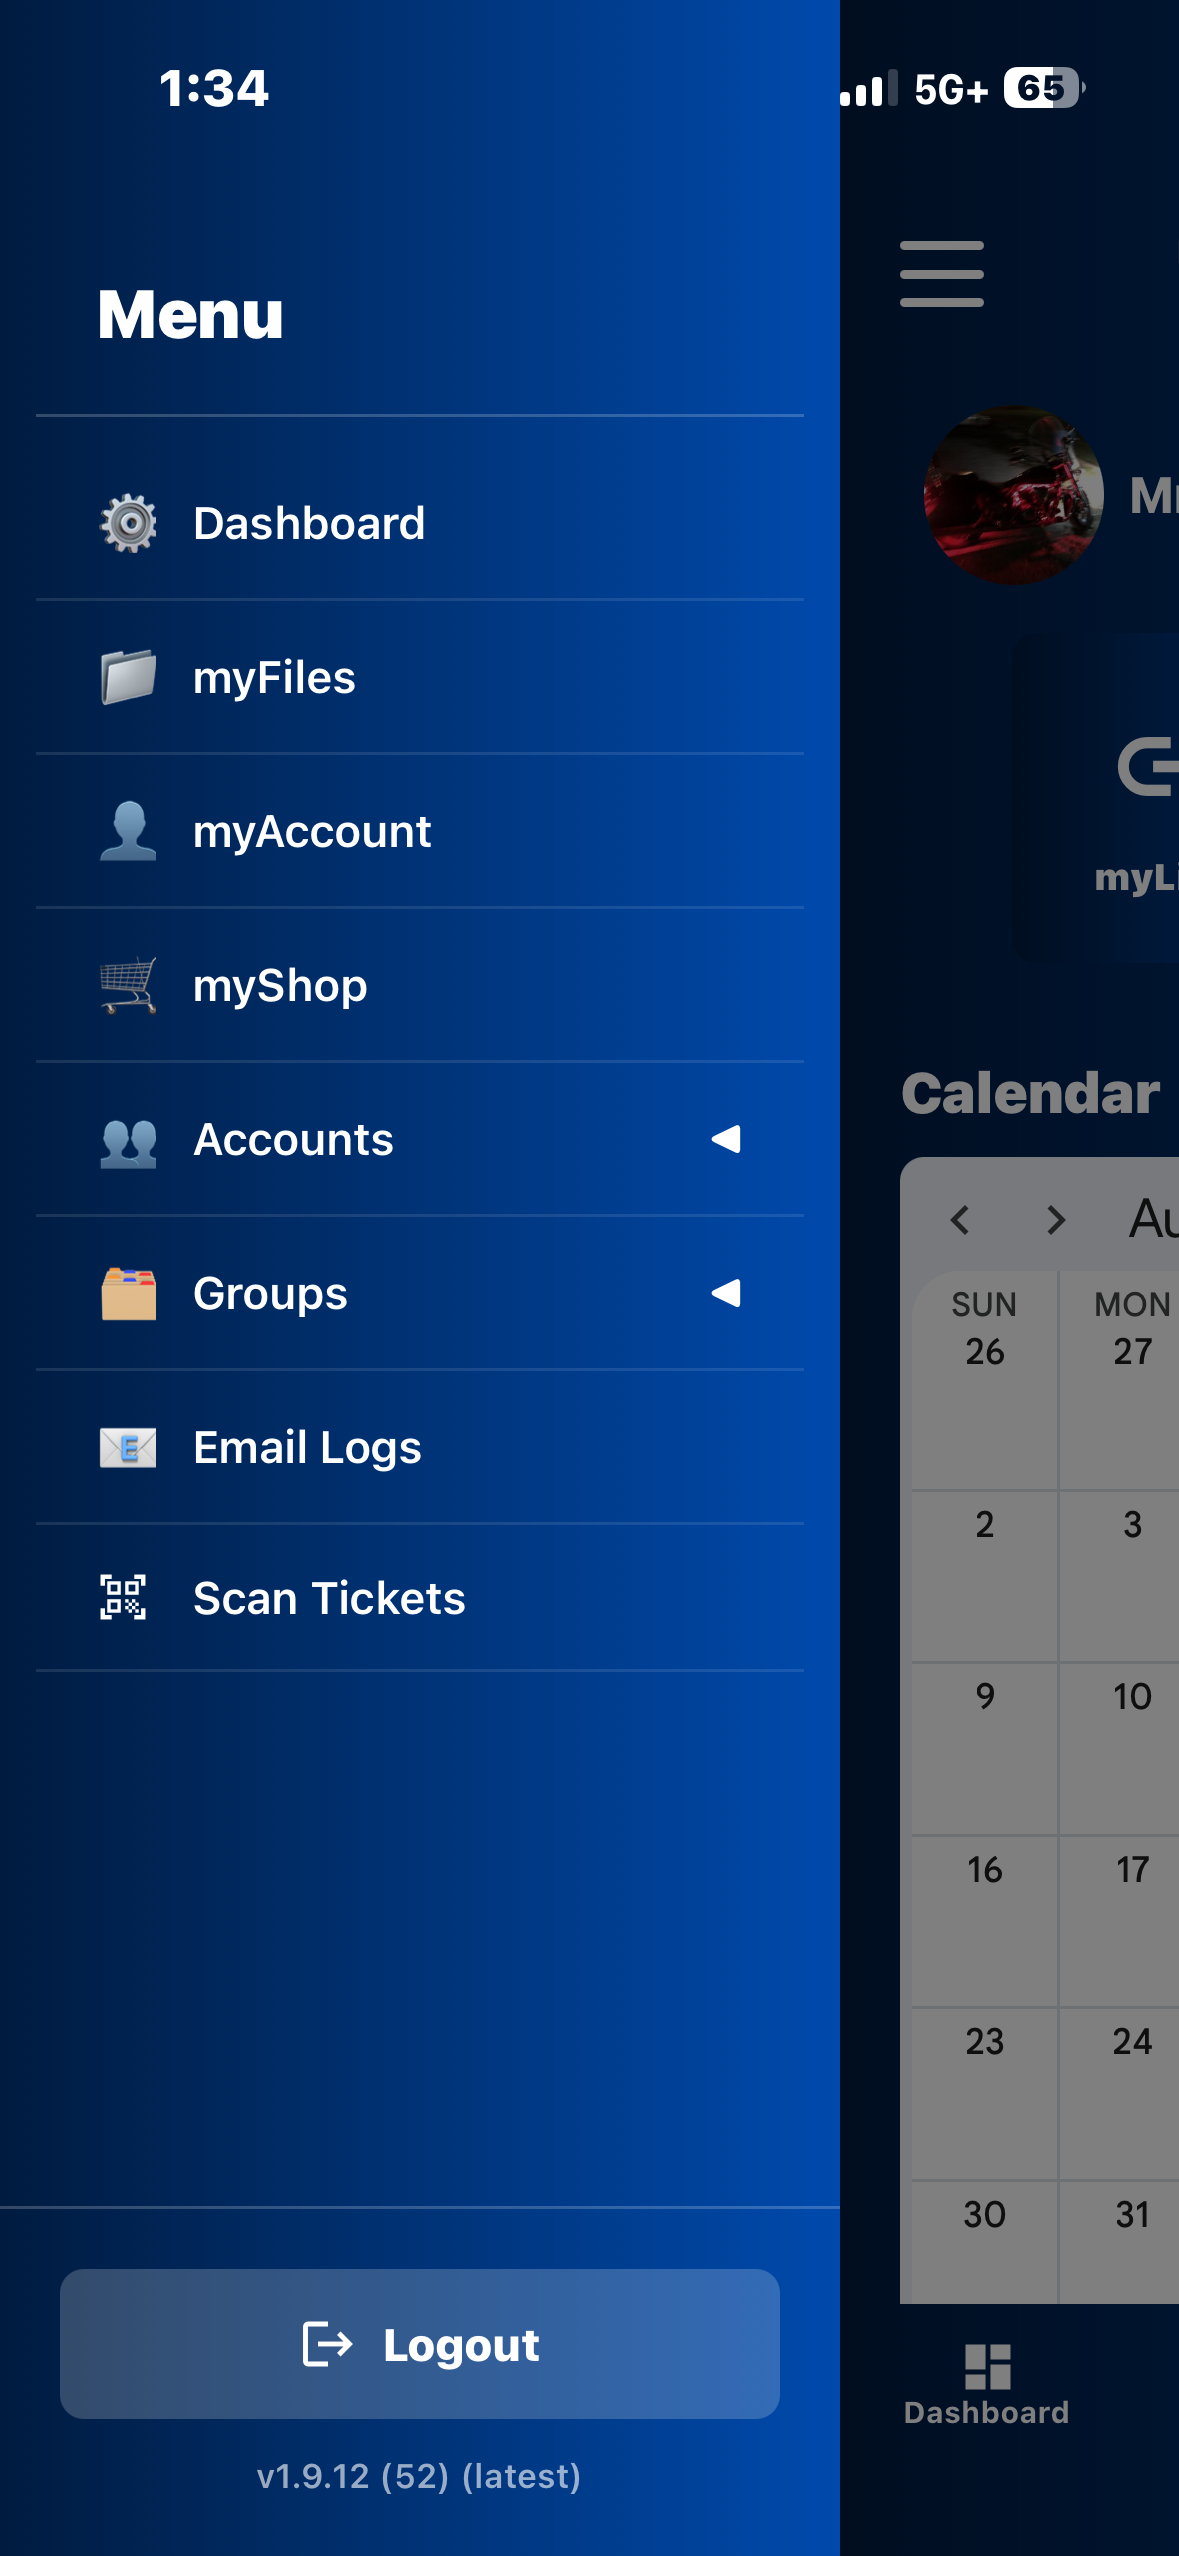
The scanner lives in the myblueboard mobile app, under Scan Tickets in the side menu. It only appears for people who have been granted permission.
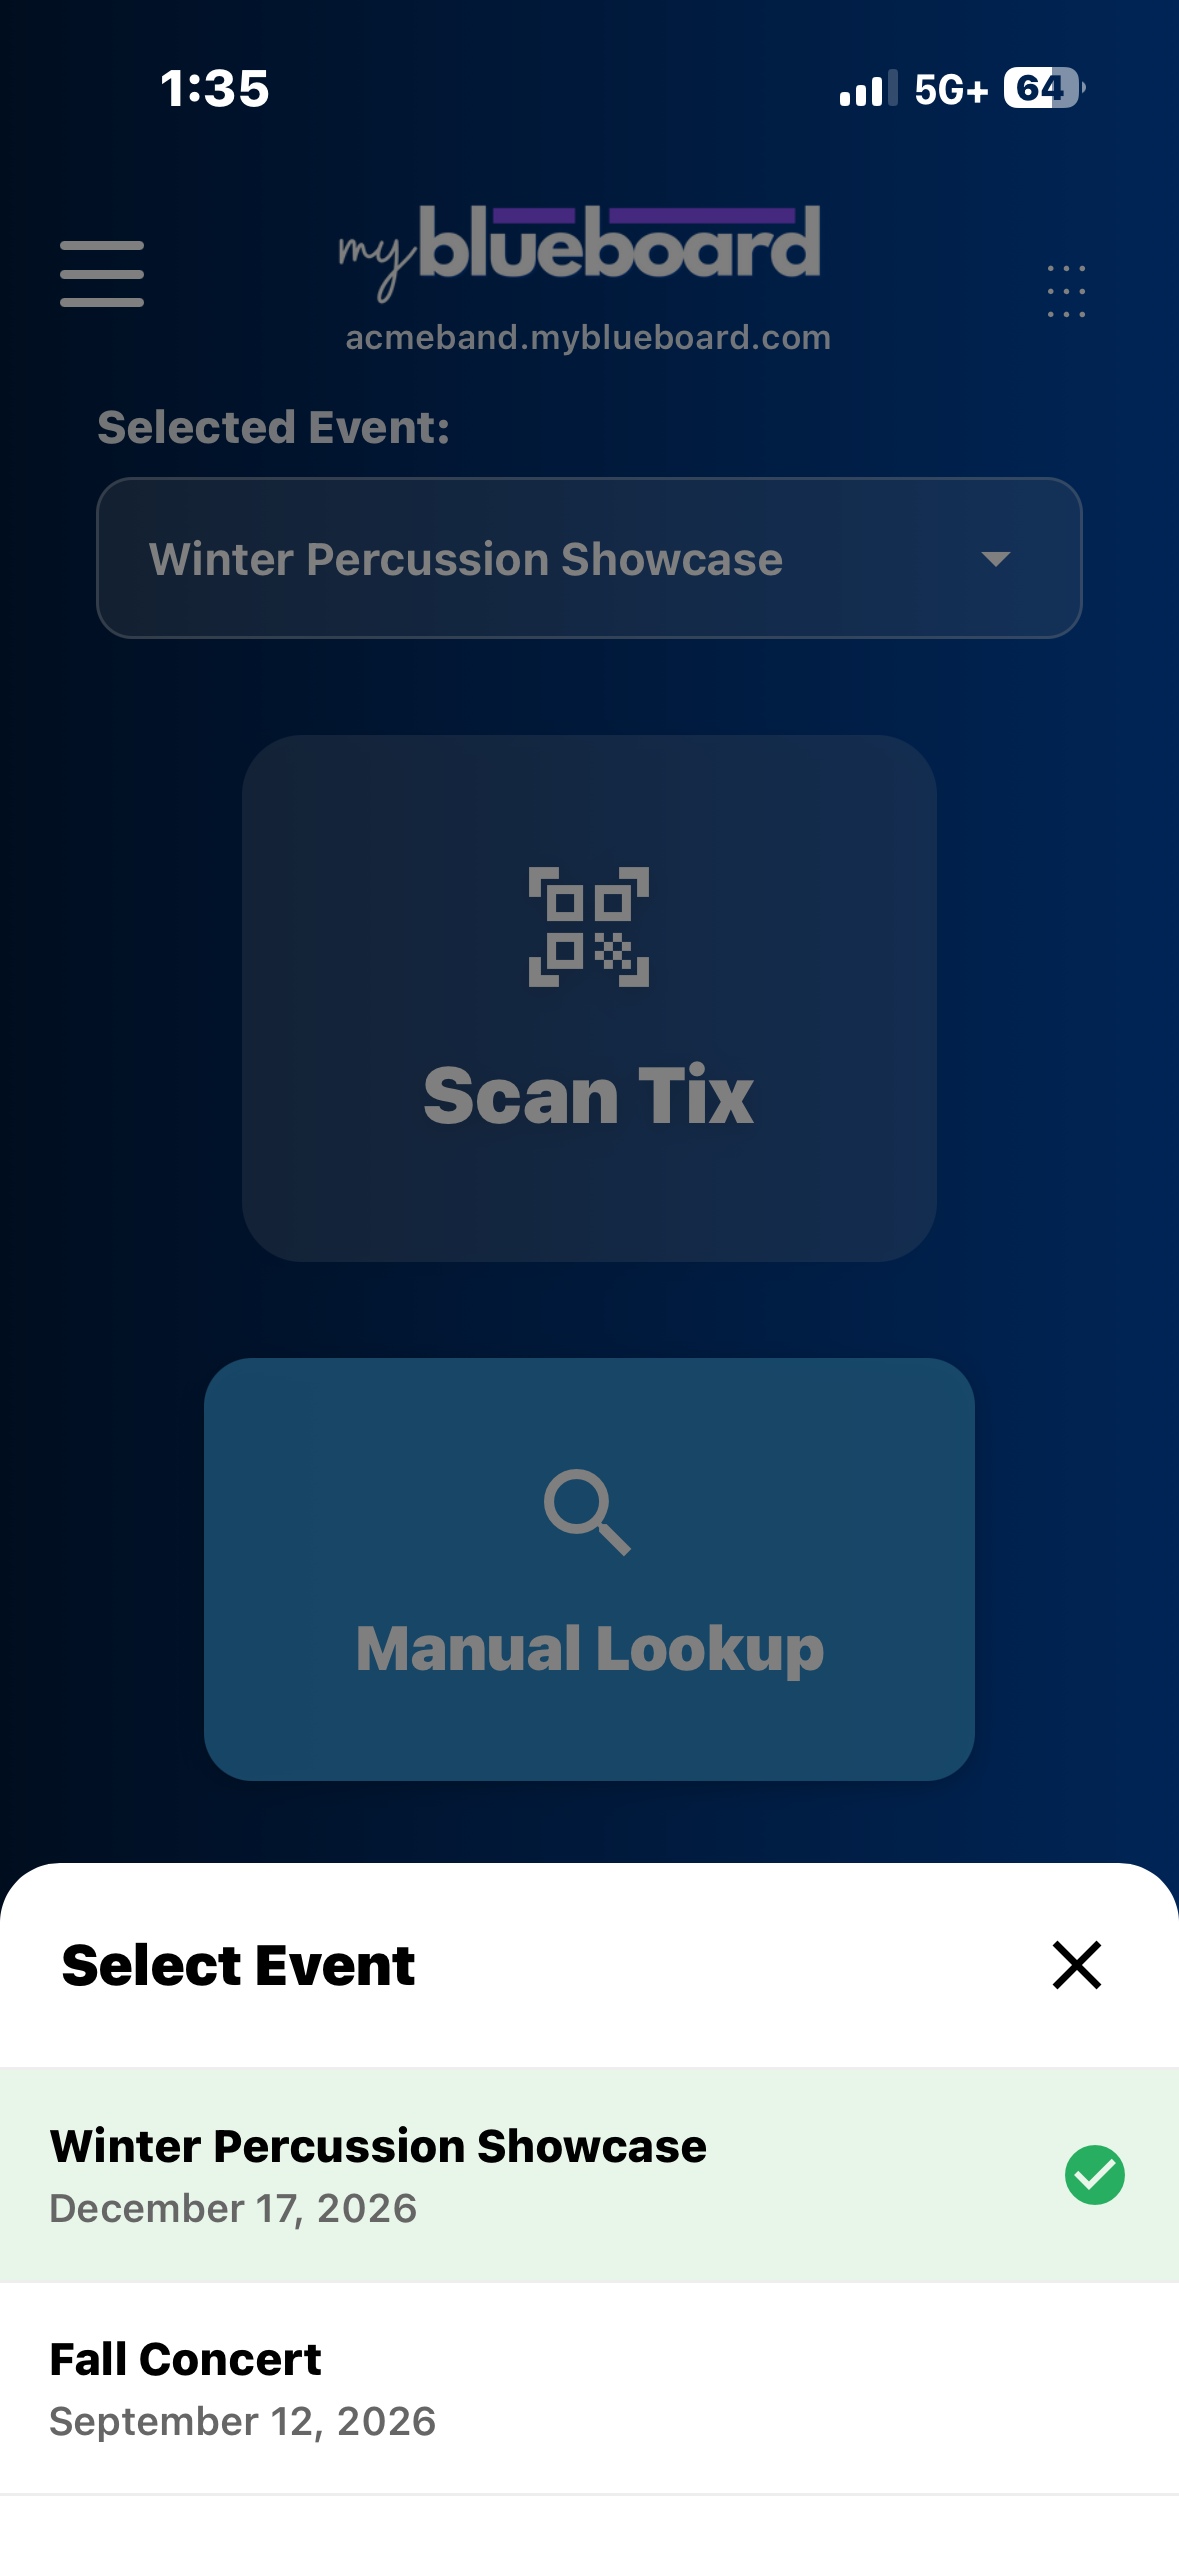
Pick the event first. The Selected Event dropdown lists the events this volunteer can scan, and everything after this point applies to that event.
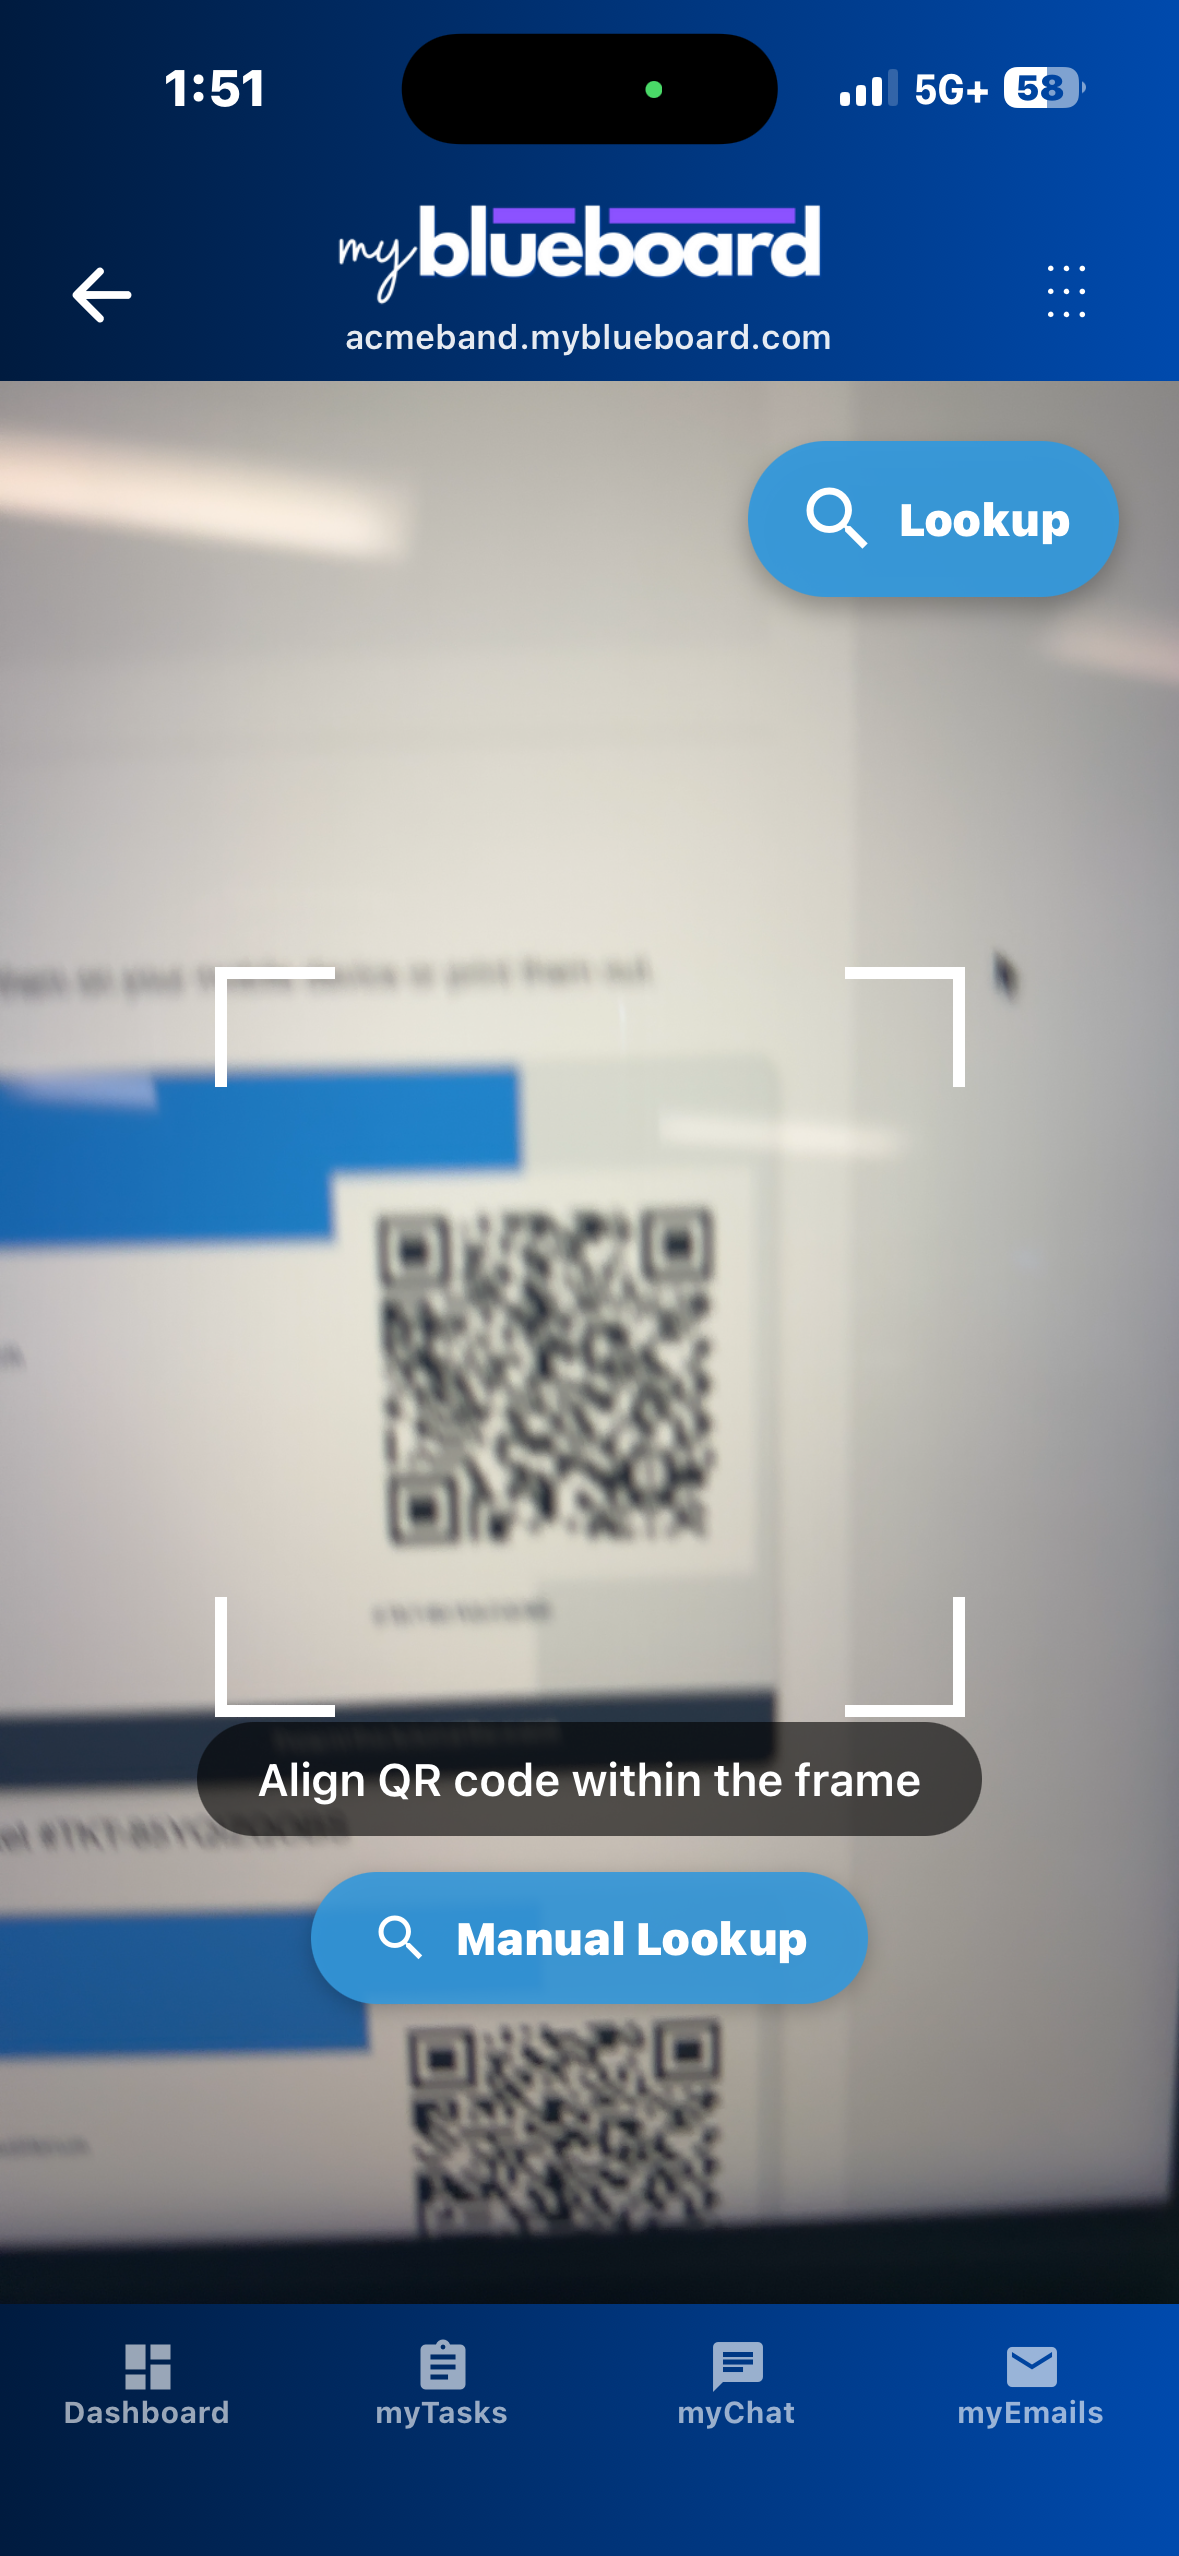
From there, Scan Tix opens the camera and Manual Lookup searches the ticket list.
Scanning
Hold the ticket's QR code inside the frame. Codes scan fine from a phone screen or a printout.
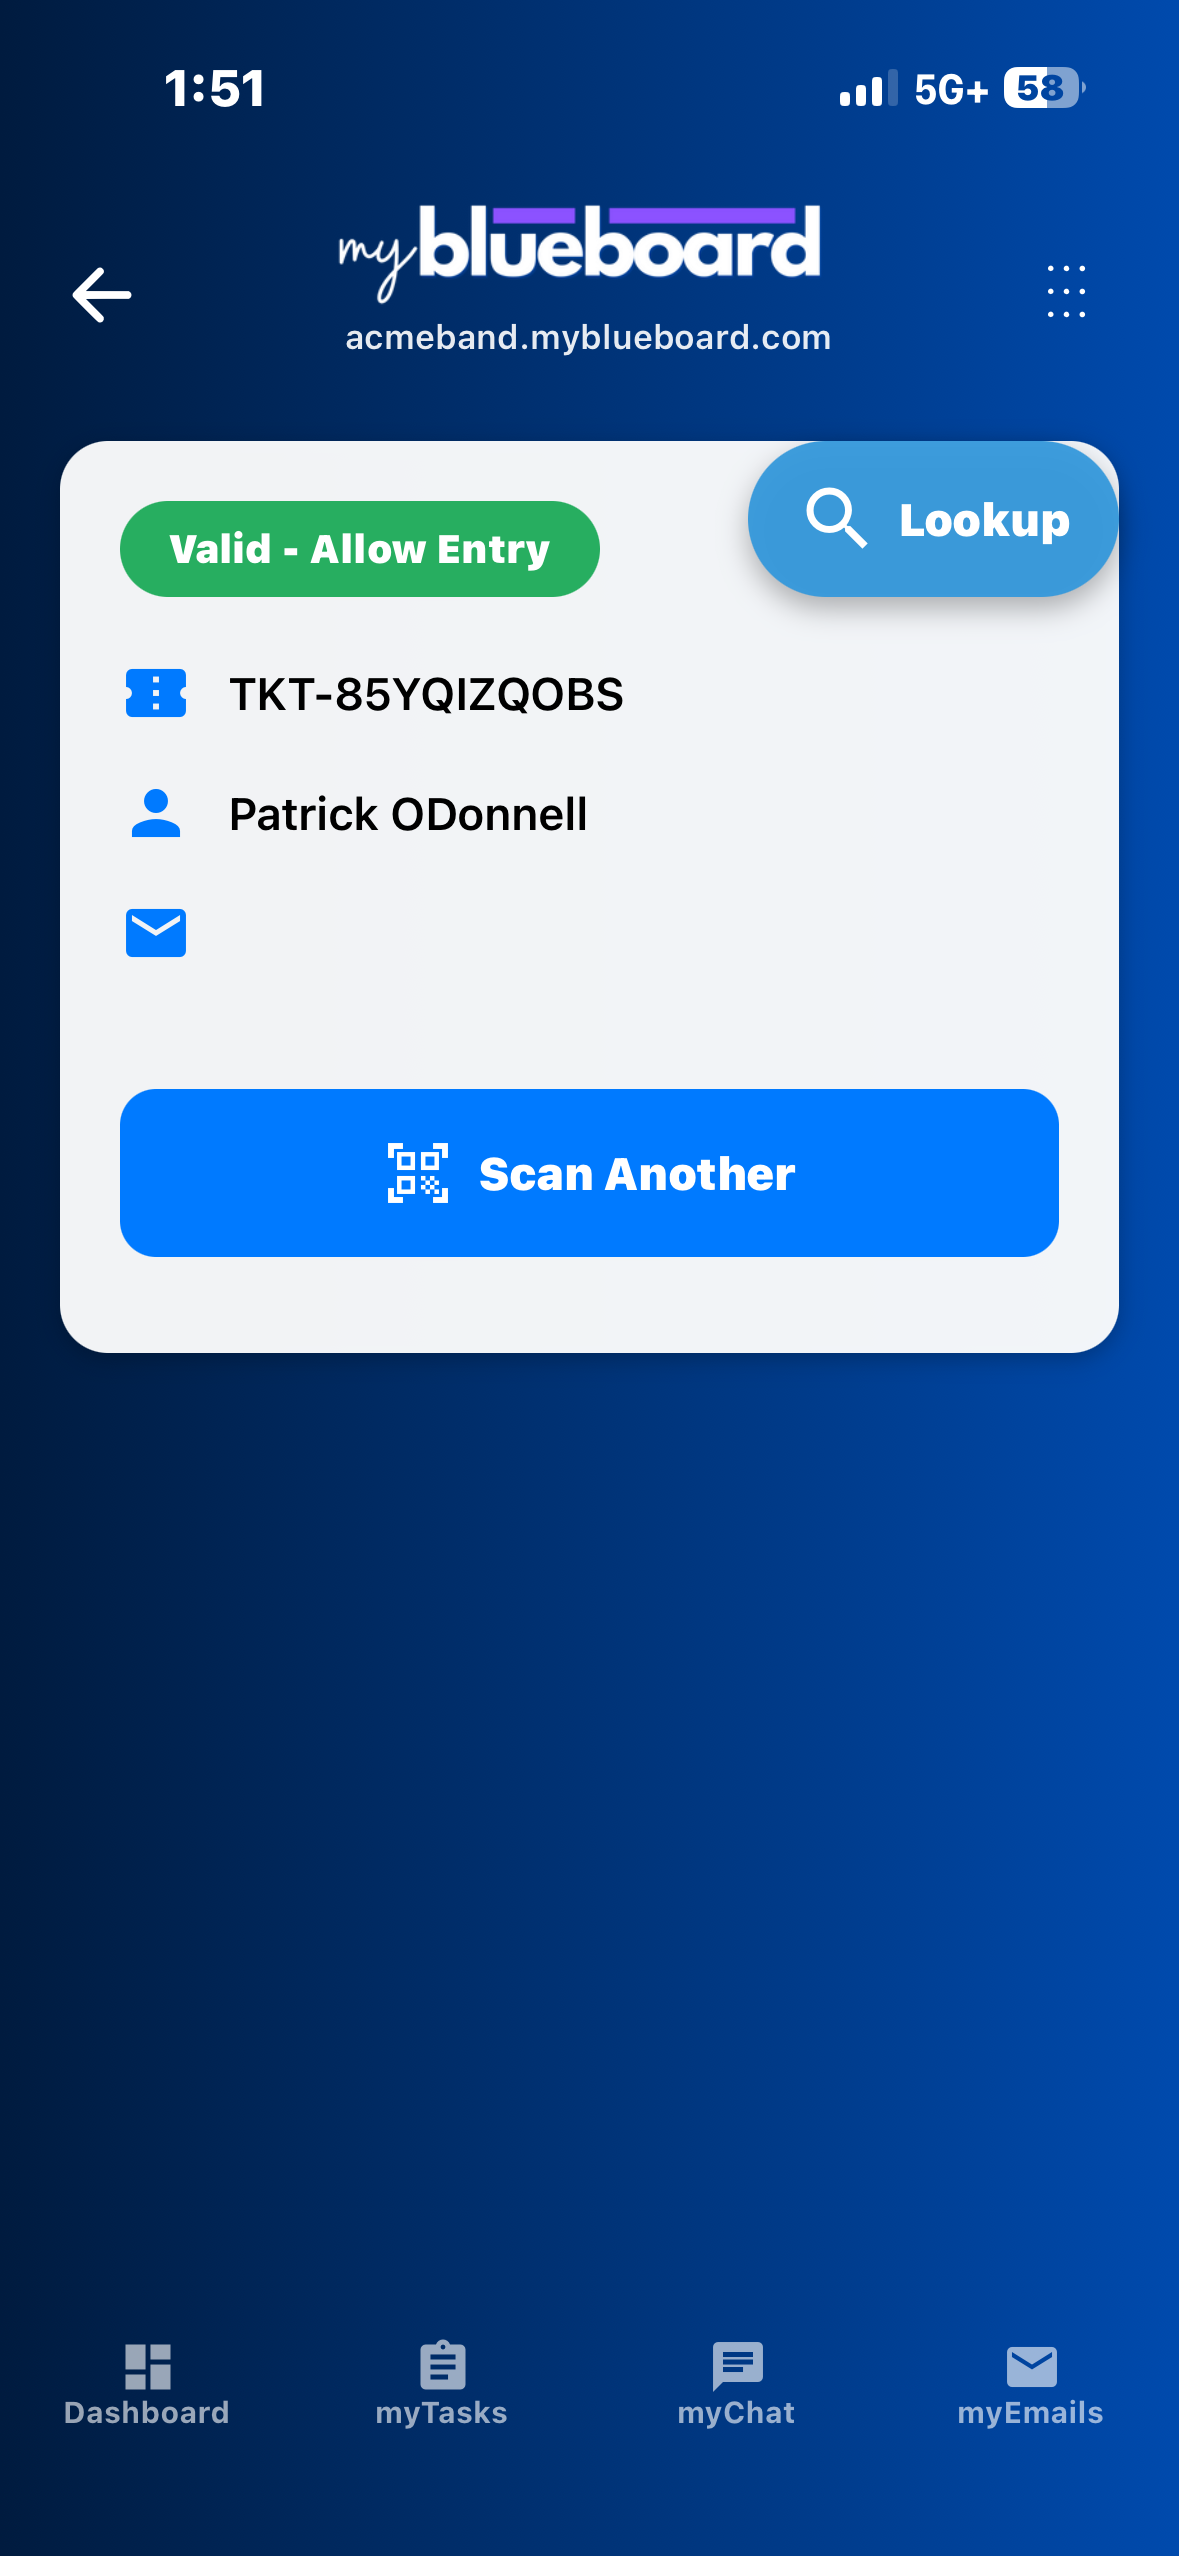
A good ticket comes back Valid - Allow Entry, with the ticket number and the holder's name. Scan Another goes straight back to the camera for the next person in line.
A code that isn't a myblueboard ticket — a loyalty card, a parking QR, a photo of someone else's screen that didn't resolve — comes back Ticket not found.
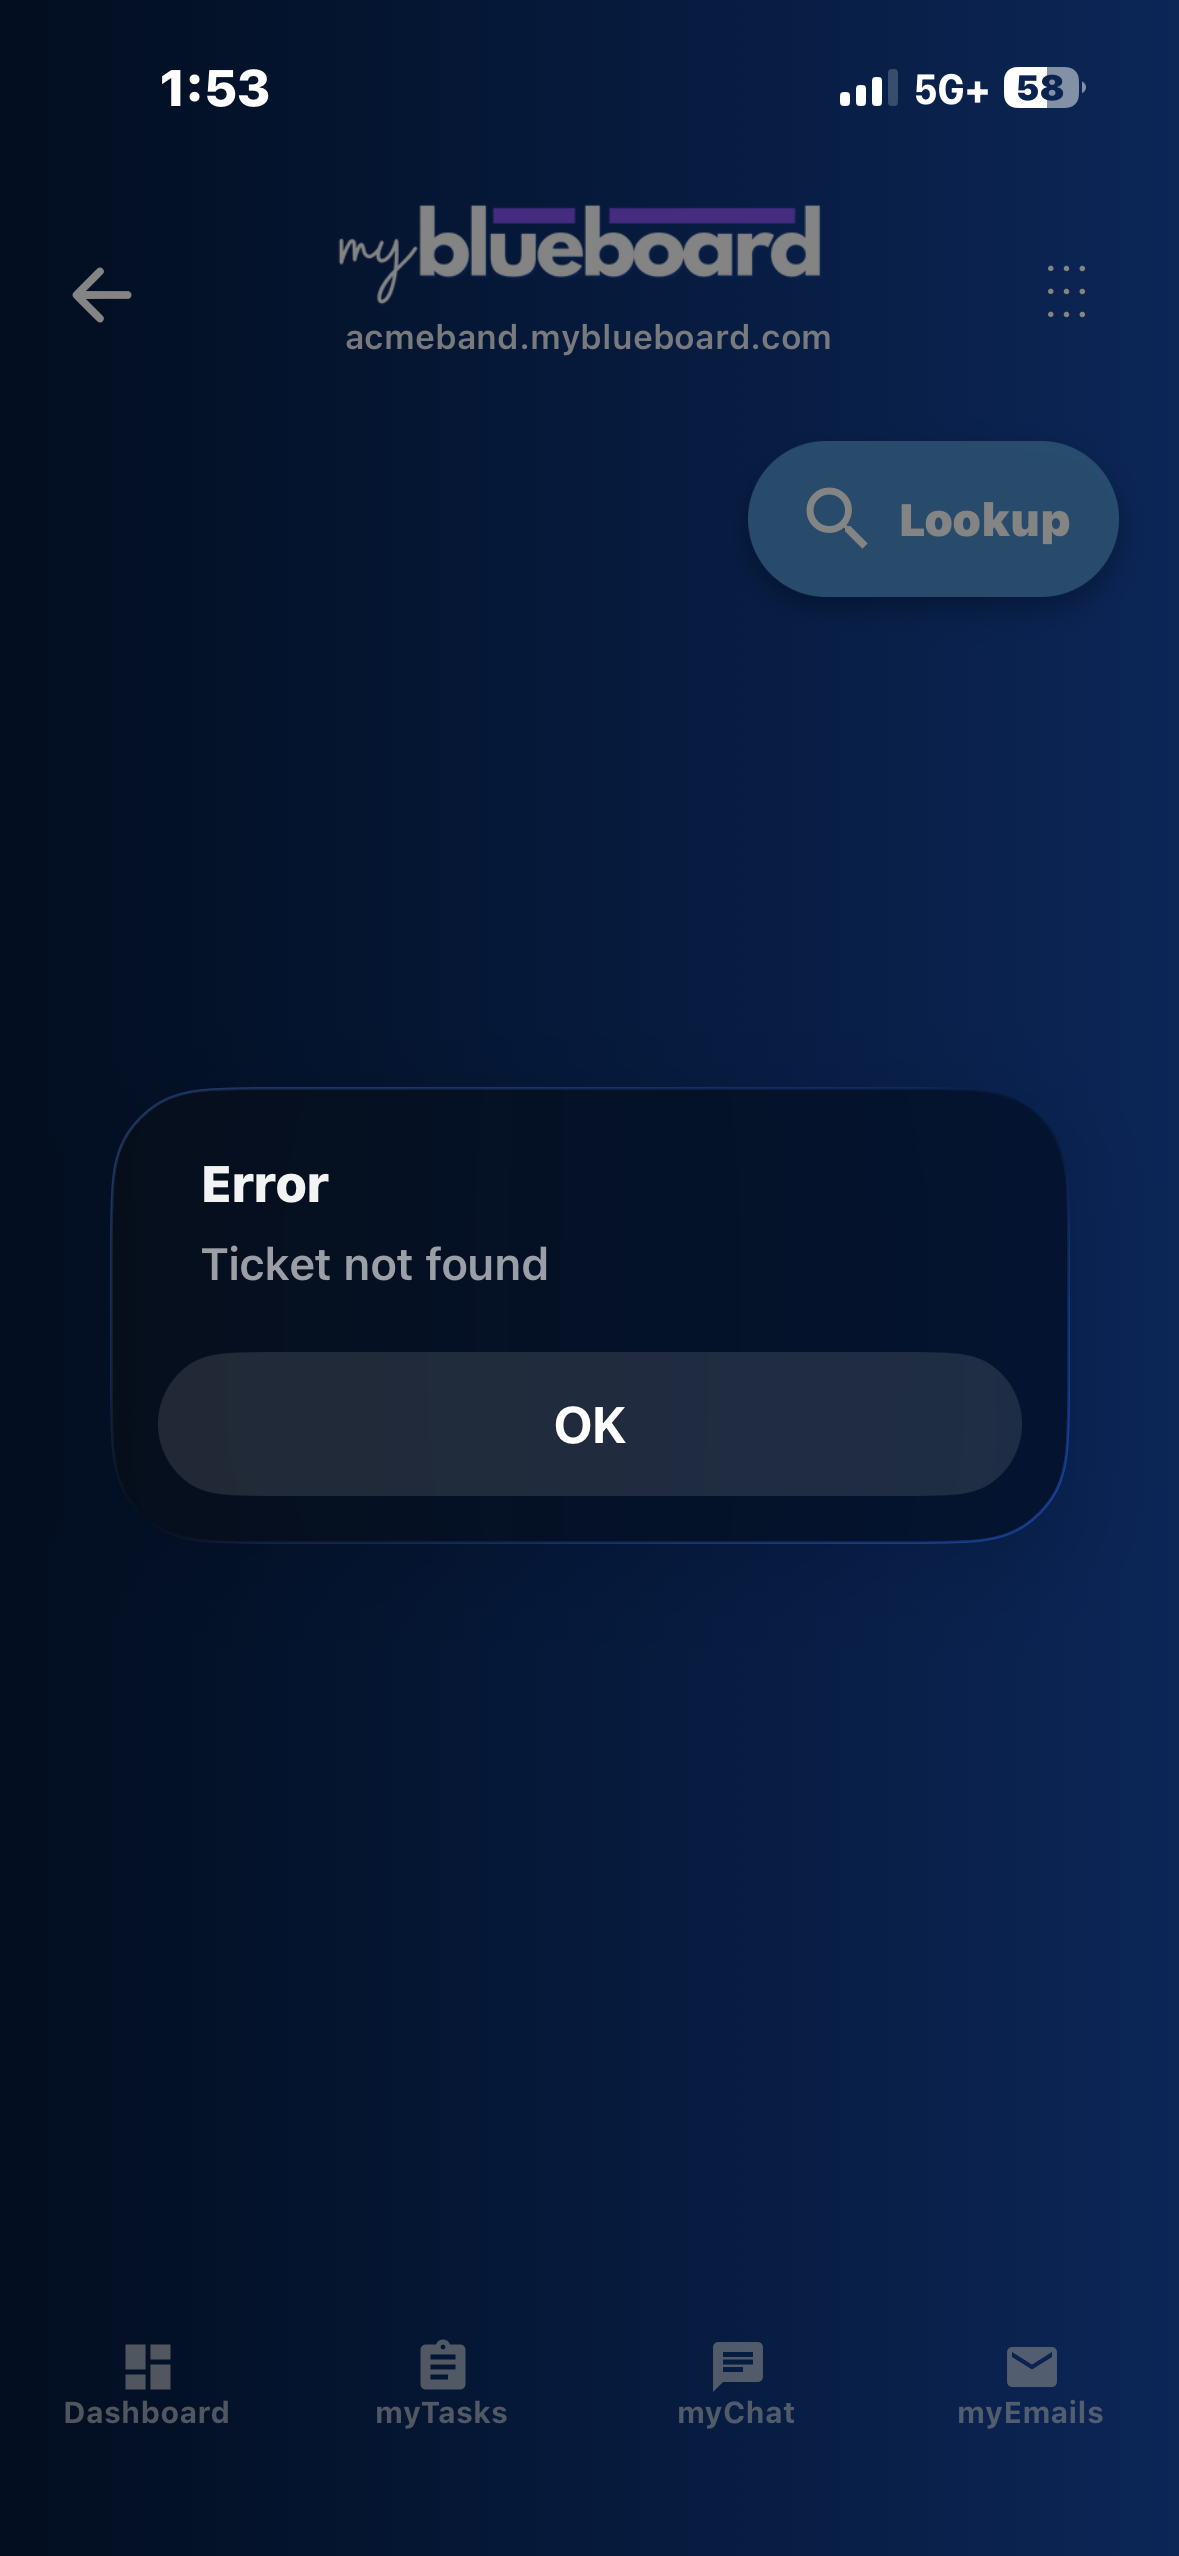
A ticket scanned twice
Scan a ticket that has already been used and the app adds a note: This ticket was previously checked in.
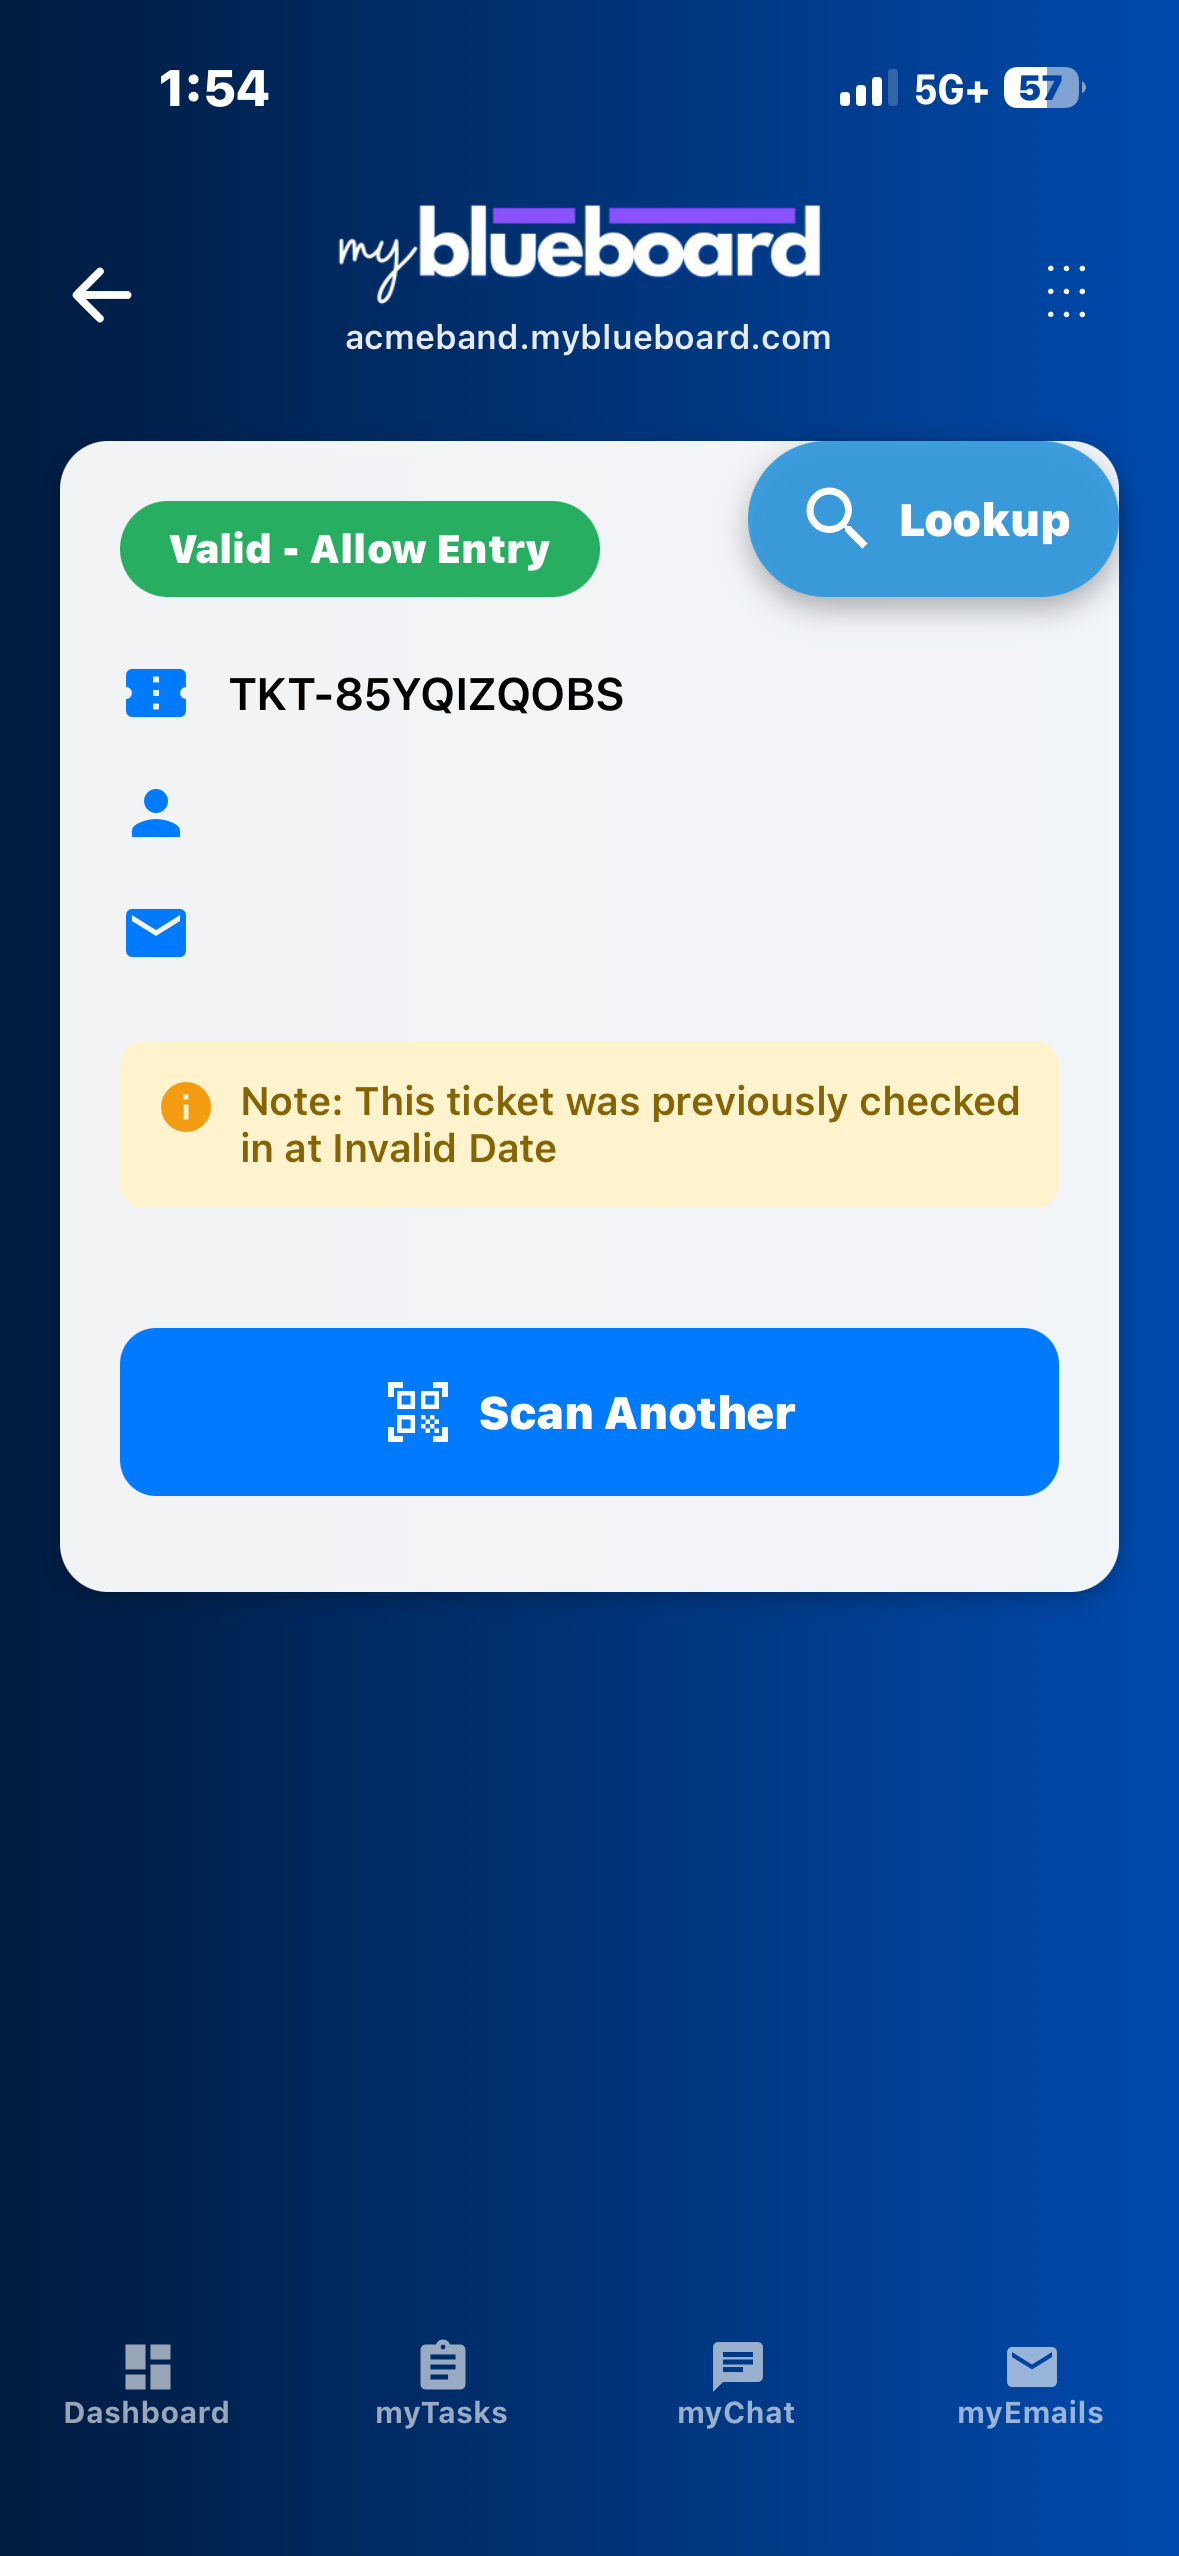
Read the note, not the badge
A re-scanned ticket still shows the green Valid - Allow Entry badge, and the time in the note currently reads Invalid Date rather than when the ticket was first scanned. Train volunteers to look for the yellow note — the badge alone does not tell them a ticket is a duplicate.
A repeat scan is usually innocent: a screenshot forwarded around a family, or the same phone presented twice at a busy door. Ask how many are in the party and count against the tickets on the order.
Checking someone in without a scan
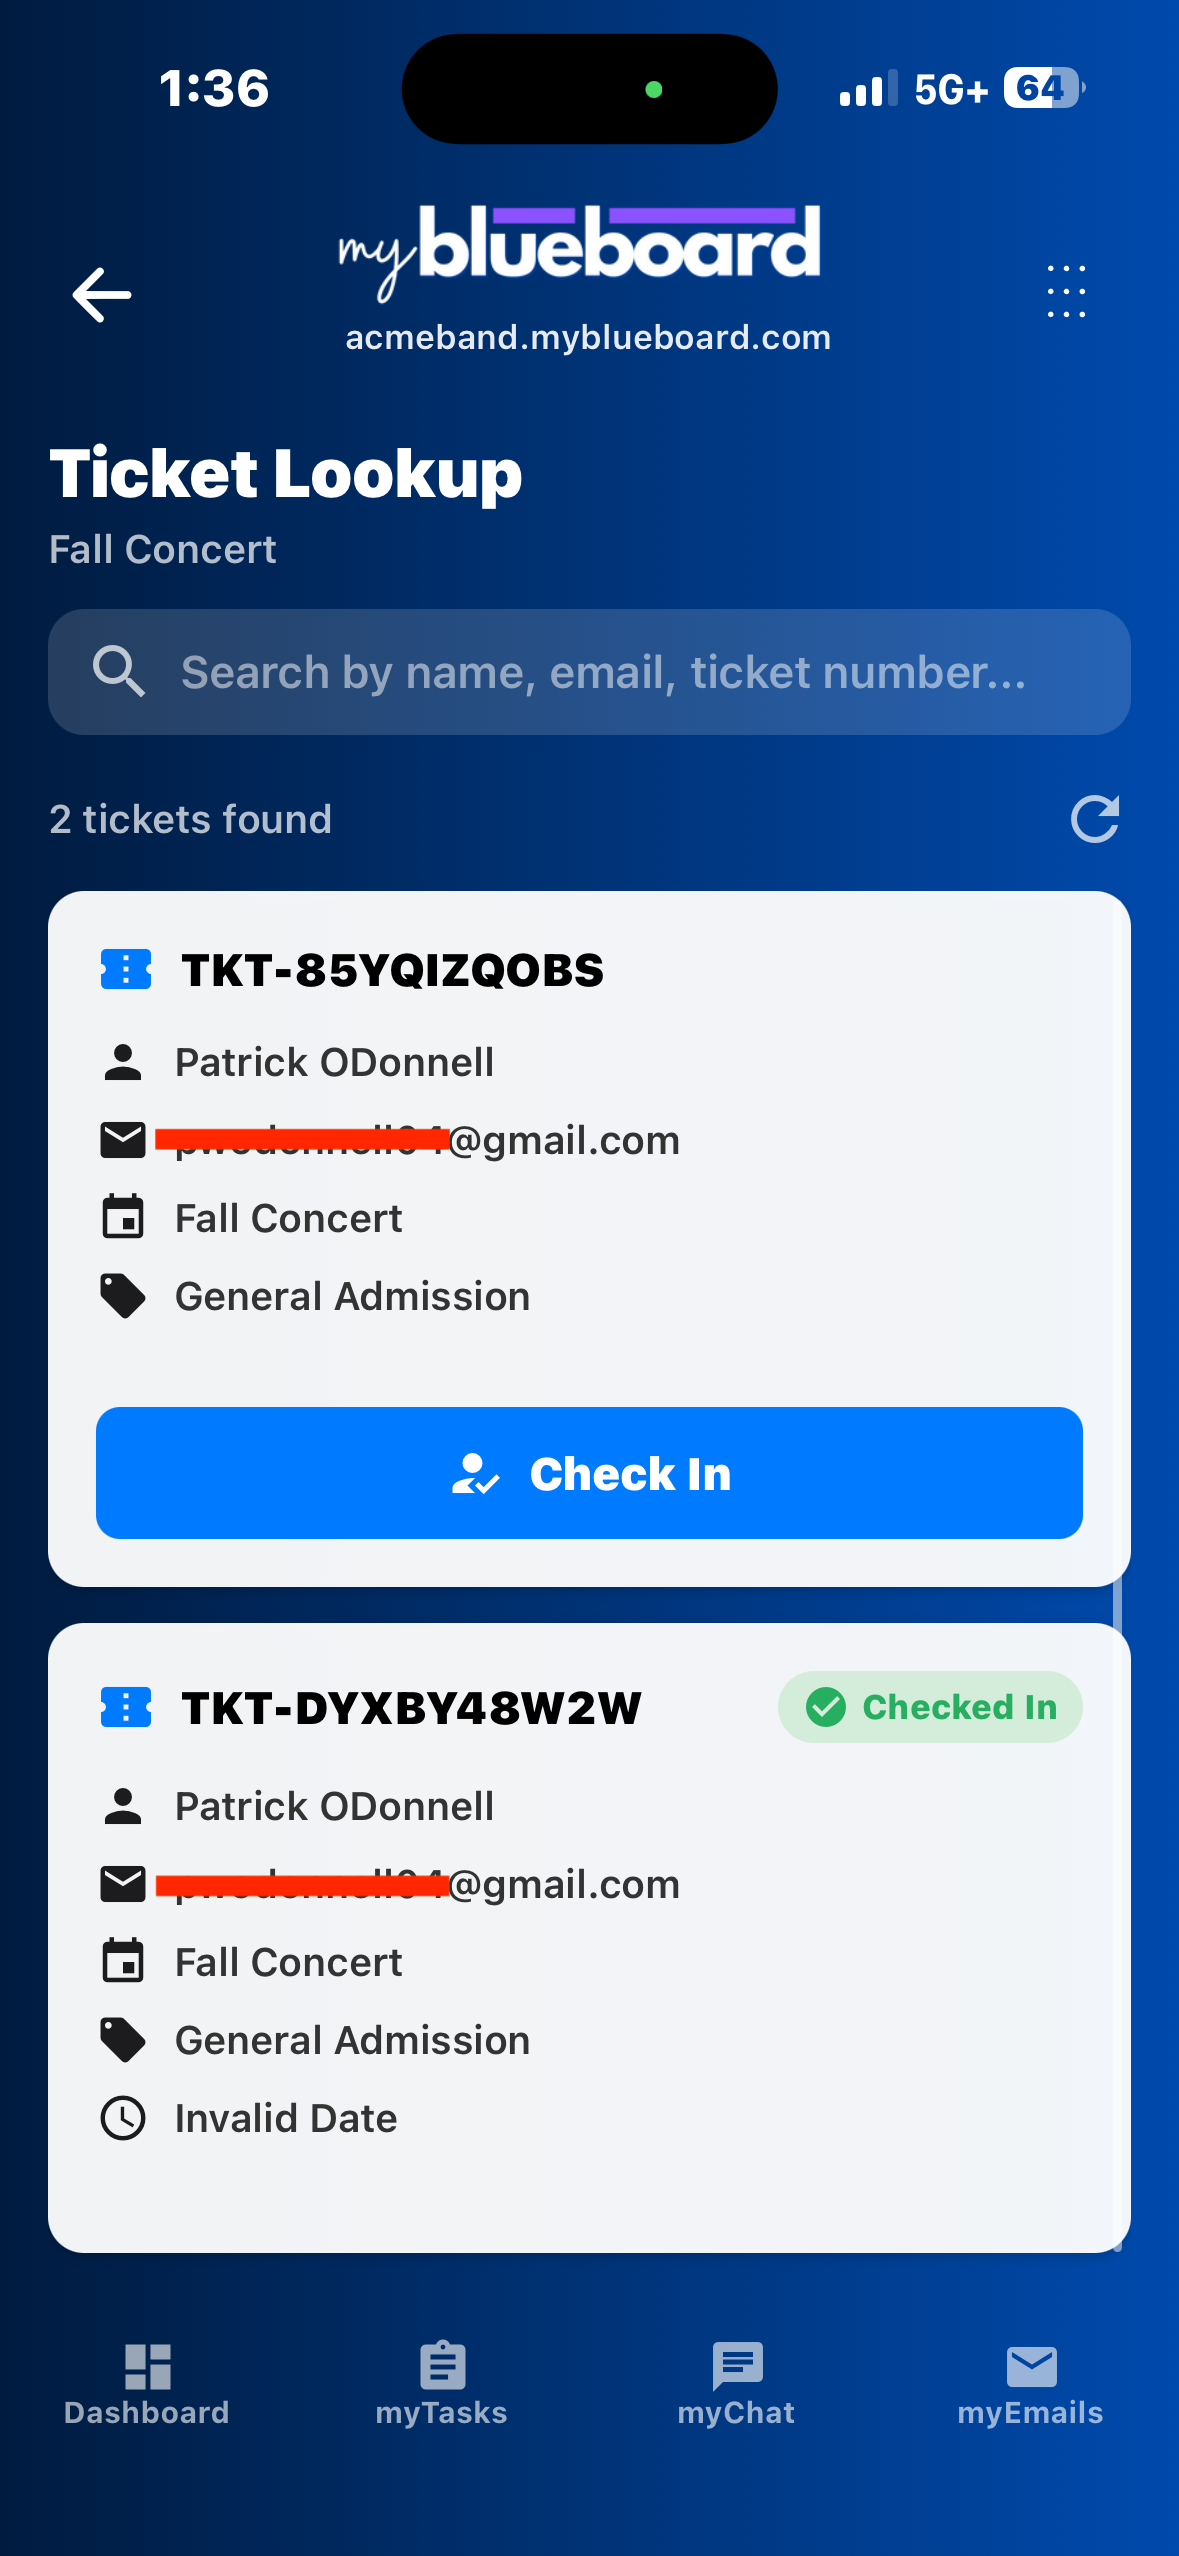
Phones die, and some people never find the email. Manual Lookup lists every ticket sold for the selected event, searchable by name, email or ticket number.
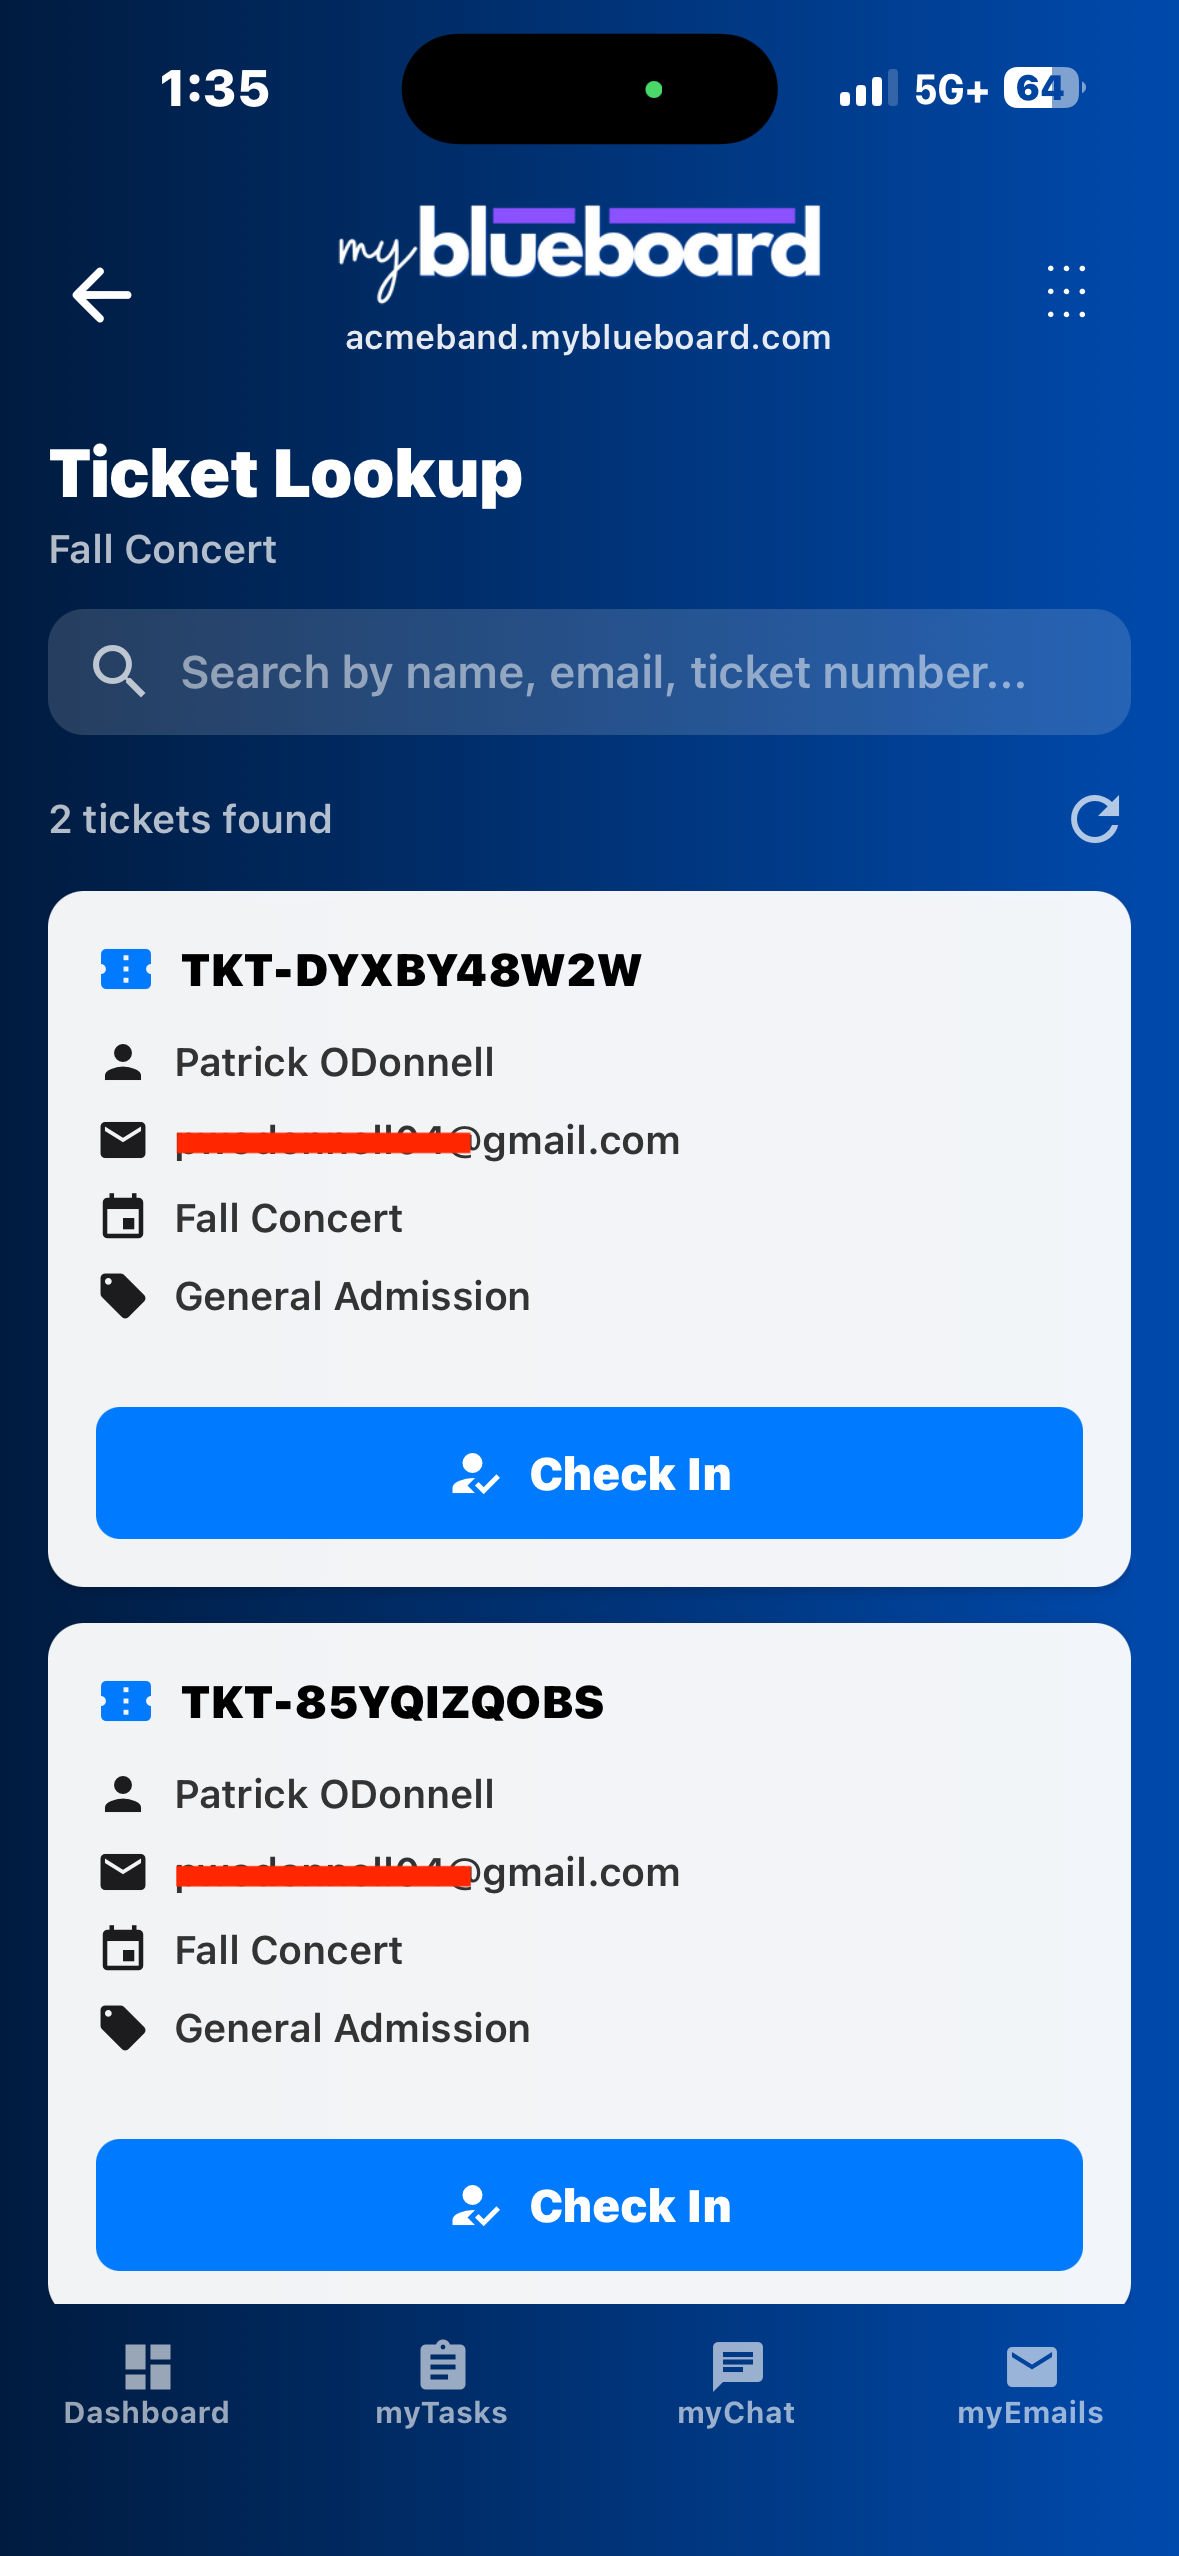
Search by the name on the order, not the name of the student — tickets are in the purchaser's name.
Check In asks to confirm, with the name, ticket number and event spelled out, so a mis-tap on a crowded list doesn't burn someone else's ticket.
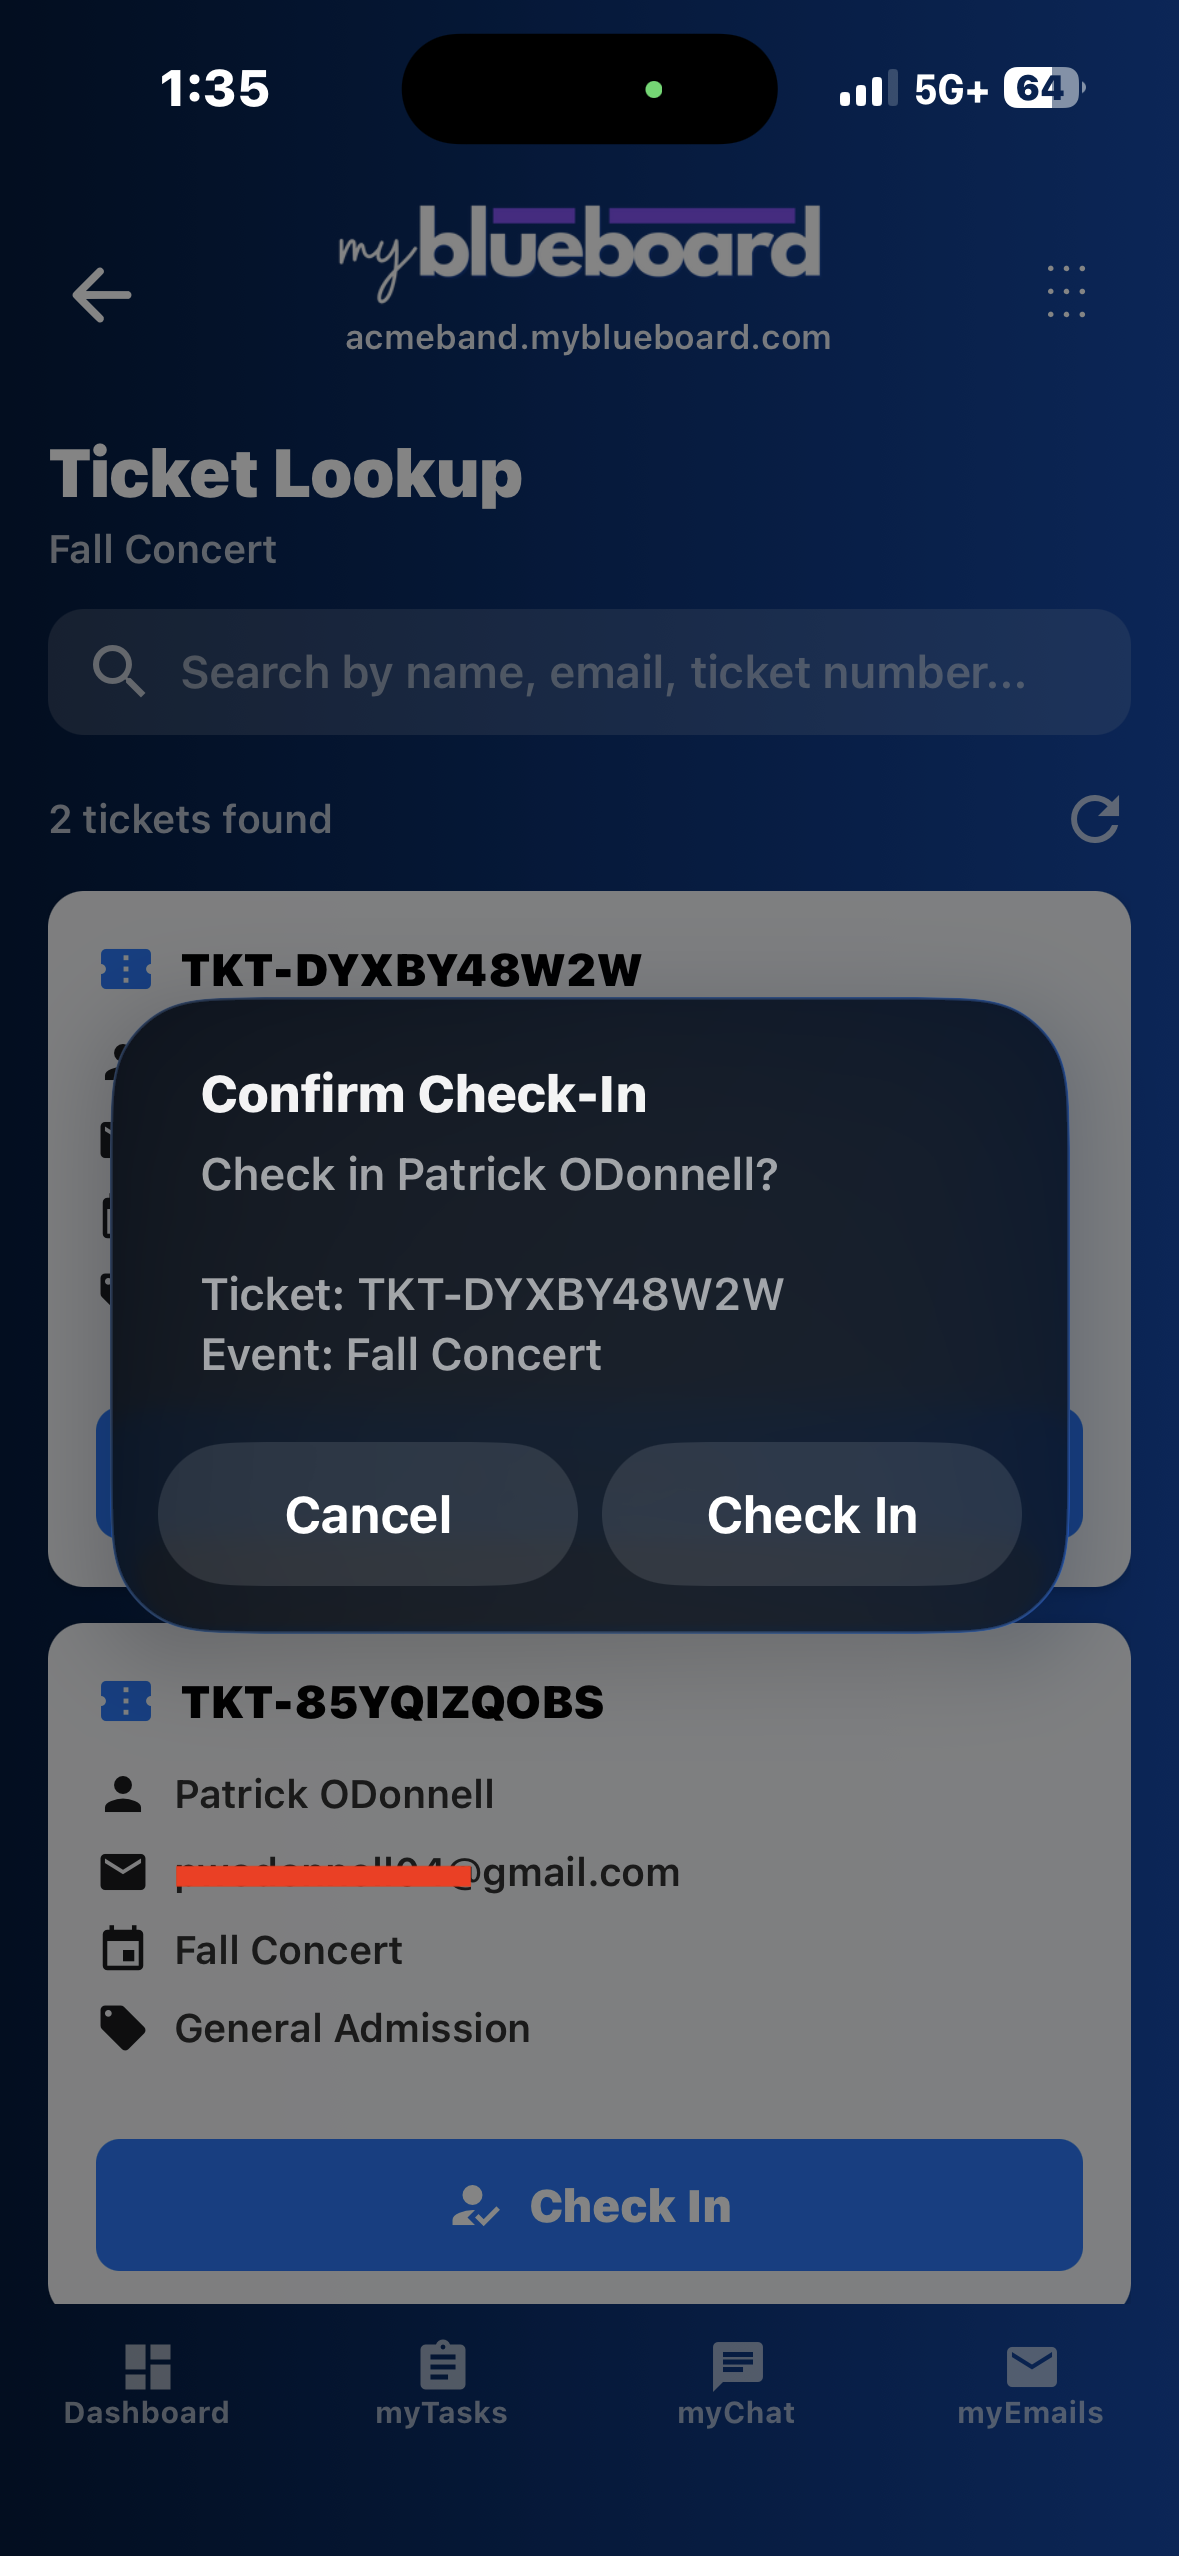
Confirming reports Ticket checked in successfully!
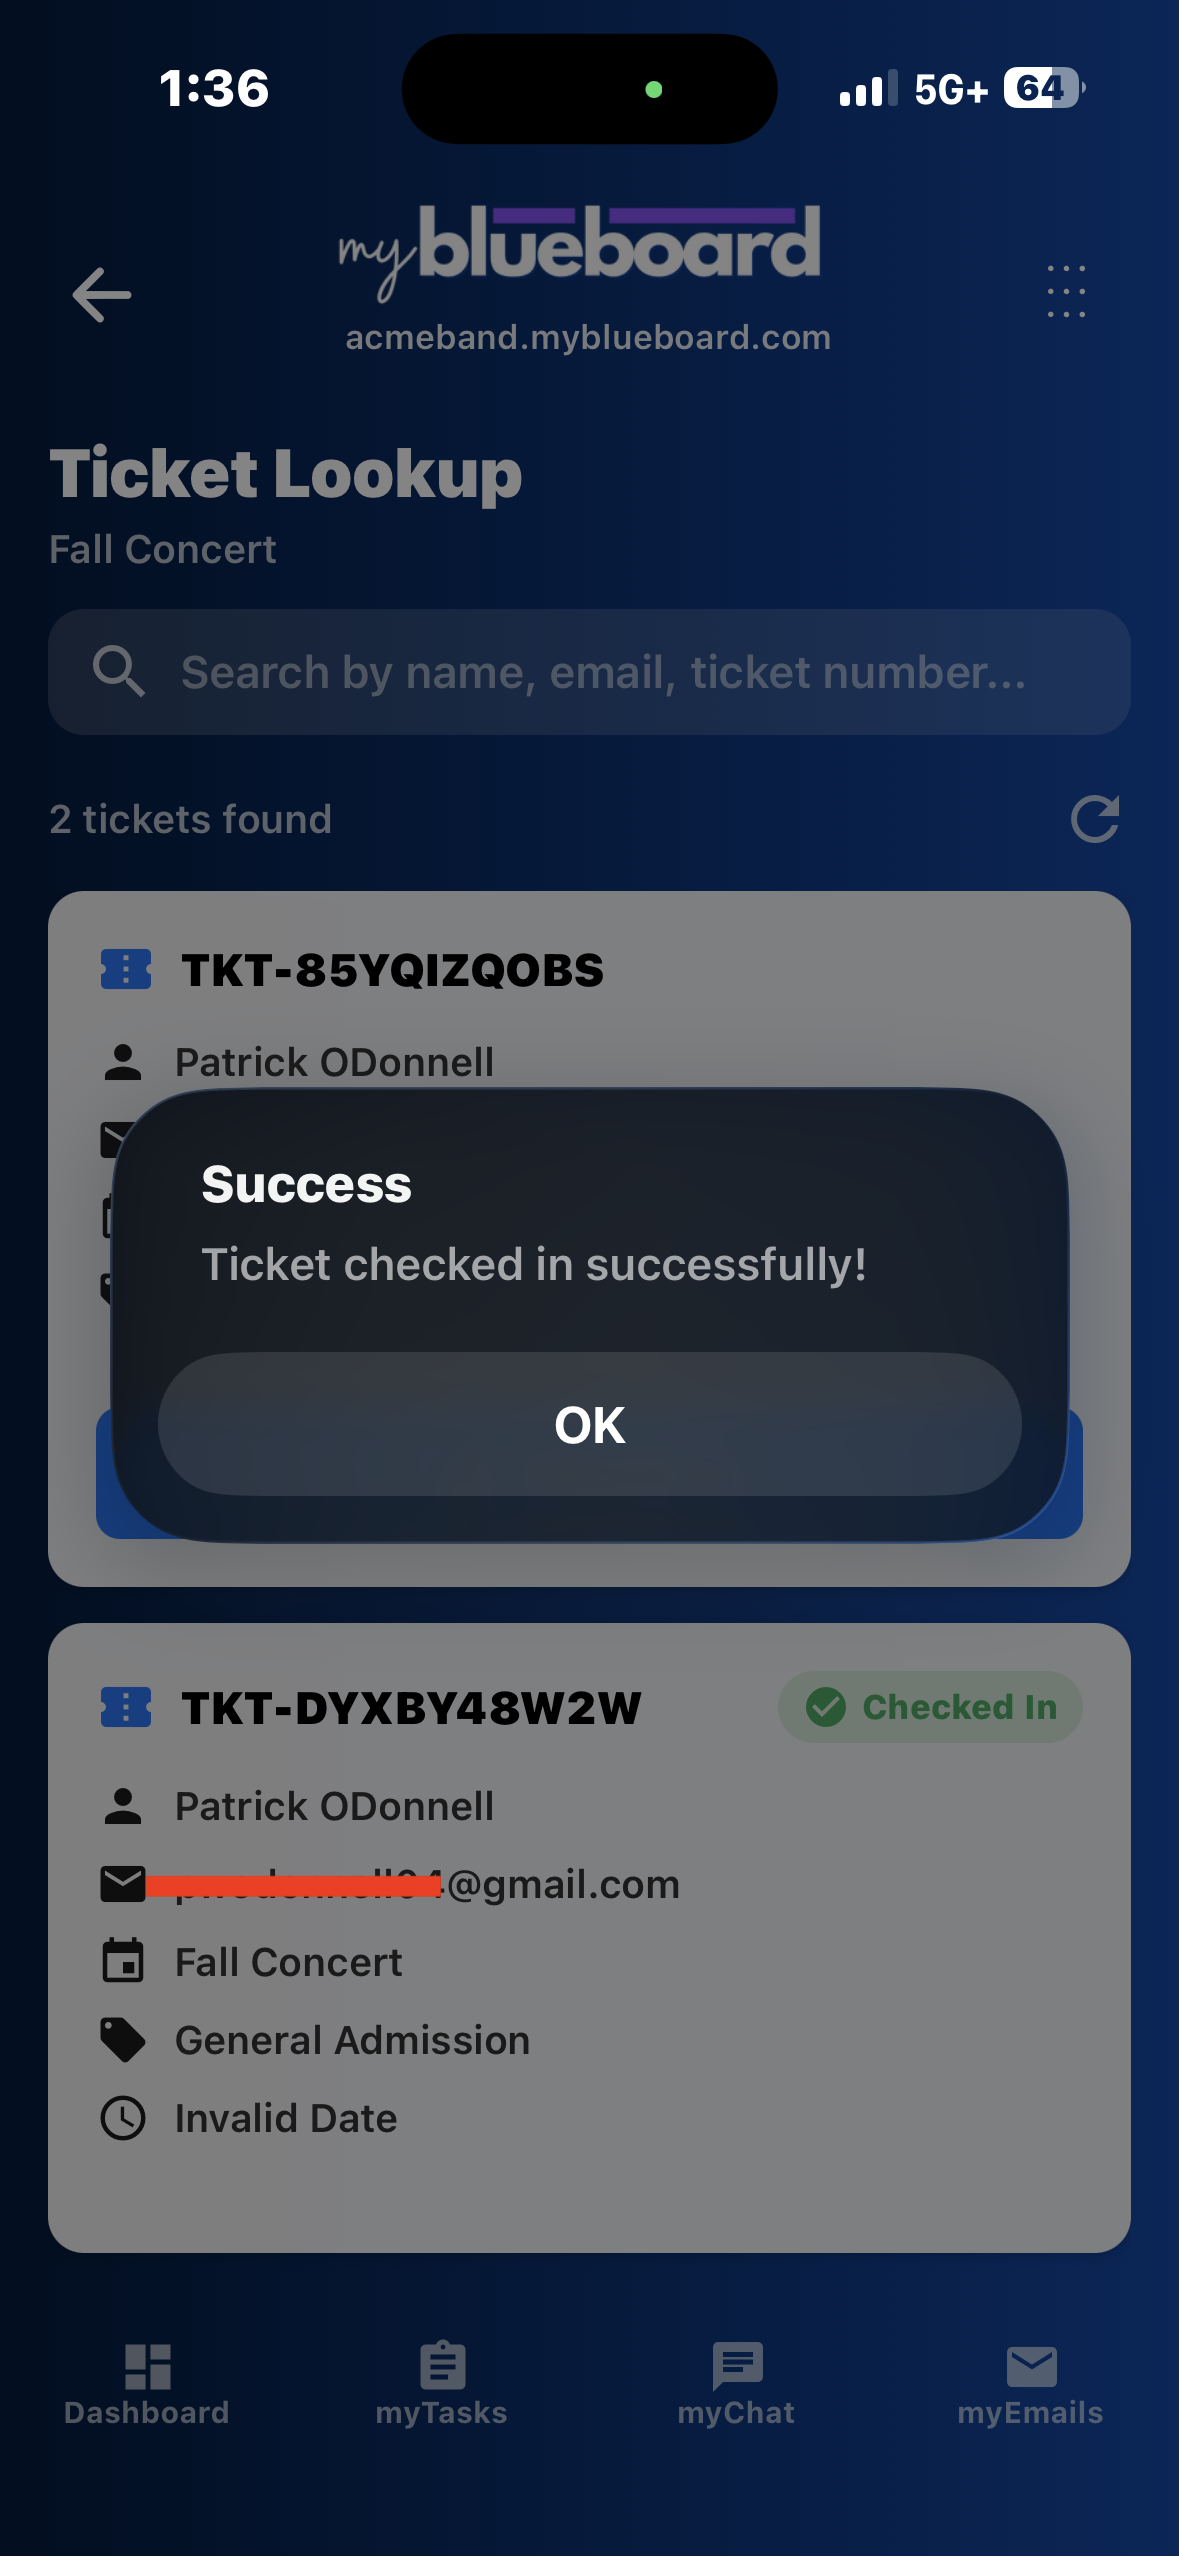
A ticket already used carries a green Checked In badge in the list and no longer offers a Check In button, which makes the list a quick way to see who has arrived.
Verifying without the app
Scanning a ticket with an ordinary phone camera opens its verification page in a browser, which shows the ticket's status. It's a fallback for a stranded volunteer, not the method — opening that page displays the status but does not check the ticket in.
Testing before the event
From Manage Event, send yourself a test ticket. You get the real ticket email, with a real, scannable QR code, without creating an order or affecting your sold counts.
Test ticket numbers begin with TEST. Scanning one reports success and confirms the scanner is
working, and nothing is recorded.
Use it to check two things people usually discover too late: that ticket emails reach families rather than their spam folder, and that a volunteer's phone can actually scan under the lighting you'll have at the door.
On the night
- Bring a second scanning device. One phone at one door is a queue
- Have the sold-tickets list open on at least one device for the people whose email vanished
- Expect duplicates. A previously-scanned ticket is a conversation, not an accusation — families forward tickets to each other constantly. Brief volunteers to read the yellow note
- Cell service is not guaranteed. Scanning needs a connection; if the venue is a dead zone, find the wifi before doors open