Advanced Filter View
The Advanced Filter View is the students list built for pulling reports. Instead of scrolling one long roster, you narrow it down to the students you want, turn on the columns you need, and export the result.
Open Students, then select Advanced Filter View at the top right of the list.
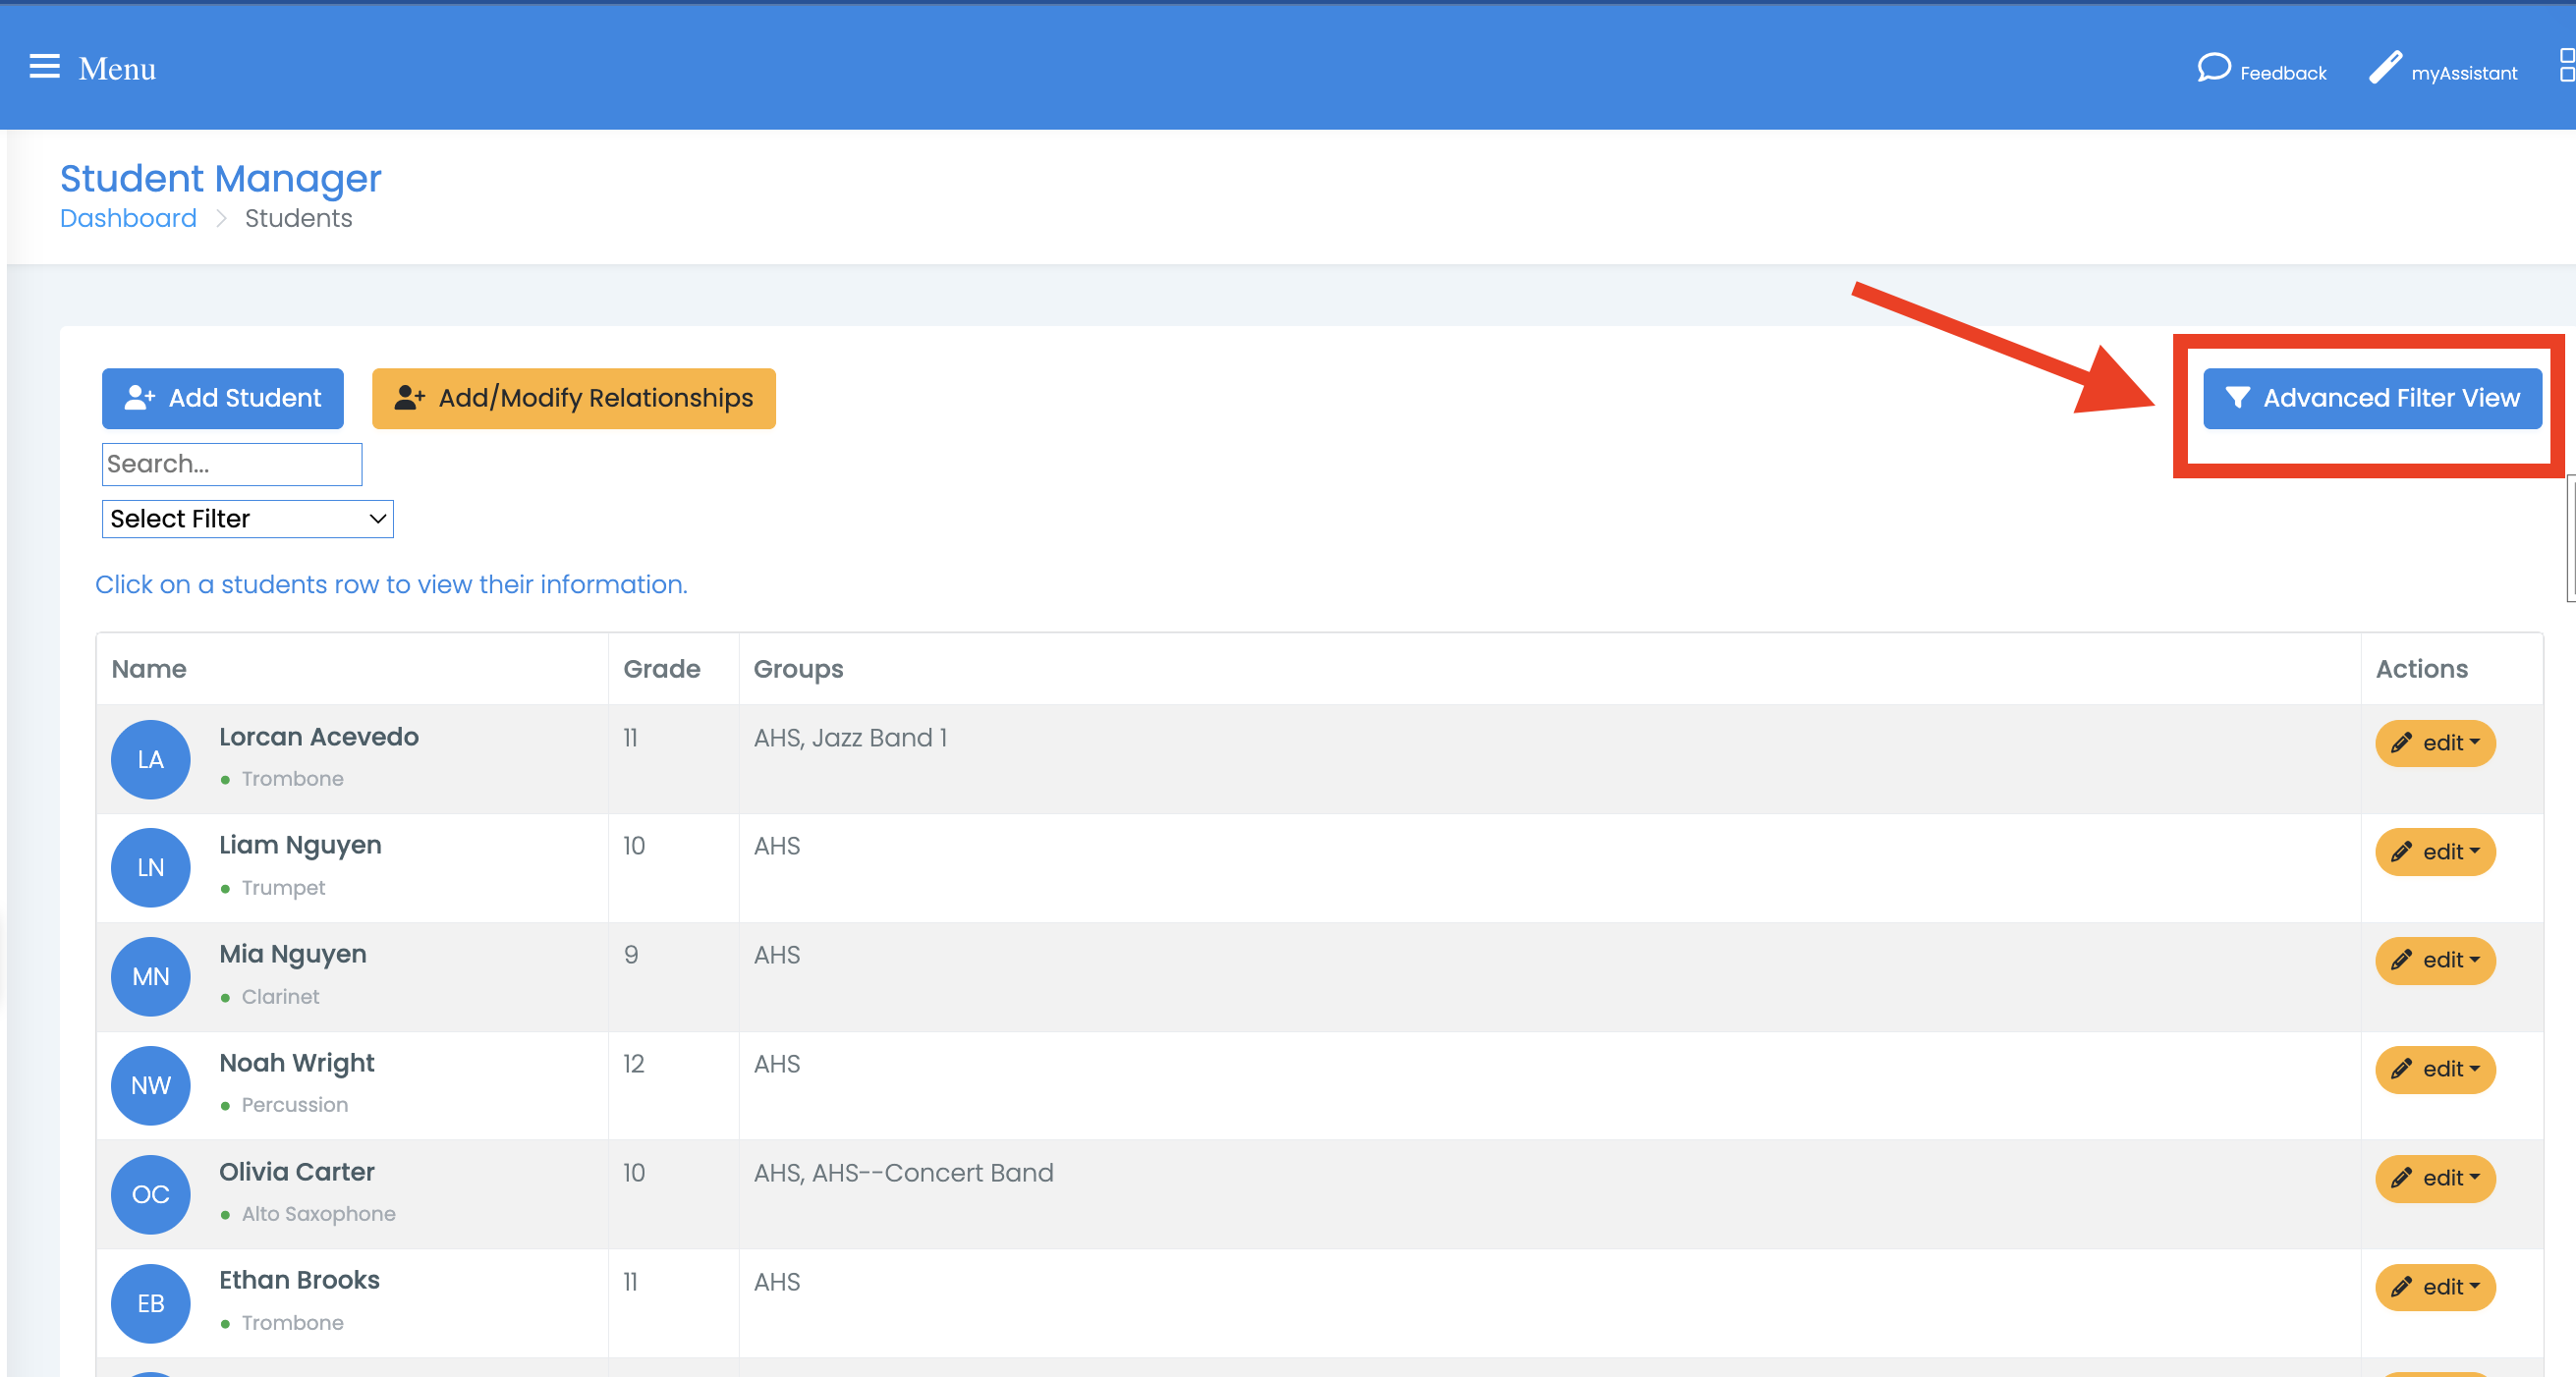
You need Accounts Access to open it. Staff Directors don't get that group automatically — ask a Full Director if the Students area isn't showing for you.
The view lists students with an active login. Students whose login has been disabled aren't included, so this isn't the place to go looking for someone you've turned off.
The three pieces
Export and Show/Hide Columns sit at the top left of the table, and the Search box is at the top right:
- Export — download or print what you're currently looking at
- Show/Hide Columns — choose which columns appear
- Search — matches text anywhere in a student's row
Below those, the Grades, Sections and Archived headers are drop-down filters rather than plain labels.
Filtering by grade and section
The Grades, Sections and Archived column headers are multi-select filters. Select one to open it, then select as many values as you want — the list stays open so you can keep picking.
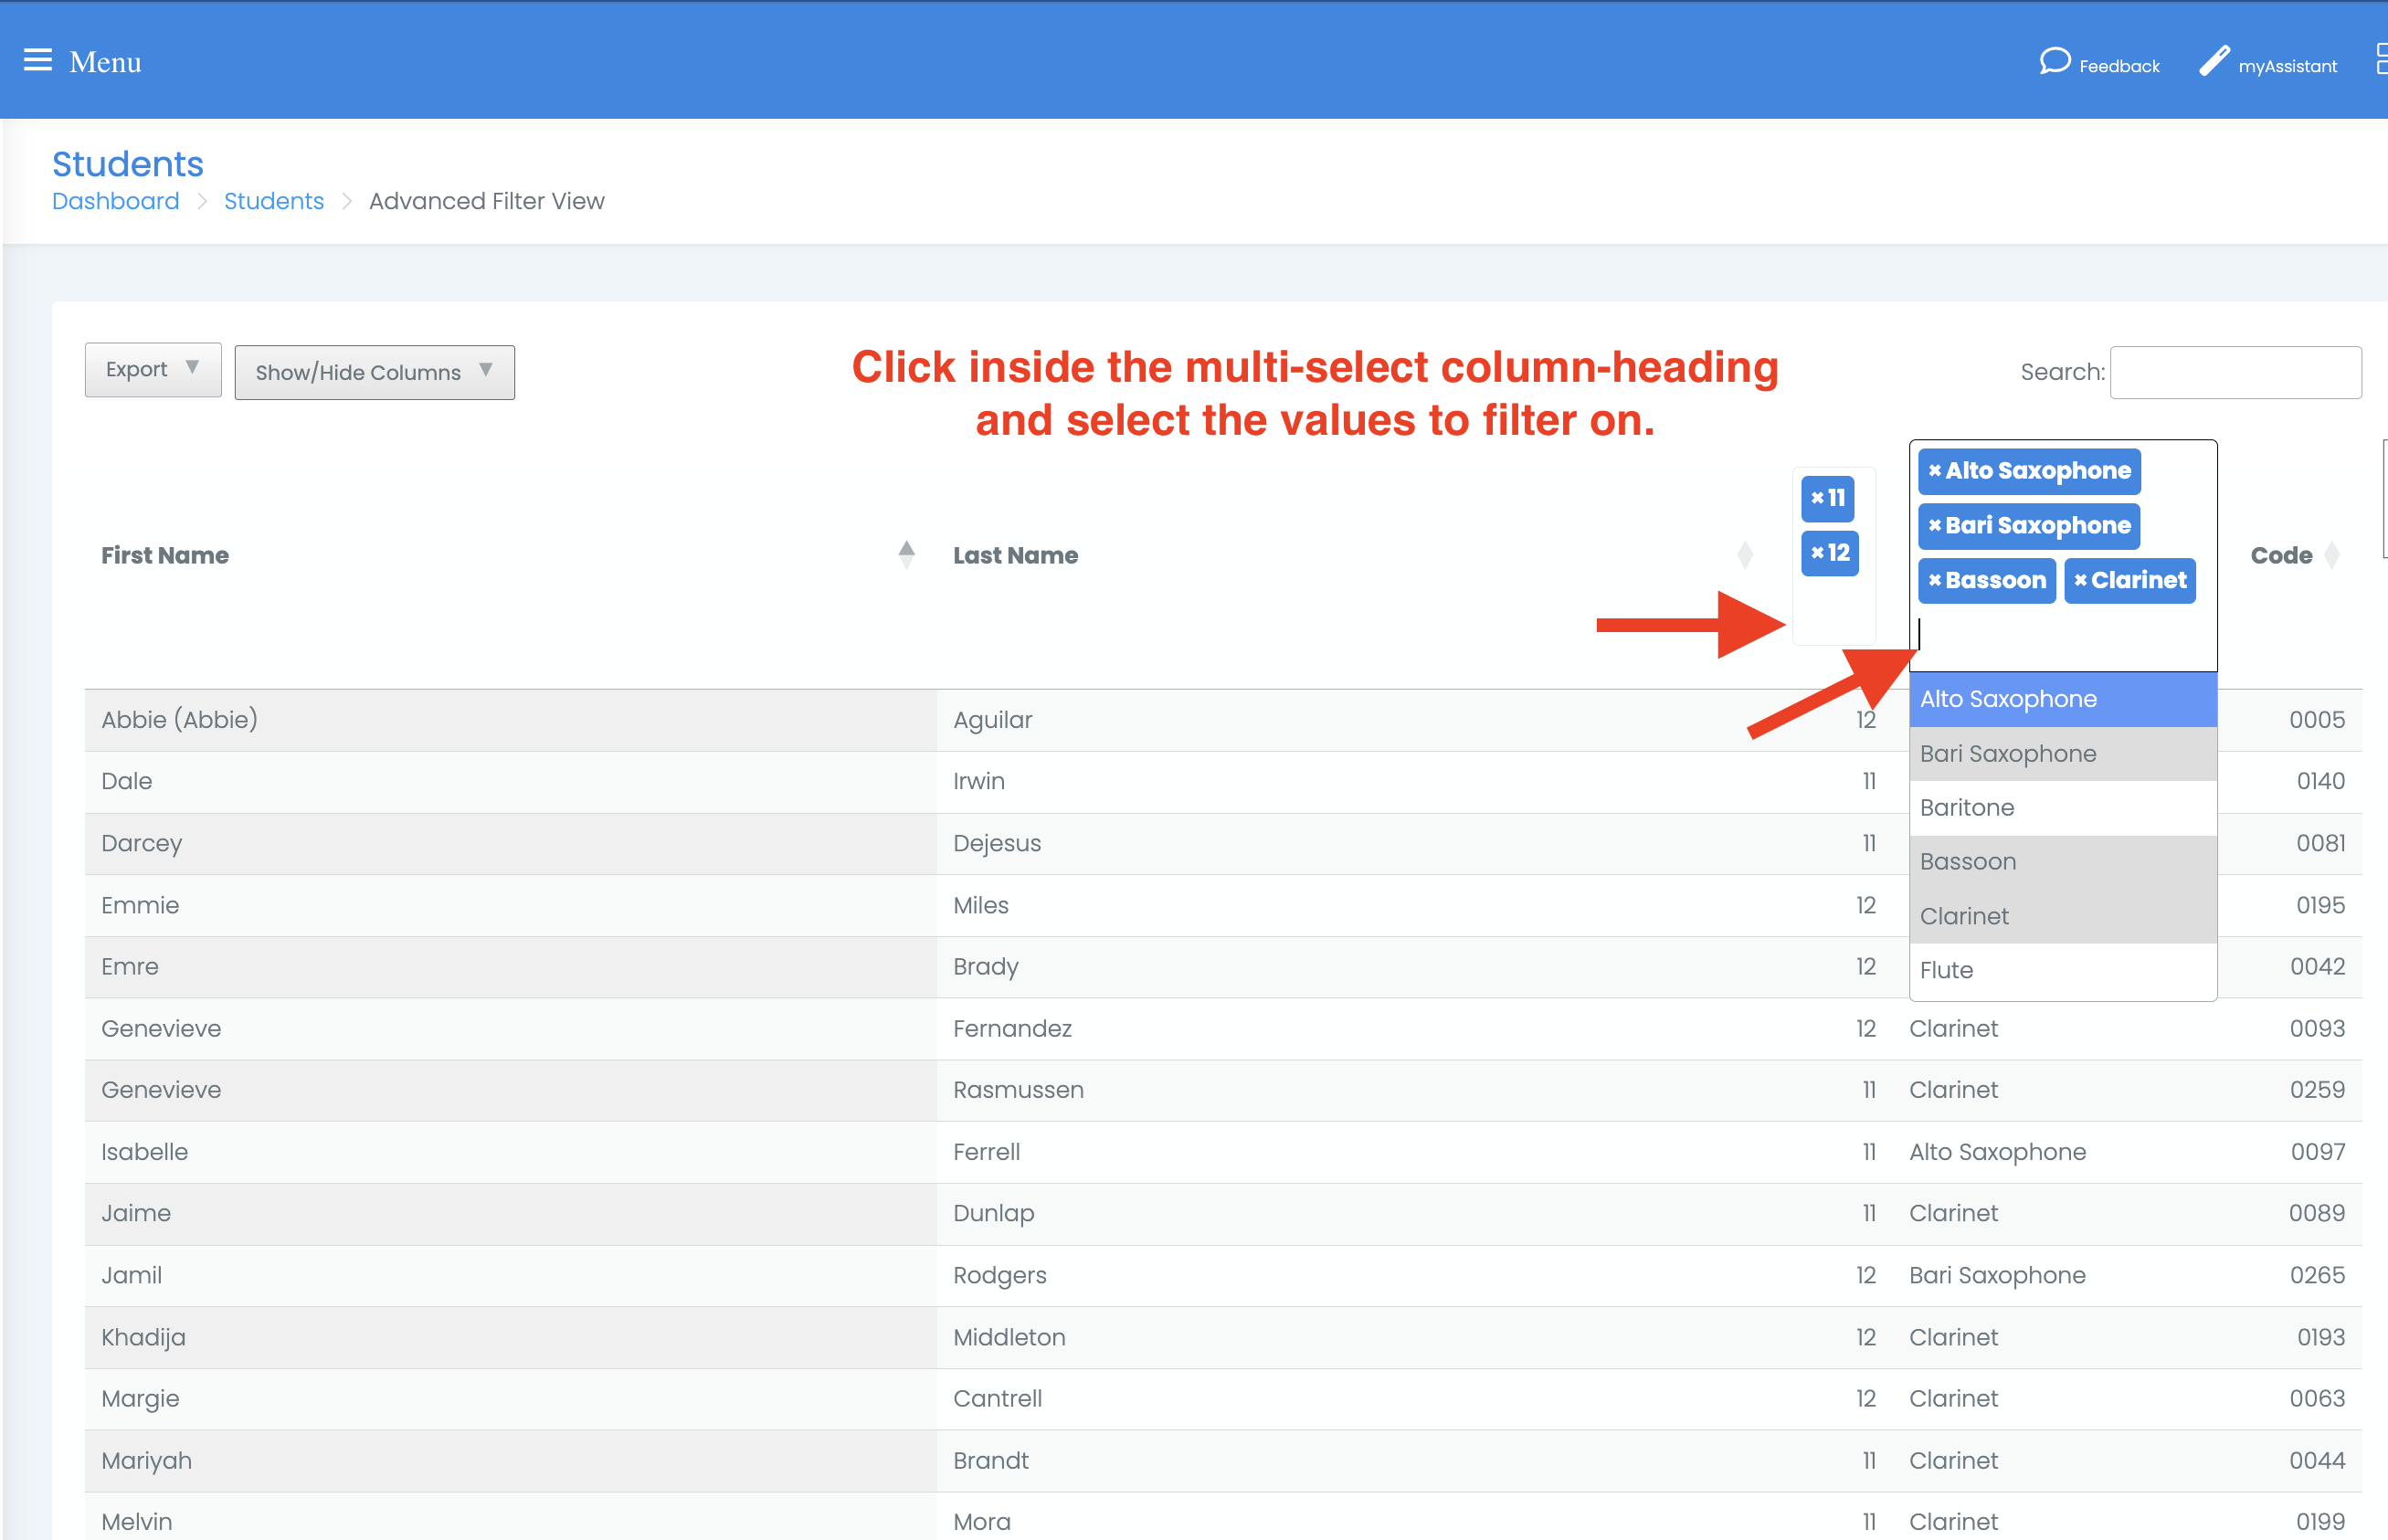
Choosing several values widens the results rather than narrowing them. Picking grades 9, 10 and 11 shows students in any of those three grades. Think "grade 9 or 10 or 11", not "students in all three at once".
Filters combine across columns, though. Choose grades 11 and 12 in one filter and Clarinet in another, and you get eleventh and twelfth graders in Clarinet — both conditions have to be true.
The values offered in each drop-down are built from the students actually in your list, so you won't see a grade or section nobody is in.
To clear a filter, remove the selected values from it. An empty filter means "show everything".
Searching
The search box matches text anywhere in a student's row, including columns you've hidden. Searching for a street name finds the student even when the Address column is switched off.
Search and the drop-down filters work together — search narrows whatever the filters have already selected.
Choosing your columns
Select Show/Hide Columns for the full list of available columns. Select a column name to turn it on, select it again to turn it off. A tick beside a name means that column is currently showing.
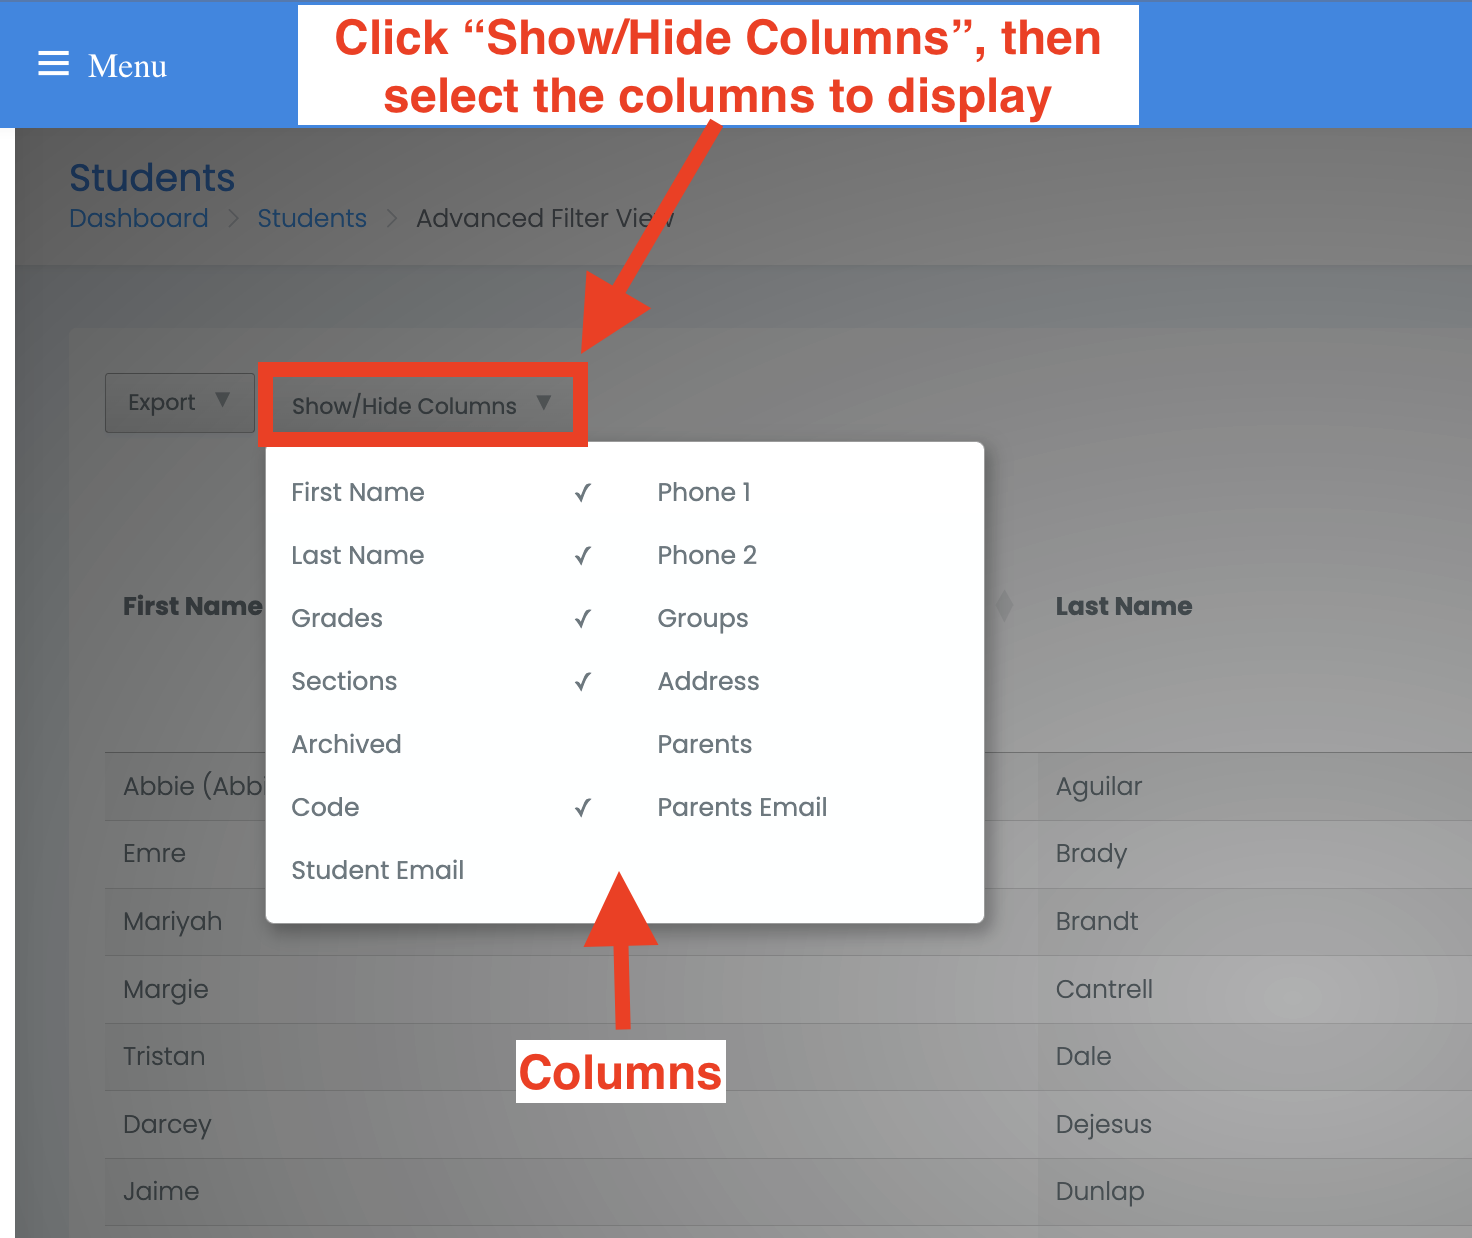
Six columns are on when you first open the view:
- First Name
- Last Name
- Grades
- Sections
- Archived
- Code
These are available but switched off until you turn them on:
- Student Email
- Phone 1
- Phone 2
- Groups
- Address
- Parents
- Parents Email
Your school may have more — Student ID, Allergies, Food Allergies, OTC Medicines, Gender and Bus Number each appear in the list only if your school uses that field.
Your column choices are remembered on the device and browser you're using, so the view opens the way you left it. They don't follow you to another computer, and a colleague opening the same page sees their own arrangement, not yours.
The Code column
Code is the student's 4-digit code — the one a parent uses to connect to their student. It
is always shown as four digits, so a code of 42 appears as 0042.
Exporting
Select Export for six options:
| Option | What you get |
|---|---|
| Copy | The table on your clipboard, ready to paste |
| CSV | A spreadsheet file |
| Excel | An Excel workbook |
| PDF (landscape) | A PDF, wide — best when you have several columns showing |
| PDF (portrait) | A PDF, tall |
| Print (portrait only) | Straight to your printer |
Exports only include what's on screen
Every export contains exactly what the view is showing you — the columns you've turned on, filtered down to the rows your filters and search have left.
Hidden columns are not in the file. Students filtered out are not in the file. If a report comes out missing something, check your columns and clear your filters before exporting again.
That behaviour is usually what you want: set the view up to be the report, then export it. It does mean a spreadsheet you send on is only as complete as the screen it came from, so it's worth a look at the table before you export.
Keeping the leading zeros on codes
Spreadsheet apps like to treat 0042 as the number 42 and drop the leading zeros.
Use the Excel export when the Code column matters — codes come through as four digits.
The CSV file is also correct, but if you open it by double-clicking it, Excel re-reads it on the way in and strips the zeros itself. Either use the Excel export instead, or import the CSV and tell Excel the code column is text.
Copy, the PDFs and Print all keep the four digits.
Practical advice
- Filter first, then pick columns, then export. Fewer surprises than exporting and checking afterwards.
- Turn off columns you don't need before a PDF or print — a wide table shrinks the type.
- Landscape for wide reports. Once you're past about six columns, portrait gets cramped.
- Clear your filters when you're done. The view reopens the way you left it, and it's easy to forget a section filter is on and think students are missing.
Related
- Account types and access
- Importing accounts — including exporting all accounts at once